
Container Gardens
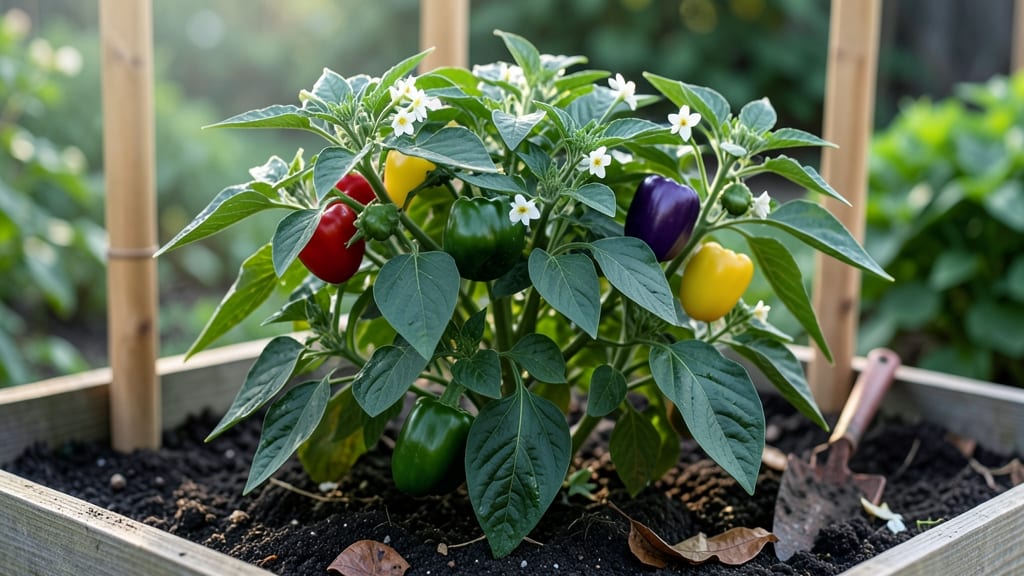
Your bell pepper growing season starts 90 days before your last frost—and getting that timing right means the difference between a bumper crop and sad, stunted plants. 🌱 I learned this the hard way when my first attempt produced only three peppers before the heat wave hit.
The secret isn’t just planting early; it’s matching your variety to your climate’s frost-free window and giving them consistent warmth from day one. Most gardeners miss the mark by focusing only on transplant dates, but bell peppers need soil temperatures above 60°F to even think about germinating.
That means starting seeds indoors 8-10 weeks before your last frost in cooler zones (like mine in Zone 6), or direct-sowing 2-3 weeks after when soil warms up. The payoff? Plants that hit the ground running and produce bold, sweet peppers instead of struggling to recover from cold stress.
Once you’ve nailed the timing, the real magic happens in season extension. Use black plastic mulch to warm soil faster, or wrap young plants in frost blankets if late frosts sneak in.
My Zone 6 garden now stretches the season 2-3 weeks longer than the calendar suggests—enough to squeeze in a second planting of quick-maturing varieties like ‘Sweet Banana.’
For cooler climates, treat bell peppers like tropical divas: they won’t tolerate temperatures below 50°F, so plan your harvest before fall chill sets in. If you’re in a warmer zone (Zones 8-10), you might even get two full harvests by planting early and late succession crops.
Let’s make this your most productive pepper season yet!
📚 In This Guide
- What you need
- Instructions
- Tips and common mistakes
- Wrapping up and next steps
What you need
- ● 5-gallon or larger containers (at least 1 per plant; ensure they have drainage holes).
- ● High-quality potting mix (sterile, well-draining, and rich in organic matter—look for a blend labeled for vegetables).
- ● Bell pepper seedlings or seeds (choose heat-tolerant varieties like Jalapeño, California Wonder, or Sweet Banana).
- ● Slow-release fertilizer (10-10-10 or organic options like compost or worm castings).
- ● Balanced liquid fertilizer (20-20-20 or fish emulsion for mid-season feeding).
- ● Mulch (straw, wood chips, or black plastic to retain moisture and regulate soil temperature).
- ● Gloves and knee pads (for comfort during planting and maintenance).
- ● Trowel or small shovel (for transplanting seedlings).
- ● Watering can or hose with a gentle spray nozzle (containers dry out fast!).
- ● Plant stakes or cages (to support tall varieties as they grow).
- ● Pruning shears (for trimming dead leaves or overgrowth).
- ○ pH testing kit (optional but helpful—bell peppers thrive in 6.0–6.8 pH).
- ○ Shade cloth (optional for hot climates to protect young plants from intense sun).
- ○ Self-watering system or moisture meter (optional for busy gardeners).
How to time your bell pepper planting for peak heat zone success
Here's the method I rely on to stretch the growing season and coax maximum fruit from every pepper plant.
🌱 Step 1: Determine Your Heat Zone and Last Frost Date
Bell peppers thrive in long, warm seasons—they need 75-95°F soil temperatures to germinate and grow. First, find your USDA heat zone (zones 9-11 are ideal; zones 7-8 need extra care). Then mark your last spring frost date on the calendar—peppers can't tolerate temps below 50°F.
Count backward 80-90 days from your first fall frost date (not spring frost). This gives you your transplant window. In zone 9, that might be February; in zone 7, you'll need to start seeds indoors in January. Real talk: I once planted too late in zone 7 and got only two peppers before frost—don't make that mistake.
☀️ Step 2: Start Seeds Indoors (For Zones 7 and Colder)
For cooler climates, begin seeds indoors 8-10 weeks before your last frost date. Use 75°F soil (a seedling heat mat helps) and plant seeds ¼ inch deep in sterile seed-starting mix. Keep them moist but not soggy—pepper seeds rot easily if overwatered.
Place under grow lights 12-14 hours daily (a sunny windowsill won't cut it). You'll see first true leaves in 10-14 days. Here's the thing—once seedlings have 2-3 sets of leaves, harden them off for 7-10 days before transplanting. I use a shaded porch area, gradually increasing exposure.
🪴 Step 3: Transplant After All Frost Risk Has Passed
Wait until soil temperatures reach at least 65°F and nighttime temps stay above 55°F before moving peppers outdoors. In cooler zones, use black plastic mulch or row covers to warm the soil—this can add 5-10°F to ground temperature instantly.
Space plants 18-24 inches apart in full sun. Dig a hole twice as wide as the root ball to encourage root spread. Bury stems deeper than they were in pots—this promotes stronger root growth. Water deeply right after transplanting to settle soil around roots and reduce transplant shock.
⏰ Step 4: Extend the Season with Strategic Planting
For a second harvest, plant a second crop 6-8 weeks before your first fall frost date. Use quick-maturing varieties like 'Early California Wonder' (60 days) or 'Sweet Banana' (65 days). In zones 9-11, you can direct-sow seeds in late summer for fall/winter harvests—just keep them well-watered.
Here's the trick: Use shade cloth (30-50%) in peak summer heat to protect plants from sunburn. You'll see leaves yellowing if temps hit 100°F+—this is a sign to provide afternoon shade. Mulch heavily with straw to keep roots cool and retain moisture during dry spells.
🌿 Step 5: Maintain Optimal Conditions Through Harvest
Pepper plants need 1-1.5 inches of water weekly, delivered at soil level to avoid wetting leaves (which causes disease). Let the top 1-2 inches of soil dry between waterings—consistent moisture prevents blossom-end rot. Fertilize every 3-4 weeks with a balanced 10-10-10 or tomato/vegetable formula.
Watch for pests like aphids or hornworms—handpick or use neem oil at first sign. You'll know peppers are ready to harvest when they've reached full color and firmness. In cooler zones, harvest before first frost and store in a 55-60°F space for 2-3 weeks—they won't ripen further off the plant.
Tips & tricks for perfect bell pepper planting timing
These practical strategies will help you maximize your pepper harvest by working with—not against—your local climate.
Heat Zone Precision: The 80-90 day countdown from your first fall frost date is your golden window, but don't rely solely on averages. Check your local microclimate—south-facing slopes warm up faster than north-facing areas, potentially adding 1-2 weeks to your growing season. I've seen gardeners in zone 7 extend their season by 10 days just by planting on a sunny hillside instead of a shaded valley. Use a soil thermometer to verify those 75-95°F soil temperatures before transplanting—cold soil will shock your plants even if air temps seem warm.
Seedling Survival Secret: That 75°F soil temperature for starting seeds is non-negotiable, but here's the trick: Use a clear plastic dome or cloche over your seed trays to create a mini greenhouse effect. This traps heat and maintains consistent moisture without needing a heat mat. Remove the dome once you see those first true leaves at 10-14 days—this gradual acclimation prevents shock when you move them to grow lights. I've had pepper seeds fail to germinate in cooler conditions until I started using these simple plastic covers.
Transplanting Technique: Burying stems deeper than their pot height might seem counterintuitive, but it triggers root growth along the buried stem. For extra insurance in cooler zones, use a "hill" planting method: mound soil around the base of the plant to create a warm microclimate. This works especially well when combined with black plastic mulch, which can raise soil temps by 5-10°F instantly. The key is to water deeply after transplanting—this helps settle soil around those newly exposed roots and prevents air pockets that cause transplant shock.
Season Extension Hacks: When planting that second crop 6-8 weeks before frost, consider using low tunnels or cold frames instead of just shade cloth. These can add 4-6 weeks to your growing season by trapping heat at night. For fall/winter harvests in zones 9-11, try using row covers—pepper plants will still produce fruit even when daytime temps dip to 55°F, as long as they get protection from nighttime chills. I've had success with 'Arpad F1' peppers continuing to produce through mild winters with just a simple row cover.
Pro Tips for Bell Pepper Growing Season
- These practical strategies will help you maximize your pepper harvest by working with—not against—your local climate.
- Heat Zone Precision: The 80-90 day countdown from your first fall frost date is your golden window, but don't rely solely on averages.
- Seedling Survival Secret: That 75°F soil temperature for starting seeds is non-negotiable, but here's the trick: Use a clear plastic dome or cloche over your seed trays to create a mini greenhouse effect.
Frequently asked questions
Got questions about growing bell peppers? You’re not alone! Here are some of the most common queries—and answers—to help you crush your container garden this season.
What’s the ideal temperature range for bell peppers during the growing season?
Bell peppers thrive in warmth—plant them when soil temps hit 60–65°F (15–18°C) and air temps stay above 55°F (13°C). They love 70–85°F (21–29°C) for optimal growth. If nights dip below 50°F (10°C), use row covers or move containers to a sheltered spot. Pro tip: Wait until after the last frost—peppers hate cold snaps!
How long does it take for bell peppers to mature after planting?
From seed to harvest, expect 60–90 days for most varieties (check your seed packet for specifics). If you’re transplanting seedlings, maturity drops to 50–70 days. Patience is key! Peppers need consistent warmth and sunlight to bulk up. Pro tip: Start seeds indoors 8–10 weeks before your last frost date for a head start.
Can I grow bell peppers in containers if I live in a short growing season?
Absolutely!
Containers let you extend the season by moving pots indoors (near a sunny window or under grow lights) when temps drop. Choose compact varieties like ‘Snackable’ or ‘Jalapeño M’ for smaller spaces. Pro tip: Use black containers to absorb heat during the day and insulate roots at night.
Why are my bell pepper leaves turning yellow, and how do I fix it?
Yellow leaves usually mean overwatering, nutrient deficiency, or pests. Check soil moisture—peppers hate soggy roots. Nitrogen deficiency? Feed with a balanced fertilizer (like 10-10-10). Pests? Inspect for aphids or spider mites; spray with neem oil if needed. Pro tip: Mulch around plants to retain moisture and deter weeds that compete for nutrients.
Can I harvest bell peppers before they turn red for a sweeter taste?
Yes! Green peppers are fully edible and often sweeter when harvested early (they’ll keep ripening off the vine). For maximum sweetness, let them turn red, yellow, or orange—but if you’re in a short season, harvest green for a harvest anytime. Pro tip: Pick peppers when they’re firm and glossy; avoid waiting until they’re wrinkled or soft.
What’s the best way to overwinter bell pepper plants for next year?
Most peppers are annuals, but you can save seeds or try overwintering in containers. Move pots indoors to a sunny spot (6+ hours of light) and reduce watering. Prune back foliage and fertilize lightly every 4–6 weeks. Pro tip: If using the same soil, sterilize it with heat or a fungicide to prevent disease buildup.
Wrapping up and next steps
Growing bell peppers in containers is a rewarding journey that thrives with the right timing, care, and a dash of patience! 🌱 By aligning your planting schedule with your heat zone and understanding the bell pepper growing season, you’ll unlock a bountiful harvest of crisp, vibrant peppers—whether you’re a seasoned gardener or just starting out.
Now that you’re armed with the essentials, why not take the next step?
- Start small: Pick one container and variety to test your setup before scaling up.
- Track progress: Snap photos of your peppers’ growth—it’s a fun way to celebrate milestones!
- Share the love: Gift your homegrown peppers to friends or neighbors (they’ll be jealous of your green thumb!).
Your garden—and your taste buds—will thank you! 🌶️