
Picking
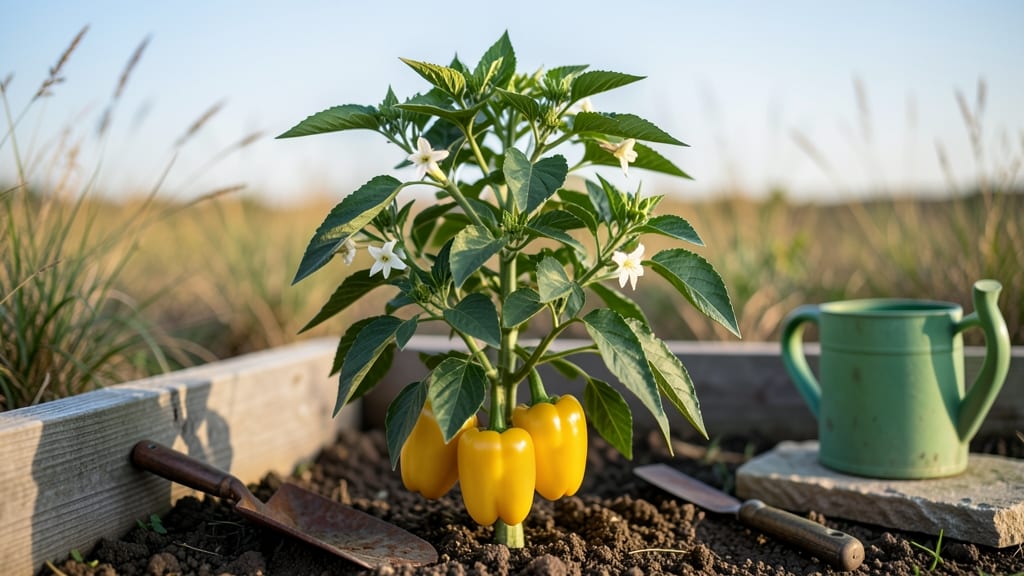
Growing Golden California Wonder bell peppers means sun-kissed harvests that turn every kitchen table into a showstopper. 🌻 These golden beauties aren't just pretty—they're the most productive peppers I've ever grown, with plants that keep delivering sweet, thick fruit from summer through fall.
The secret lies in heat-zone timing: plant them after your last frost when soil temps hit 60°F, and they'll thrive in full sun (6+ hours daily). Rich, well-draining soil with compost keeps them happy, and consistent moisture prevents cracking—those thick walls need steady water, not drought cycles.
Pests? Watch for aphids and spider mites, but a strong spray of water usually sends them packing. You'll start harvesting in 70-80 days, with plants that keep producing until frost. The flavor? Sweet with just a hint of tang, perfect for stuffing, grilling, or slicing fresh.
My plants average 12-15 peppers per season, and neighbors always ask for extras. Works in zones 4-10, though southern gardeners should use shade cloth during peak summer heat. Here's how to grow yours—no green thumb required!
📚 In This Guide
- What you need
- Instructions
- Tips and common mistakes
- Wrapping up and next steps
What you need
- ● Seeds or Seedlings: 3–5 Golden California Wonder pepper seeds (or 3–5 healthy seedlings from a nursery).
- ● Well-Draining Soil: 10–15 lbs of potting mix (or garden soil amended with compost). Opt for a blend with 50–60% organic matter for best results.
- ● Containers or Garden Space: Containers: 5-gallon pots (minimum) with drainage holes (1–2 per plant).
- ● Garden Beds: Full sun (6+ hours/day) in a heat-tolerant zone (7–10).
- ● Fertilizer: Balanced 10-10-10 or 5-10-10 fertilizer (organic options like composted manure or worm castings work too!).
- ● Mulch: Straw or shredded leaves (2–3 inches) to retain moisture and regulate soil temp.
- ● Basic Gardening Tools: Trowel or small shovel
- ● Pruning shears (for trimming excess foliage)
- ○ Gloves (optional but handy!)
- ● Watering Can or Hose: With a gentle spray nozzle for even moisture.
- ○ Support (Optional): Cage or stakes (for taller plants, though Golden California Wonder stays compact).
- ○ Heat Mat (Optional): For starting seeds indoors in cooler climates.
Step-by-Step instructions for growing golden california wonder bell peppers
Here's how I grow these sweet, sun-loving peppers—timing is everything for that signature golden color.
🌱 Step 1: Start Seeds Indoors 8-10 Weeks Before Last Frost
Fill 2-3 inch deep seed-starting trays with moistened seed-starting mix. Press it down gently so it's firm but not compacted—you want roots to push through easily. Plant 1-2 seeds per cell at a depth of ¼ inch (about the width of a pencil eraser). Golden California Wonders germinate best in 75-85°F soil, so I use a seedling heat mat underneath the tray.
Cover the tray with a humidity dome or plastic wrap to trap warmth and moisture. Check daily for condensation—this is your signal the environment is right. Seeds should sprout in 7-14 days. Once they do, remove the dome immediately to prevent damping-off. You'll know they're ready when the first true leaves (not the initial seed leaves) appear.
☀️ Step 2: Provide Bright Light for Strong Seedlings
Move seedlings under grow lights or to a south-facing window immediately after germination. These peppers need 14-16 hours of light daily—without it, they'll stretch leggy and weak. I position my LED grow lights 2-4 inches above the seedlings and raise them weekly as the plants grow.
Watch for pale, elongated stems—this is your sign the light is too far away. Healthy seedlings have thick stems, deep green leaves, and compact spacing between leaves. Rotate the tray a quarter turn daily so they grow straight instead of leaning toward the light.
🪴 Step 3: Transplant Outdoors After All Frost Risk Has Passed
Golden California Wonders thrive in full sun and warm soil—they won't tolerate cold. Wait until nighttime temperatures stay above 55°F and the soil is at least 60°F before transplanting. Choose a spot with 6+ hours of direct sun daily and well-draining soil.
Dig holes twice as wide as the root ball but only as deep as the container. Gently remove seedlings from their trays, loosen the roots if they're circling, and place them in the holes. Fill with soil, firm gently, and water deeply at the base. Space plants 18-24 inches apart—they need room to grow bushy.
💧 Step 4: Water Consistently and Fertilize for Sweetness
Water at the base 1-2 inches deep every 2-3 days until the soil feels dry to the touch. Golden California Wonders are sensitive to inconsistent moisture—too much causes rot, too little causes blossom-end rot. I use drip irrigation to keep water at the roots and avoid wetting leaves.
Feed with a balanced fertilizer (10-10-10) every 4-6 weeks once flowers appear. These peppers reward consistent care with sweeter fruit. You'll notice the first flowers in 6-8 weeks after transplanting—this is when you'll see the classic white blooms that lead to those golden peppers.
✂️ Step 5: Prune and Harvest for Continuous Production
Prune suckers (the small shoots that grow between the main stem and branches) to direct energy into fruit production. Remove any leaves touching the soil to improve airflow and prevent disease. Harvest peppers when they're 6-8 inches long and fully golden—this ensures peak sweetness.
Pick peppers in the morning when they're cool and firm. Use pruning shears to snip the stem cleanly, leaving a small stub. You'll see new flowers forming within 2-3 weeks of harvesting, signaling the plant is ready for another round. With proper care, one plant yields 10-20 peppers per season—enough for fresh eating, roasting, or preserving.
Tips & tricks for perfect golden california wonder bell peppers
Timing and temperature are everything when growing these vibrant peppers—here's how to nail the details that make all the difference.
Seedling Heat Secret: Those 75-85°F soil temperatures in Step 1 are non-negotiable for germination. I use a seedling heat mat set to 80°F and place it under my seed-starting trays. If you don't have one, try placing the tray on top of your refrigerator (not inside!) for gentle warmth. The goal is consistent heat—fluctuations delay sprouting or cause uneven germination. Check soil moisture daily with your finger; it should feel like a damp sponge, not soggy.
Light Position Technique: The 14-16 hours of light in Step 2 requires a timer for grow lights. Set your lights to turn on automatically at dawn and off at dusk to maintain consistency. I position my LED grow lights 3 inches above seedlings initially, then raise them weekly by ½ inch as plants grow. Watch for the "light stretch" warning sign—pale, elongated stems mean the lights are too far away. Healthy seedlings should have leaves spaced about 1 inch apart with no gaps showing bare stems.
Transplanting Temperature Check: Don't rush transplanting in Step 3! I test soil temperature with a thermometer before moving seedlings outdoors. If nighttime temps dip below 55°F or soil is under 60°F, wait another week. A simple trick: bury a thermometer in the ground where you'll plant—this gives you real-time readings. Also, harden off seedlings gradually by placing them outside in shade for 1 hour the first day, then increasing by 1 hour daily until they're acclimated to full sun.
Harvest Timing: Those 6-8 inch golden peppers in Step 5 are sweetest when harvested in the morning after dew has dried. Use a sharp knife or pruning shears to cut the stem cleanly—leave a ¼ inch stub to prevent rot. I harvest every 3-4 days during peak season to encourage continuous production. If you miss the window, peppers can turn red, but they'll still be delicious—just less sweet. Store unharvested peppers in the fridge for up to 1 week to maintain quality.
Pro Tips for Golden California Wonder Bell Pepper
- Timing and temperature are everything when growing these vibrant peppers—here's how to nail the details that make all...
- Seedling Heat Secret: Those 75-85°F soil temperatures in Step 1 are non-negotiable for germination. I use a seedling ...
- Light Position Technique: The 14-16 hours of light in Step 2 requires a timer for grow lights. Set your lights to tur...
Frequently asked questions
Got questions about growing your own Golden California Wonder Bell Pepper? You’re not alone! Here are some of the most common queries—plus quick, actionable answers to help you cultivate a bountiful harvest.
When is the best time to plant Golden California Wonder peppers in my zone?
The Golden California Wonder thrives in USDA Zones 8-10 and needs 60-90 warm days (50°F+) to mature. Start seeds indoors 8-10 weeks before last frost or transplant seedlings after soil reaches 70°F. For cooler zones, opt for container growing or a greenhouse to extend the season.
How long does it take for Golden California Wonder peppers to produce fruit?
From transplanting, expect 60-75 days to first harvest under ideal conditions (full sun, consistent water, and warm temps). Peppers ripen from green to golden-yellow over 2-4 weeks—so patience pays off! If fruits stay small, check for underwatering, poor soil fertility, or lack of sunlight.
Can I grow Golden California Wonder peppers in containers? If so, what size pot do I need?
These peppers adapt well to containers. Use a 5-gallon pot (minimum) with drainage holes and well-draining potting mix. Place pots in full sun (6+ hours/day) and fertilize every 2-3 weeks with a balanced veggie feed. Just avoid overcrowding—one plant per pot works best!
Why are my Golden California Wonder peppers cracking or turning bitter?
Cracking often happens due to inconsistent watering (soak soil, then let it dry slightly between waterings). For bitterness, check for over-ripening, heat stress, or uneven water. Harvest peppers when fully golden and avoid watering late in the day. If soil lacks calcium, add crushed eggshells or lime to prevent issues.
Are Golden California Wonder peppers disease-resistant? How do I prevent common issues?
While not immune, they’re moderately resistant to common pepper diseases like bacterial spot. To stay ahead:
- Rotate crops annually to reduce soil-borne pathogens.
- Avoid overhead watering—use drip irrigation to keep foliage dry.
- Prune lower leaves for airflow and remove diseased ones immediately.
- Use copper fungicide preventatively if your area has fungal risks.
Wrapping up and next steps
The Golden California Wonder bell pepper is a sun-kissed treasure in any garden—packed with flavor, vibrant color, and ease of growth! With the right heat-zone timing, soil prep, and a little patience, you’ll be harvesting crisp, sweet peppers in no time. 🌞
Ready to put your green thumb to work? Start by planting your seeds or seedlings this season and watch your garden transform into a pepper paradise. Happy growing—your taste buds will thank you! 🌱🍅