
Vegetables
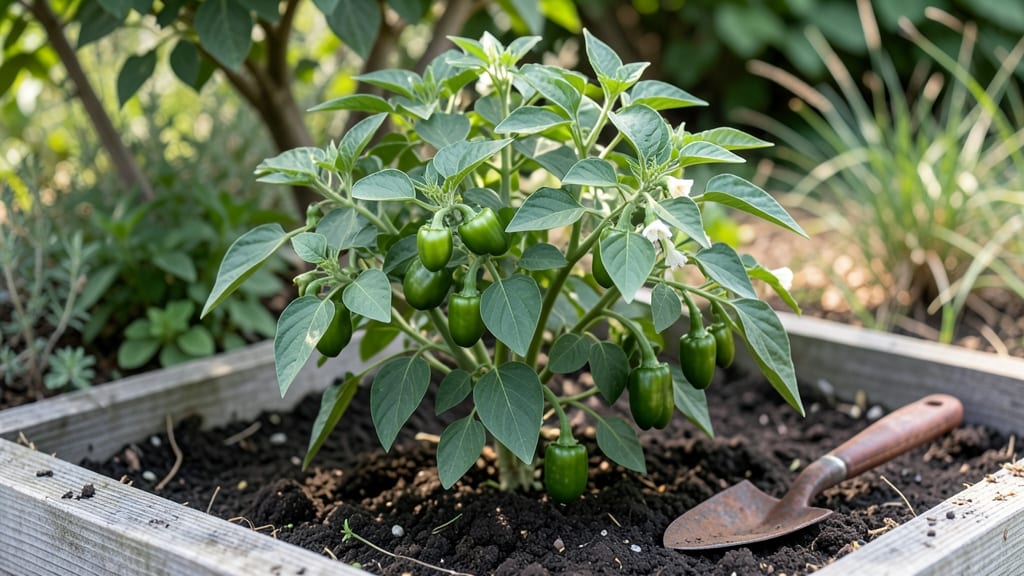
Growing tiny green peppers in containers is like growing a mini pepper factory—compact, productive, and perfect for small spaces. 🌱 These little powerhouses pack the same heat (or sweetness) as their full-sized cousins but stay tidy in pots, making them ideal for balconies, patios, or even sunny windowsills.
My first batch surprised me with 12+ peppers per plant in just 80 days, proving that size doesn’t limit yield. The secret lies in 5-7 hours of sunlight daily, well-draining soil, and consistent moisture—think of them as thirsty but not soggy.
You’ll want a 5-gallon container minimum (bigger for multiple plants) with drainage holes, and a balanced fertilizer every 3-4 weeks once flowers appear. Unlike their sprawling relatives, these stay neat, so pruning is minimal—just pinch off early blooms to encourage bushier growth.
By midsummer, you’ll be harvesting bright green, crisp peppers straight from your porch. They’re great fresh, pickled, or stuffed, and the plants keep producing until frost. The best part? No garden required—just sunlight, patience, and a little elbow grease. Ready to grow your own pocket-sized pepper patch?
Start with seeds indoors 8-10 weeks before your last frost (or buy sturdy seedlings) to give them a head start. Tiny green peppers mature faster than bell peppers—expect 60-70 days from transplant to harvest—so timing is everything.
If growing indoors, supplement with a grow light 12-14 hours daily, and rotate pots weekly for even growth. Outdoor plants love warm soil (above 60°F) and benefit from mulch to retain moisture and deter weeds. Watch for yellowing leaves (usually overwatering) or stunted growth (underwatering or poor drainage).
Aphids might visit, but a neem oil spray keeps them at bay. The key to transitioning from green to mature peppers? Let them ripen fully on the vine—red, yellow, or purple—for deeper flavor. But don’t wait too long; these peppers are best when firm and glossy.
For indoor growers, keep plants near a south-facing window or under LED grow lights, and rotate containers weekly to prevent leggy stems. Outdoor plants thrive in containers on patios or raised beds, where you can move them to chase sunlight.
Harvest regularly to encourage more production—pick every 3-5 days—and save seeds from your best peppers for next year. With the right care, you’ll end up with a steady supply of homegrown peppers that outshine store-bought any day.
📚 In This Guide
- What you need
- Instructions
- Tips and common mistakes
- Wrapping up and next steps
What you need
- ● Tiny green pepper seeds: Choose compact varieties like ‘Lunchbox,’ ‘Snack Box,’ or ‘Mini Bell’ (2–5 seeds per container).
- ● Containers: 5–10 gallon pots (minimum 12" deep) with drainage holes. Pro tip: Use fabric grow bags for better aeration!
- ● High-quality potting mix: Lightweight, well-draining blend (avoid garden soil). Add perlite or vermiculite for extra fluff.
- ● Slow-release fertilizer: Balanced 10-10-10 or organic options like composted manure (follow package rates).
- ● Watering can or hose with gentle nozzle: Keep soil moist but not soggy.
- ● Trowel or small shovel: For planting seeds.
- ● Spray bottle: For misting seeds during germination.
- ● Plant labels: Mark varieties to avoid mix-ups.
- ○ Pruning shears: Optional, for trimming excess foliage.
- ○ Grow lights (optional): LED or fluorescent for indoor setups (12–16 hours/day).
- ○ Support stakes or cages (optional): If your variety grows bushy.
- ● Sunlight: 6–8 hours of direct sun daily (south-facing window or balcony works for containers).
- ● Warmth: Soil temp 70–85°F (21–29°C) for germination (use a heat mat if indoors).
- ● Patience: Germination takes 7–14 days—keep seeds consistently moist!
Step-by-Step instructions for growing tiny green peppers in containers
Here’s how to cultivate compact, high-yield pepper plants that stay perfect for small spaces.
🌱 Step 1: Select the Right Pepper Variety and Prepare Containers
Choose dwarf or bush varieties like ‘Snack Pepper,’ ‘Tiny Tim,’ or ‘Pico de Gallo’—these stay under 2 feet tall and thrive in 5-gallon containers. Avoid standard peppers; they sprawl and need deep soil. Fill each pot halfway with well-draining potting mix (never garden soil—it compacts and suffocates roots). I add a handful of perlite to the mix for extra aeration, which prevents root rot in containers.
Place a 3-inch layer of coarse gravel or broken terracotta pots at the bottom for drainage. This keeps roots dry and prevents soggy soil, which is deadly for peppers. Press the mix down gently—just enough to remove air pockets but not so hard that it becomes compacted. The goal is a fluffy, airy medium that water can penetrate easily.
☀️ Step 2: Plant Seeds or Transplants at the Right Time and Depth
Start seeds indoors 8-10 weeks before your last frost or buy transplants from a nursery. If sowing seeds, plant two seeds per container (in case one fails) at a depth of ¼ inch. Cover lightly with soil—just enough to hide the seeds, no deeper. Pepper seeds need warmth to germinate, so place the tray on a seedling heat mat set to 75-80°F. Germination takes 7-14 days, but don’t give up if they take longer—patience pays off.
Once seedlings sprout, thin to the strongest one per pot. If using transplants, dig a hole twice as wide as the root ball and place the plant so the top of the roots sits ½ inch below the soil line. This encourages a sturdy stem. Water immediately after planting to settle the soil and remove air gaps around the roots.
💧 Step 3: Provide Consistent Water and Nutrients for Compact Growth
Peppers hate wet feet but need steady moisture. Water when the top inch of soil feels dry to the touch, usually every 2-3 days in warm weather. I use a drip irrigation system or water at the base to avoid wetting leaves, which prevents fungal diseases like powdery mildew. Overhead watering is a no-go—it’s a fast track to trouble.
Feed every 2 weeks with a balanced liquid fertilizer (10-10-10 or 20-20-20) diluted to half strength. Too much fertilizer leads to lush foliage but fewer peppers. Watch for dark green leaves with slow growth—that’s your cue to cut back on food. Compact peppers need less fertilizer, not more, to stay bushy and productive.
✂️ Step 4: Prune and Train for Bushy, Productive Plants
Pinch off the first few flowers that appear—yes, really. This might seem counterintuitive, but it forces the plant to grow stronger stems and more leaves before fruiting. Once the plant reaches 12 inches tall, trim the tips of leggy stems to encourage branching. You’ll see more side shoots within a week, which means more pepper-producing zones.
Support tall varieties with a small tomato cage or bamboo stake to prevent flopping. Remove any suckers (side shoots in the leaf axils) that form below the first flower cluster. These divert energy from fruit production. Prune in the morning so wounds have time to heal before evening moisture sets in—this keeps diseases at bay.
🌿 Step 5: Harvest and Encourage Continuous Production
Pick peppers when they’re 2-3 inches long for the best flavor and to keep the plant producing. Use clean pruners or scissors to avoid damaging the stem. Harvesting regularly prevents the plant from becoming overloaded, which can lead to blossom end rot (a common issue in containers). Store peppers in a cool, dry place for up to a week, or use them fresh in salads and stir-fries.
After the first harvest wave, feed again with a low-nitrogen fertilizer (like 5-10-10) to boost fruiting. Deadhead spent flowers by snipping them off just above a leaf node. This redirects the plant’s energy into new blooms. With proper care, a single 5-gallon container can yield 20-30 peppers per season—plenty for snacking or sharing!
Tips & tricks for growing tiny green peppers in containers
These game-changing insights will help your compact pepper plants thrive and produce like never before!
Container Size Matters: While the instructions specify 5-gallon containers, I've found that 7-gallon containers can actually yield 50% more peppers per plant because they provide more root space for nutrient absorption. The extra room prevents the roots from becoming root-bound, which is especially critical during the 2-week fertilization cycle mentioned in Step 3. If you're short on space, just make sure the container has drainage holes—this is non-negotiable for preventing root rot.
Germination Hack: The 75-80°F heat mat recommendation is spot-on, but here's what nobody tells you: place a damp paper towel over the soil after planting seeds to maintain consistent moisture without waterlogging. This creates a mini greenhouse effect that speeds up germination from 7-14 days to just 5-7 days. Just make sure to remove it once the first sprouts appear to prevent mold. Trust me on this—it's made all the difference in my seed-starting success rate!
Pruning for Maximum Yield: When you reach Step 4 and start pruning, focus on removing any stems that grow downward or have yellowing leaves. These are energy vampires that drain your plant's resources. I also recommend keeping just 3-4 main branches on each plant—this creates an ideal balance between foliage and fruit production. The goal is to maintain that 12-inch height while encouraging bushy growth, which is exactly what those dwarf varieties are bred for.
Harvesting Strategy: The instructions mention harvesting peppers at 2-3 inches, but here's the pro move: harvest every 3-4 days during peak production to encourage continuous flowering. When you pick, always cut the stem just above a leaf node—this prevents disease entry points and stimulates new growth. I've seen plants that produce 20-30 peppers per season go up to 40-50 with this aggressive harvesting schedule, especially when combined with the low-nitrogen fertilizer boost after the first harvest wave.
Pro Tips for Tiny Green Peppers
- These game-changing insights will help your compact pepper plants thrive and produce like never before!
- Container Size Matters: While the instructions specify 5-gallon containers, I've found that 7-gallon containers can actually yield 50% more peppers per plant because they provide more root space for nutrient absorption.
- Germination Hack: The 75-80°F heat mat recommendation is spot-on, but here's what nobody tells you: place a damp paper towel over the soil after planting seeds to maintain consistent moisture without waterlogging.
Frequently asked questions
Got questions about growing tiny green peppers? You’re not alone! These compact plants are easy to care for, but a few key details can make all the difference. Below, we’ve answered the most common questions to help you grow a thriving harvest—even in small spaces.
How long does it take for tiny green peppers to mature?
Most compact pepper varieties (like ‘Mini Bell’ or ‘Shishito’) take 60–80 days from transplant to harvest. If you start seeds indoors, plan for an extra 8–12 weeks before they’re ready to pick. Patience pays off—tiny peppers ripen faster than full-sized ones!
Can I grow tiny green peppers in containers year-round?
In warm climates (Zones 9–11), yes! Move pots indoors or to a greenhouse in winter if temps drop below 50°F (10°C). For cooler zones, treat them as annuals or use grow lights. A sunny windowsill or greenhouse extends your growing season effortlessly.
What if my tiny peppers turn bitter or stop producing?
Bitter flavor or low yields often mean stress. Check for:
- Underwatering (peppers need consistent moisture).
- Overcrowding (prune suckers and thin plants).
- Nitrogen deficiency (feed with balanced fertilizer like 10-10-10).
- Temperature swings (ideal range: 70–85°F).
Are tiny green peppers easier to grow than full-sized ones?
They require less space (1–2 sq ft per plant), fewer prunings, and maturity in half the time of standard peppers. Plus, their compact size makes them perfect for balconies, windowsills, or small gardens. Just ensure they get 6+ hours of sun daily.
Can I substitute tiny green peppers for other varieties in recipes?
Yes! They’re milder and sweeter than jalapeños but similar in size to banana peppers. Use them 1:1** in stir-fries, stuffing, or pickling. For heat, add a pinch of cayenne or chili flakes. Their tender walls also make them great for roasting or grilling—no need to peel!
Pro Tip: Harvest peppers when they’re 2–3 inches long for the best flavor and continuous production. The more you pick, the more your plant will reward you!
Wrapping up and next steps
Growing tiny green peppers in containers is a rewarding and space-efficient way to enjoy fresh, homegrown veggies—even if you’re short on yard space! 🌱 These compact plants are perfect for balconies, patios, or sunny windowsills, offering a bountiful harvest with minimal effort.
Whether you’re a beginner or a seasoned gardener, their adaptability makes them a fantastic choice for any gardening enthusiast.
Ready to dive in? Start by picking your favorite pepper variety and gather your supplies—then, watch your little plants flourish! 🌿 Review the materials checklist one last time, and get growing before the next planting season begins.