
Shrubs
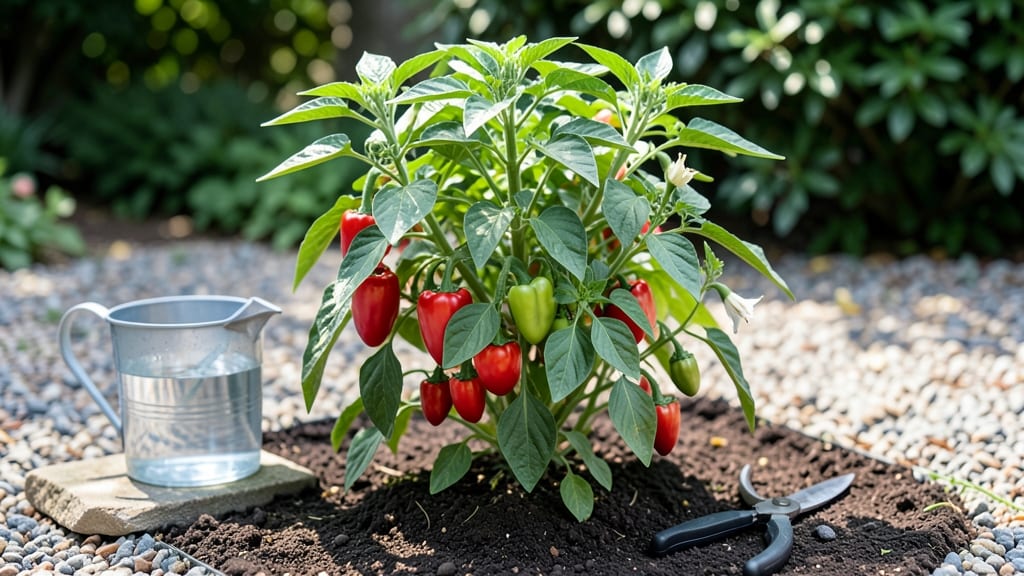
Growing miniature red bell peppers lets you enjoy sweet, vibrant harvests in pots or small gardens. 🌱 I've grown these compact plants for years, and they produce just as much flavor in a fraction of the space—perfect for balconies, windowsills, or even indoor growing setups with the right light.
The secret starts with the right soil: a well-draining mix with compost keeps roots happy while preventing blossom-end rot. Plant seeds indoors 8-10 weeks before your last frost, or buy transplants in the spring.
These little powerhouses thrive in full sun (6+ hours daily) and need consistent moisture—about 1 inch per week—but never soggy soil. You'll start seeing tiny red peppers forming in just 60-70 days after transplanting, and with proper care, each plant can yield 50-100 peppers per season. The flavor?
A perfect balance of sweetness and mild heat, ideal for snacking or cooking—though I mostly eat them straight from the vine. They handle container life beautifully, making them ideal for small spaces or urban gardens.
Just watch for aphids and spider mites, which love the tender new growth, and provide support if plants get top-heavy with fruit. Here's how to get started!
📚 In This Guide
- What you need
- Instructions
- Tips and common mistakes
- Wrapping up and next steps
What you need
- ● Miniature Red Bell Pepper Seeds: 5–10 seeds (choose a compact variety like 'Lunchbox,' 'Pocket Pepper,' or 'Tiny Tim').
- ● Containers: 5–7 inch pots (or a raised bed if planting outdoors) with drainage holes.
- ● Potting Mix: 1–2 bags of high-quality, well-draining organic potting soil (avoid garden soil—it compacts too easily!).
- ● Fertilizer: Balanced organic fertilizer (5-5-5 or 10-10-10 NPK ratio) or compost.
- ● Watering Can or Spray Bottle: For gentle, consistent hydration.
- ● Grow Lights (Indoor) or Sunny Spot (Outdoor): Indoor: LED grow lights (12–16 hours/day, 6–12 inches above plants).
- ● Outdoor: Full sun (6+ hours daily) in USDA Zones 9–11; use a greenhouse or indoor setup for cooler climates.
- ○ Support (Optional but Helpful): Small stakes or cages (4–6 inches tall) to keep plants upright as they grow.
- ● Pruning Shears: For trimming leggy growth or dead leaves.
- ● pH Test Kit: To ensure soil pH is between 6.0–6.8 (ideal for peppers).
- ● Mulch: Straw or shredded leaves to retain moisture and regulate soil temperature.
- ○ Spray Bottle with Neem Oil (Optional): For pest control (aphids or spider mites can be pesky!).
Step-by-step instructions for growing miniature red bell peppers
Here's how to cultivate these tiny, flavor-packed peppers that thrive in small spaces.
🌱 Step 1: Start Seeds Indoors 8-10 Weeks Before Last Frost
Fill 2-3 inch deep seedling trays with sterile seed-starting mix (never garden soil—it's too dense). Press the mix down lightly so it's firm but not compacted. Plant 2 seeds per cell, pressing them just below the soil surface—about ¼ inch deep. Cover with a fine layer of mix and mist gently until the surface looks uniformly damp.
Place the tray in a warm spot with 75-85°F soil temperatures for best germination. A seedling heat mat works wonders here. Keep the soil consistently moist but never soggy—you'll know it's right when the top inch feels damp to touch. Germination typically takes 7-14 days, though cooler rooms may extend this to 3 weeks.
☀️ Step 2: Provide Bright Light Immediately After Germination
The instant those first true leaves appear (not the initial seed leaves), move seedlings under 14-16 hours of grow light daily. A full-spectrum LED bulb positioned 2-3 inches above the plants works best. Without enough light, seedlings stretch toward the window and become weak—watch for thin stems and leaves spaced far apart.
Rotate the tray a quarter turn daily so plants grow straight instead of leaning. You'll notice stronger stems and darker green leaves within a week. When seedlings have 3-4 true leaves (about 4-6 weeks after sowing), it's time to transplant.
🪴 Step 3: Transplant to Individual Pots
Choose 5-7 inch diameter containers with drainage holes for each plant. Fill with a well-draining potting mix amended with compost. Gently remove one seedling at a time, keeping the root ball intact, and place it in its own pot. Press the soil lightly around the base to eliminate air pockets.
Water immediately after transplanting to help settle the soil. Place pots in a spot with 6-8 hours of direct sun daily. Miniature varieties tolerate partial shade better than full-size peppers, but they'll produce more peppers with adequate light. Watch for new growth within 7-10 days—that's your sign everything's settled in.
💧 Step 4: Maintain Consistent Moisture and Fertility
Water when the top 1-2 inches of soil feel dry to the touch. Miniature peppers hate soggy roots but also struggle in dry soil—think of it as keeping the soil "evenly moist." Use a moisture meter if you're unsure, aiming for 50-60% moisture in the root zone.
Feed every 2-3 weeks with a balanced liquid fertilizer (like 10-10-10) diluted to half-strength. You'll see faster growth and more blooms when the plants get regular nutrients. Prune any leggy stems back by ¼ inch above a leaf node to encourage bushier growth.
✂️ Step 5: Harvest and Encourage Continuous Production
Peppers are ready to pick when they're 1-2 inches long and fully colored. Use clean scissors to snip stems just above the fruit—this prevents disease from spreading through the plant. You'll notice new flowers forming within 10-14 days of harvest, signaling the plant is ready to produce again.
For year-round harvests, bring pots indoors before frost and place under grow lights for 12-14 hours daily. Keep temperatures above 60°F and maintain consistent moisture. With proper care, a single miniature plant can produce 50+ peppers per season—far more than full-size varieties in the same space.
Tips & tricks for perfect miniature red bell pepper cultivation
These little powerhouses pack big flavor in small spaces—here's how to give them the best growing conditions for maximum yield.
Seed Starting: Don't rush germination! The 75-85°F soil temperature is crucial—if your room runs cooler, place the seed tray on top of the fridge (not inside) to create a warm microclimate. I've seen germination speed up dramatically when using a seedling heat mat, especially in cooler homes. And here's a pro move: label your seed trays with the planting date—this helps track the 8-10 week countdown to transplanting.
Light Management: Those 14-16 hours of grow light aren't optional—they're what transforms weak seedlings into sturdy plants. I keep my LED bulb 2-3 inches above the seedlings and adjust the height as they grow. Watch for that "leggy" look (long stems with leaves spaced far apart)—that's your signal to move them closer to the light immediately. A simple timer set to 14 hours on/2 hours off makes this effortless.
Transplanting Strategy: When moving to 5-7 inch pots, I make it a two-person job: one holds the seedling while the other gently presses the soil. This keeps the root ball intact and prevents transplant shock. After transplanting, I give the soil a good soak—this helps settle the roots and eliminates air pockets that can cause rot. Place pots in a spot with 6-8 hours of direct sun, but don't panic if you can't provide full sun—these mini varieties are more shade-tolerant than their larger cousins.
Harvesting Hack: For continuous production, I harvest every 10-14 days when peppers reach 1-2 inches. Here's what nobody tells you—always use clean scissors! Dirty tools can introduce bacteria that spreads through the plant. I also keep a small notebook by my growing area to track harvest dates and note which plants produce the most consistently. This helps me plan for year-round harvests when I bring pots indoors.
Pro Tips for Miniature Red Bell Pepper
- These little powerhouses pack big flavor in small spaces—here's how to give them the best growing conditions for maximum yield.
- Seed Starting: Don't rush germination!
- Light Management: Those 14-16 hours of grow light aren't optional—they're what transforms weak seedlings into sturdy plants.
Frequently asked questions
Got questions about growing or using miniature red bell peppers? Here are answers to the most common ones—because even tiny peppers deserve big answers!
How long does it take for miniature red bell peppers to mature?
Miniature red bell peppers typically mature in 60–75 days from transplant, depending on your climate and growing conditions. Start seeds indoors 8–10 weeks before the last frost for a head start, or buy young plants to skip the wait. Patience pays off—those sweet, crunchy peppers are worth it!
Can I grow miniature red bell peppers in containers?
These compact plants thrive in 5-gallon containers or larger with well-draining soil. Ensure pots have drainage holes and place them in a spot with 6–8 hours of sunlight daily. Just avoid overcrowding—one plant per container works best for optimal airflow and growth.
Why aren’t my miniature red bell peppers turning red?
If your peppers stay green or yellow, it’s often due to cool temperatures, insufficient sunlight, or over-fertilizing with nitrogen. Move plants to a sunnier spot, reduce watering slightly, and switch to a low-nitrogen, high-phosphorus fertilizer to encourage ripening. Patience helps—some varieties need extra time!
Are miniature red bell peppers hotter than regular bell peppers?
Not at all! Miniature red bell peppers are just sweeter and milder than their larger counterparts, with a crisp texture perfect for snacking or cooking. Their small size doesn’t change their flavor—just their convenience. Great for stuffing, roasting, or adding to salads without overwhelming heat.
What’s the best way to harvest miniature red bell peppers?
Harvest when peppers are fully red and firm for the best flavor. Use clean pruning shears or scissors to snip stems, leaving a small portion attached to encourage more production. Pick regularly to keep plants productive—overripe peppers can turn mealy or bitter. Store in the fridge for up to 1 week or freeze for later use!
Wrapping up and next steps
Miniature red bell peppers are a fantastic choice for gardeners—whether you’re short on space or eager for a year-round harvest of vibrant, flavorful peppers! Their compact size, easy care, and high yield make them perfect for containers, balconies, or small plots.
With the right setup and a little patience, you’ll enjoy a bounty of sweet, crunchy peppers that add color and nutrition to your meals.
Ready to grow? Start small—pick a sunny spot, grab your seeds or seedlings, and get planting! Soon, you’ll be savoring homegrown goodness with zero regrets. 🌱✨