
Picking
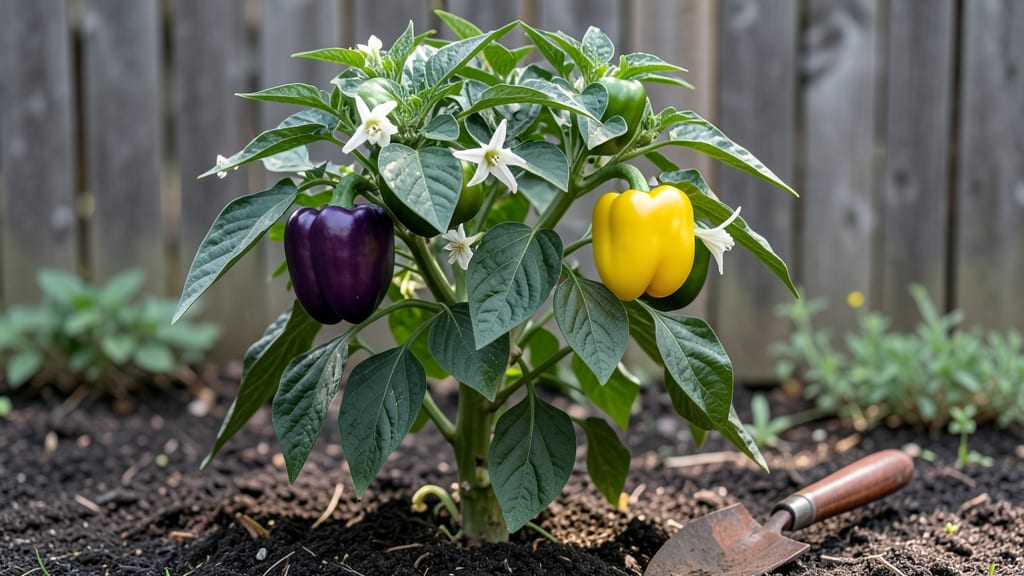
Growing Islander bell peppers means summer harvests that taste like sunshine. 🌶️ These thick-walled beauties thrive in heat, producing sweet, blocky peppers perfect for stuffing or grilling—once you nail their exact growing conditions.
My first batch yielded 20+ peppers per plant, and I learned the hard way that timing and soil make all the difference.
The trick starts with soil that drains fast but holds moisture—think sandy loam mixed with compost. Islander peppers demand 6+ hours of sunlight daily and soil temps above 60°F to germinate, so wait until after your last frost.
Transplants work best, but if you direct-sow, use biodegradable pots to avoid disturbing roots when moving them outside.
Water deeply once a week (more in heatwaves) and fertilize lightly with balanced 10-10-10 every 4-6 weeks. The payoff? Glossy green peppers that ripen from green to red in 70-80 days, with flavors that beat store-bought any day. Prune suckers early to focus energy on fruit, not foliage.
Pests like aphids or spider mites? Spray with neem oil at first sign. Harvest when firm and fully colored—don’t wait too long, or they’ll turn mealy. These peppers store well in the fridge, so you’ll enjoy your garden’s bounty long after summer fades.
📚 In This Guide
- What you need
- Instructions
- Tips and common mistakes
- Wrapping up and next steps
What you need
- ● Islander bell pepper seeds – 3–5 seeds per plant (or 1–2 starter plants from a nursery).
- ● Well-draining potting mix – 10–15 lbs for containers or 2–3 cubic feet for in-ground planting.
- ● Containers or garden bed – At least 12–18 inches deep and wide per plant (or 18-inch spacing if planting multiple).
- ● Organic compost or fertilizer – 1–2 cups per planting hole (balanced 10-10-10 or tomato/vegetable-specific blend).
- ○ Slow-release fertilizer – Optional but helpful for nutrient consistency (follow package instructions).
- ● Garden trowel or transplanting spade – For digging holes (6–8 inches deep).
- ● Watering can or hose with gentle nozzle – Avoid overwatering young plants.
- ● Mulch (straw, pine needles, or black plastic) – 2–3 inches thick to retain moisture and regulate soil temp.
- ○ Pruning shears – For trimming excess foliage or dead leaves (optional but helpful).
- ○ Plant stakes or cages – 2–3 feet tall to support heavy peppers (optional for indeterminate varieties).
- ● Full sun exposure – At least 6–8 hours of direct sunlight daily (Islander peppers love heat!).
- ● Warm soil temps – Wait until soil is at least 60°F (15°C) before transplanting (use a soil thermometer if unsure).
- ● pH-balanced soil – Aim for 6.0–6.8 pH (test kit recommended).
- ● Patience! – Islander peppers take 70–90 days to mature from transplant.
- ● Drip irrigation system – For consistent moisture without overwatering.
- ● Row covers or shade cloth – To protect seedlings from early heat or pests.
- ● Epsom salt (magnesium sulfate) – 1 tbsp per gallon of water for a mid-season boost.
- ● Companion plants – Basil, marigolds, or onions to deter pests naturally.
Step-by-Step instructions for growing Islander bell peppers
Here's how I grow this heat-loving variety—from seed to harvest—with foolproof techniques.
🌱 Step 1: Start Seeds Indoors 8-10 Weeks Before Last Frost
Islander bell peppers need a long growing season, so begin seeds indoors under grow lights or in a sunny window. Fill seed trays with seed-starting mix and plant seeds ½ inch deep, spacing them 1 inch apart. Keep the soil consistently moist but never soggy—pepper seeds rot easily in waterlogged conditions.
Cover the trays with plastic wrap or a humidity dome to retain warmth and moisture. Place them in a warm spot, ideally 75-85°F, until germination. You'll see sprouts in 7-14 days, though cooler rooms may take longer. Once seedlings emerge, remove the cover immediately to prevent damping-off disease.
☀️ Step 2: Provide Full Sun and Fertile Soil After Transplanting
When seedlings have 4-5 true leaves and are 4-6 inches tall, transplant them outdoors after hardening off for 1-2 weeks. Choose a location with 6-8 hours of direct sun daily—Islander peppers thrive in heat but need consistent sunlight to produce fruit.
Amend the soil with compost to ensure fertility, as peppers are heavy feeders. Work in 2-3 inches of compost and mix it into the top 6 inches of soil. This variety performs best in well-draining soil with a pH of 6.0-6.8. Space plants 18-24 inches apart to allow airflow and prevent disease.
💧 Step 3: Water Deeply and Maintain Consistent Moisture
Water peppers deeply 1-2 inches per week, aiming for the soil rather than the leaves to avoid fungal issues. Islander peppers are drought-tolerant once established, but they produce better fruit when moisture is consistent. Let the top 1-2 inches of soil dry out between waterings—this prevents blossom-end rot, a common problem with bell peppers.
Mulch around plants with 2-3 inches of straw or wood chips to retain moisture and regulate soil temperature. This is especially important in hot climates, where soil can dry out quickly. Avoid overhead watering after mulching, as wet foliage invites disease.
✂️ Step 4: Prune and Fertilize for Maximum Yield
Prune suckers (the small shoots that form in the leaf axils) to direct energy into fruit production. Islander peppers benefit from light pruning—remove only the suckers that form below the first flower cluster. This keeps the plant focused on developing peppers rather than excessive foliage.
Fertilize every 3-4 weeks with a balanced 10-10-10 or 5-5-5 fertilizer to support steady growth. Reduce nitrogen as peppers near maturity—too much greenery means fewer peppers. You'll know fertilization is right when new leaves are dark green and stems are sturdy, not leggy.
🌿 Step 5: Harvest at Peak Ripeness for Best Flavor
Islander bell peppers are ready to harvest when they reach 3-4 inches in diameter and are fully colored. Use pruning shears or a sharp knife to cut the pepper from the plant, leaving a small stem attached. Harvesting encourages more fruit to develop—check plants every 3-5 days during peak production.
Store harvested peppers in the refrigerator for up to 2 weeks or preserve them by pickling, drying, or freezing. If left on the plant too long, they may turn mealy or develop seeds. The key to a continuous harvest is consistent care—water, prune, and fertilize as needed throughout the growing season.
Tips & tricks for growing heat-loving Islander bell peppers
These practical insights will help you avoid common pitfalls and maximize your harvest with this tropical variety.
Germination Temperature: To speed up those 7-14 days of germination in Step 1, place your seed trays on a heating mat set to 75-85°F. I've found that maintaining this consistent warmth—especially in cooler homes—cuts germination time by nearly half. Just monitor soil moisture closely; heat increases evaporation. The key is balancing warmth with moisture without letting seeds sit in soggy conditions.
Hardening Off Strategy: For the 1-2 week hardening off period in Step 2, I recommend starting with just 1 hour of outdoor exposure on day one, then gradually increasing by 1 hour each day. Islander peppers are heat-loving but still need this gradual adjustment. Watch for wilting—if leaves droop after exposure, they're not ready for more sun. This slow process prevents transplant shock that can stunt early growth.
Soil pH Test: Before planting in Step 2, test your soil pH—Islander peppers thrive in the 6.0-6.8 range. If your soil tests outside this range, amend with sulfur to lower pH or lime to raise it. I've seen plants struggle in slightly alkaline soil, producing fewer peppers. A simple soil test kit costs pennies and prevents wasted effort. The 2-3 inches of compost you're mixing in helps, but pH balance is non-negotiable for this variety.
Pruning Visual: When pruning suckers in Step 4, look for those small shoots growing in the leaf axils (the V-shaped areas where leaves meet stems). These suckers compete with fruit production. I like to prune them when they're about 2 inches long—smaller ones are harder to spot but easier to remove. The goal is to keep the plant's energy focused on developing those 3-4 inch peppers you'll harvest later.
Pro Tips for Islander Bell Pepper
- These practical insights will help you avoid common pitfalls and maximize your harvest with this tropical variety.
- Germination Temperature: To speed up those 7-14 days of germination in Step 1, place your seed trays on a heating mat set to 75-85°F.
- Hardening Off Strategy: For the 1-2 week hardening off period in Step 2, I recommend starting with just 1 hour of outdoor exposure on day one, then gradually increasing by 1 hour each day.
Frequently asked questions
Got questions about growing Islander bell peppers? You’re not alone! This heat-loving variety thrives with the right care, but even the best gardeners need a little guidance. Below, we’ve answered the most common questions to help you cultivate a bountiful harvest without the guesswork.
How long does it take for Islander bell peppers to mature and bear fruit?
Islander bell peppers typically take 70–85 days from transplanting to maturity, depending on your climate and growing conditions. In hotter regions, they may ripen faster (as early as 65 days), while cooler areas could extend this timeline. Patience pays off—wait for vibrant green (or red/yellow if variety-specific) for peak flavor!
Do Islander bell peppers need full sun, or can they tolerate partial shade?
These peppers are sun-hungry! While they’ll survive in 6–8 hours of direct sunlight daily, they thrive best with full sun (8+ hours). Partial shade (especially in scorching afternoons) can reduce yield and flavor. If your garden is shady, opt for a south-facing spot or use reflective mulch to maximize light.
What should I do if my Islander peppers turn yellow or blighted?
Yellowing or blighted peppers often signal overwatering, fungal issues, or nutrient deficiencies. First, check soil moisture—peppers hate soggy roots! Improve airflow by pruning foliage and avoid wetting leaves when watering. If blight persists, treat with neem oil or copper fungicide. Prevention tip: Space plants 18–24 inches apart for airflow!
Can I grow Islander bell peppers in containers, and what’s the best pot size?
Islander peppers adapt well to containers if given enough space. Use a pot at least 12–15 inches deep and wide (5-gallon minimum) with drainage holes. Ensure the container stays warm (black pots absorb heat) and fertilize regularly. Bonus: Container gardening makes rotating crops easier!
Are there any substitutes for Islander bell peppers in recipes?
If you’re short on Islander peppers, try other sweet bell peppers (like California Wonder) or banana peppers for a milder kick. For heat lovers, jalapeños or serrano peppers add spice, while poblano peppers offer a smoky depth. Pro tip: Roast substitutes for a deeper flavor!
Wrapping up and next steps
Growing Islander bell peppers is a rewarding adventure for any gardener—especially those who love bold flavors and heat-tolerant plants! 🌶️ With the right soil, sunlight, and care, you’ll soon enjoy a bountiful harvest of sweet, vibrant peppers to spice up your favorite dishes.
Whether you’re a beginner or a seasoned pro, these tips will set you up for success.
Ready to take the next step? Start by planting your seeds or seedlings this season and watch your garden transform into a pepper paradise. Happy growing—and may your harvest be as plentiful as it is delicious! 🌱✨