Container Gardens
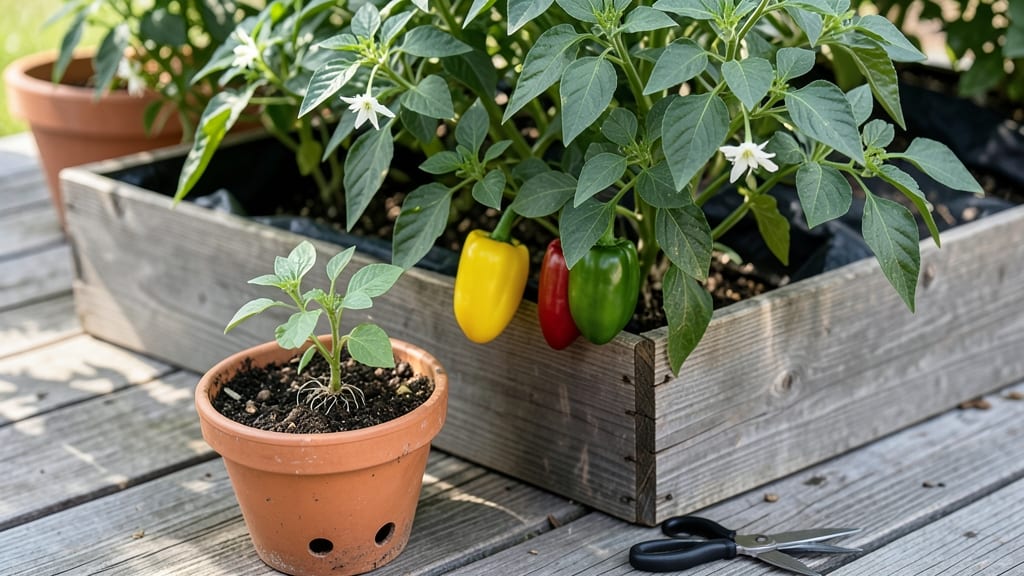
Planting peppers in containers lets you grow fiery jalapeños and sweet bell peppers even on a balcony. 🌱 I’ve grown enough peppers in pots to fill my freezer with salsa—no backyard needed. The secret? Matching container size to pepper ambition and keeping roots happy with the right soil mix.
Start with 5-gallon containers for each pepper plant (bigger is better for heat-loving varieties). Choose compact varieties like ‘Shishito’ or ‘Jalapeño M’ for small spaces, or go bold with ‘Banana Pepper’ in larger pots.
Fill with well-draining potting mix—peppers hate soggy roots—and add a handful of compost for extra flavor. Plant seeds 1/4 inch deep, 12 inches apart, and keep soil warm (70°F+).
Within 6-8 weeks, you’ll see thick, glossy leaves and the first tiny peppers forming. Morning sun and afternoon shade keep plants thriving, while consistent watering (let soil dry slightly between waterings) prevents blossom-end rot. The best part? Containers keep pests like squash bugs away—no chemicals needed.
This method works year-round in warm climates, or extend your season with grow lights. By summer’s end, you’ll have enough peppers to share (or can). Ready to turn your patio into a spice factory? Let’s get planting!
📚 In This Guide
- What you need
- Instructions
- Tips and common mistakes
- Wrapping up and next steps
What you need
- ● Containers: At least 1–2 large pots per pepper plant (minimum 5-gallon capacity for mature plants). Use pots with drainage holes and saucers to catch excess water. Pro tip: 💡 Opt for fabric grow bags or self-watering containers for better root health!
- ● Potting Mix: 1–2 bags of high-quality, well-draining potting soil (avoid garden soil—it compacts and retains too much moisture). Look for a mix labeled for vegetables or container gardening.
- ● Pepper Seeds or Seedlings: Seeds: 2–3 seeds per container (if starting from scratch). Choose varieties suited for containers, like Jalapeño, Bell, or Shishito.
- ● Seedlings: 1 healthy transplant per pot (available at nurseries or garden centers). Pick compact or dwarf varieties for smaller spaces.
- ● Fertilizer: A balanced, water-soluble fertilizer (e.g., 10-10-10 or 5-5-5) or an orgainc option like compost or worm castings.
- ○ Drainage Material (Optional but Helpful): 1–2 inches of perlite, pumice, or gravel at the bottom of pots to improve drainage.
- ● Trowel or Small Shovel: For planting seeds or seedlings and mixing soil.
- ● Spray Bottle or Watering Can: With a gentle nozzle for watering seedlings.
- ○ Gloves (Optional): To protect your hands while handling soil or spicy pepper varieties.
- ● Plant Labels: To keep track of pepper varieties (especially if growing multiple types!).
- ○ Pruning Shears (Optional): For trimming leggy seedlings or harvesting peppers.
- ● Sunlight: A location with 6–8+ hours of direct sunlight per day (peppers are sun-worshippers!).
- ● Warmth: Peppers thrive in temperatures between 70–85°F (21–29°C). Avoid placing containers in frost-prone areas.
- ● Watering Routine: Keep soil consistently moist but not soggy (peppers hate "wet feet").
- ● Patience: Peppers take 60–90 days to mature, depending on the variety!
Step-by-Step instructions for planting peppers in containers
Here's how I grow bold, productive peppers in pots—no garden needed, just smart container prep.
🪴 Step 1: Choose the Right Containers and Drainage
Peppers need at least 5-gallon containers for each plant—10 gallons is ideal for larger varieties like bell peppers. I use fabric grow bags because they prevent root circling and allow roots to breathe. If using plastic or ceramic, drill extra drainage holes if they don't already have them.
Place a 2-inch layer of gravel or broken pottery at the bottom to create an air pocket and prevent soil compaction. This ensures water drains freely and roots don't suffocate. I always test drainage by filling the empty pot with water—if it drains in under 30 seconds, it's ready for planting.
🌱 Step 2: Prepare Lightweight, Fertile Potting Mix
Fill containers with a blend of 60% premium potting mix and 40% perlite or coco coir to improve aeration. Peppers hate soggy roots, so this mix prevents compaction while holding enough moisture. I add a handful of worm castings to each pot—they provide gentle, long-lasting nutrients without burning tender roots.
Moisten the mix until it feels like a damp sponge—squeeze a handful and it should hold its shape but not drip. Avoid garden soil; it's too dense and can harbor diseases. If your mix feels too dry after a few weeks, I top-dress with ½ inch of fresh compost instead of watering heavily.
☀️ Step 3: Plant Transplants at the Right Depth
Dig a hole in the center of the pot twice as wide as the transplant's root ball but no deeper. Gently remove the pepper from its nursery pot and tease the roots outward if they're circling. Place the plant so the top of the root ball sits ½ inch below the soil line—this prevents stem rot while allowing room for new roots to form.
Fill the hole with soil and press lightly around the base to eliminate air pockets. Water deeply until it runs out the drainage holes, then let the pot sit for 10 minutes to drain completely. Peppers are sensitive to overwatering right after transplanting, so I wait until the top inch of soil feels dry before watering again.
💧 Step 4: Set Up Consistent Watering and Light
Containers dry out faster than garden beds, so I water peppers when the top 2 inches of soil feel dry. Use a drip irrigation system or watering can with a narrow spout to deliver water directly to the soil—avoid overhead watering, which spreads disease. I always water in the morning so foliage has all day to dry.
Peppers need 6-8 hours of direct sunlight daily. A south-facing window works for small plants, but you'll need a grow light for strong fruiting. I keep my lights 6-12 inches above the plants and adjust as they grow. Watch for leggy growth—if stems stretch toward the light, it's too far away.
✂️ Step 5: Prune and Support for Maximum Yield
Pinch off the first few flowers that appear—this encourages the plant to focus on foliage first. Once the plant is established, I remove suckers (side shoots in leaf axils) to direct energy to fruit production. I also prune any yellow or diseased leaves immediately to prevent spread.
Tall varieties like jalapeños need stakes or cages to prevent falling. I tie stems loosely with soft plant ties every 6-8 inches as they grow. Harvest peppers when they reach 75% of their mature size—this keeps the plant producing instead of overloading with one giant fruit.
Tips & tricks for perfect container-grown peppers
Here's what I've learned after growing peppers in pots for years—tricks that make all the difference between struggling plants and a thriving spice garden.
Container Size Matters: The 5-gallon minimum isn't just a suggestion—it's non-negotiable for healthy peppers. I've seen plants in smaller pots struggle with stunted growth and poor fruiting. For bell peppers, the 10-gallon recommendation is ideal because they develop larger root systems. If you're working with limited space, consider using self-watering containers—they help maintain consistent moisture without overwatering.
Drainage Test: That 30-second drainage test in Step 1 is crucial. I've had containers fail because they didn't drain properly, leading to root rot. If your pot drains too quickly (under 10 seconds), add a layer of landscape fabric over the gravel to slow water flow. For slow-draining pots (over 1 minute), increase the gravel layer to 3 inches. The goal is to let excess water escape while keeping the root zone moist but not waterlogged.
Soil Mix Secrets: The 60/40 ratio of potting mix to perlite/coco coir creates the perfect balance. I've found that adding a handful of horticultural charcoal to each pot helps prevent fungal issues and keeps the mix fresh longer. For extra insurance against soggy roots, I mix in a small amount of orchid bark—it improves aeration even more than perlite alone. Remember, peppers hate wet feet, so this mix is designed to keep roots happy without suffocating them.
Lighting Strategy: Those 6-8 hours of direct sunlight are non-negotiable, but here's the trick: if you're using grow lights, position them just 6 inches above the plants initially. As your peppers grow, raise the lights gradually to maintain that distance—this prevents leggy growth. I've had great success with full-spectrum LED grow lights because they mimic natural sunlight without the heat output of HPS bulbs. For window growers, rotate pots weekly to ensure even light exposure on all sides.
Pro Tips for Plant Peppers In Containers
- Here's what I've learned after growing peppers in pots for years—tricks that make all the difference between struggling plants and a thriving spice garden.
- Container Size Matters: The 5-gallon minimum isn't just a suggestion—it's non-negotiable for healthy peppers.
- Drainage Test: That 30-second drainage test in Step 1 is crucial.
Frequently asked questions
Got questions about growing peppers in containers? You’re not alone! Here are answers to the most common concerns—from timing to troubleshooting—to help you grow a thriving mini pepper garden.
When is the best time to plant peppers in containers?
Peppers thrive in warm soil, so wait until after the last frost (typically mid-to-late spring for most climates). If you’re in a cooler zone, start seeds indoors 8–10 weeks before the last frost, then transplant. For year-round harvests, move containers indoors in winter (near a sunny window or under grow lights).
What’s the best container size for pepper plants?
Peppers need at least 5-gallon containers (12–18 inches deep) for mature plants. Smaller pots (1–3 gallons) work for starter plants or dwarf varieties, but roots will outgrow them quickly. Ensure containers have drainage holes to prevent soggy soil, which invites root rot.
Can I grow peppers in containers without soil?
Yes! Use soilless mixes like coconut coir, peat moss, or hydroponic media (e.g., clay pebbles + nutrient solution). For soil-based options, blend potting mix with perlite or vermiculite (60/40 ratio) to improve drainage. Just ensure your chosen medium holds moisture but isn’t waterlogged—peppers hate wet feet!
Why are my container-grown peppers turning yellow or dropping leaves?
Yellow leaves often signal overwatering, nutrient deficiency, or poor drainage. Check soil moisture (top inch should dry between waterings) and fertilize with a balanced 10-10-10 or tomato/vegetable mix every 2–4 weeks. If leaves curl or drop, it could also mean heat stress—move containers to partial shade during extreme heat (above 90°F).
How do I get peppers to fruit in containers?
Peppers need full sun (6–8 hours daily), consistent water, and regular feeding. If blooms appear but drop, they may lack pollination—gently shake plants or use a small brush to transfer pollen. For indoor growers, try a handheld fan to mimic wind. Also, ensure containers are large enough (roots compete for nutrients in small pots).
Can I reuse the same container for peppers year after year?
Yes, but sterilize containers first to prevent disease. Scrub with a 10% bleach solution (1 part bleach to 9 parts water), rinse well, and refill with fresh potting mix. Rotate crops annually if possible (e.g., peppers → herbs → tomatoes) to reduce soil-borne pests. Pro tip: Add compost or worm castings to replenish nutrients!
Wrapping up and next steps
Growing peppers in containers is a rewarding way to enjoy fresh, homegrown flavor without needing a sprawling garden. With the right pot size, well-draining soil, and a little TLC, you’ll be harvesting spicy jalapeños, sweet bell peppers, or tangy bananas in no time! 🌱
Now that you’re armed with tips and tricks, it’s time to get planting. Start with one or two varieties, experiment with fertilizers, and watch your container garden thrive.
Before you know it, you’ll be sharing your pepper bounty with friends—or turning them into salsas, stir-fries, or pickles. Happy growing! 🌶️