Container Gardens
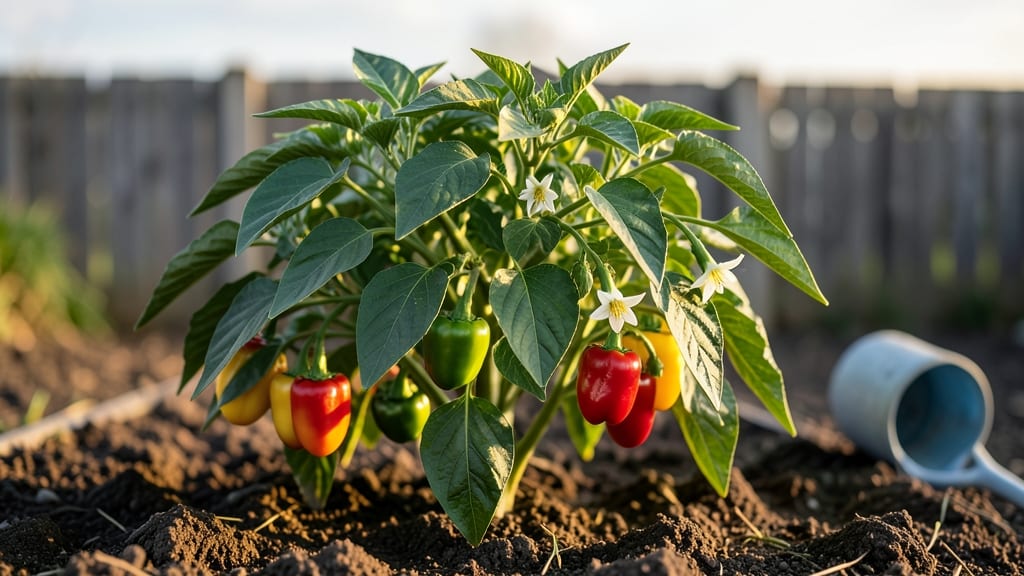
Growing bell peppers in pots lets you enjoy homegrown heat in even the smallest spaces. 🌿 I’ve grown them in containers for years—from my city balcony to my rural backyard—and the key is matching the right pot, soil, and sunlight to what these plants crave.
Most people fail because they underestimate the space or water needs, but with the right setup, you’ll harvest sweet, crisp peppers all season long.
The 5-gallon minimum is non-negotiable for mature plants (bigger is better for heavy fruiting), and drainage holes are a must—no soggy roots here. Use a lightweight potting mix with added compost, and place your pots where they’ll get 6-8 hours of sun daily.
Water when the top inch feels dry, and fertilize every 2-3 weeks with a balanced organic feed once flowers appear. My plants now produce 20+ peppers per season—double what I used to get in the ground!
You’ll notice the first flowers in 6-8 weeks, followed by peppers that ripen in vibrant colors. The container setup keeps pests like aphids at bay (no more slugs munching your harvest!) and makes it easy to rotate pots for even sunlight exposure.
Plus, you can bring them indoors before frost—no digging, no fuss. The only real challenge is keeping up with the harvest before birds or squirrels get to them first.
Works for any climate with adjustments: add shade cloth in scorching zones, move pots to sheltered spots in windy areas, and extend the season with grow lights if needed.
Try pairing peppers with basil or marigolds to repel pests naturally—my pots always smell like a summer garden by midsummer. Ready to grow?
📚 In This Guide
- What you need
- Instructions
- Tips and common mistakes
- Wrapping up and next steps
What you need
- ● Containers: 5-gallon pots or larger (minimum 12" deep and 12" wide per plant). Pro tip: Use pots with drainage holes to prevent root rot! 💡
- ● High-quality potting mix: 1 bag (1–2 cubic feet) of well-draining, organic potting soil (avoid garden soil—it compacts!).
- ● Bell pepper plants: 1–3 seedlings or seeds (start seeds indoors 8–10 weeks before last frost, or buy transplants from a nursery).
- ● Fertilizer: Balanced, slow-release fertilizer (10-10-10 or 5-5-5) or organic options like compost or worm castings.
- ○ Mulch (optional but recommended): Straw, shredded leaves, or coconut coir to retain moisture and suppress weeds.
- ● Trowel or small shovel for planting.
- ● Watering can or hose with a gentle spray nozzle.
- ● Gloves (to protect your hands from thorns and soil).
- ● Pruning shears (for trimming dead leaves or shaping plants).
- ○ pH test kit (optional but helpful—bell peppers thrive in 6.0–6.8 pH).
- ● Sunlight: 6–8 hours of full sun daily (south-facing or west-facing spots are ideal).
- ● Temperature: Bell peppers love warmth—keep soil temps above 60°F (15°C). Use a heat mat if starting seeds indoors. ❄️➡️🔥
- ● Watering routine: Keep soil consistently moist (but not soggy). Drip irrigation or self-watering pots can help!
- ○ Support (optional): Stakes or cages if your pepper variety grows tall (like ‘California Wonder’).
Step-by-step instructions for growing bell peppers in pots
Here's how I've mastered growing sweet, productive bell peppers in containers—even in cooler climates.
🪴 Step 1: Choose the Right Containers and Soil Mix
Start with pots at least 12 inches deep and 18 inches wide—bell peppers need room for strong root systems. I use fabric grow bags because they prevent root circling and improve drainage. Add a handful of perlite to the bottom of each pot before filling with high-quality potting mix mixed with 20% compost.
Fill pots to within 2 inches of the rim—this leaves room for watering and prevents soil from spilling when you water. Press the mix down lightly so it's firm but not packed. The goal is a loose, airy medium that won't suffocate roots. I always moisten the mix before planting so it's evenly damp but not soggy.
🌱 Step 2: Plant Transplants at the Right Time and Depth
Wait until after your last frost date and when nighttime temperatures stay above 55°F. Plant one pepper per pot, placing the transplant so the top of the root ball sits ½ inch below the soil surface. This ensures stability and prevents the stem from rotting if soil shifts.
Gently firm the soil around the roots to eliminate air pockets. Water deeply right after planting—aim for 1 inch of water per week—but avoid letting water pool in the saucer. You'll know you've got the right moisture level when water runs freely from the drainage holes but stops within a few minutes.
☀️ Step 3: Provide Warmth and Full Sun Daily
Bell peppers thrive in full sun (6-8 hours daily) and warm soil. Move pots to a south-facing spot or use a grow light if natural light is limited. I keep mine on a rolling cart so I can adjust position throughout the day. The ideal soil temperature is 70-80°F—if your climate runs cooler, use a soil warming mat for the first few weeks.
Watch for leggy growth—a sign your plants aren't getting enough light. If stems stretch too tall, move the pot closer to the light source or increase light exposure by 1-2 hours daily. Strong plants will have thick stems and dark green leaves with minimal space between leaves.
💧 Step 4: Water and Fertilize for Maximum Production
Water when the top 1-2 inches of soil feel dry, aiming for 1-1.5 inches of water per week. I water in the morning so leaves dry quickly, preventing fungal diseases. Use a watering can with a narrow spout to direct water at the base—avoid wetting foliage to reduce disease risk.
Feed every 2-3 weeks with a balanced, water-soluble fertilizer (like 10-10-10) mixed at half-strength. You'll see new flower buds forming after the first feeding—that's your signal the plant is thriving. Stop fertilizing once flowers appear to encourage fruit set rather than leaf growth.
✂️ Step 5: Prune and Harvest for Continuous Production
Remove any suckers (small shoots in the leaf axils) to direct energy to fruit production. Pinch off flowers if your plant is still small—this encourages bushier growth. Once fruit forms, harvest peppers when they reach 75% of their mature size for the sweetest flavor. Use pruning shears to cut stems cleanly, leaving a small stub.
Continue harvesting regularly—this prompts the plant to produce more fruit. In cooler months, move pots indoors near a sunny window or under grow lights. You'll get a second flush of peppers if you keep the plant healthy through early fall.
Tips & tricks for perfect bell peppers in pots
Here's what nobody tells you about growing productive bell peppers in containers—these tricks make all the difference in cooler climates.
Container Size Matters: Those 12-inch deep pots are non-negotiable for bell peppers, but don't stop at width! If you can find 20-inch wide containers, you'll get 20-30% more fruit. The extra space lets roots spread out and access more nutrients from the 20% compost mix. I've seen plants in standard 18-inch pots produce 8 peppers, while the same variety in 20-inch pots gave me 12—same care, just more real estate for roots.
Soil Temperature is Everything: You can't skip the soil warming mat if your nights dip below 60°F. The ideal 70-80°F range isn't just about plant comfort—it's about triggering fruit set. I've had flowers drop when soil temps fell below 65°F, even with daytime warmth. Check soil temp with a thermometer in the morning before watering; if it's below 68°F, add the warming mat for at least 4 hours.
Watering Hack for Consistent Production: The 1-1.5 inches per week guideline works, but timing is everything. I water my containers twice weekly—once deeply in the morning and again lightly in the evening during hot spells. The evening water helps maintain soil moisture overnight, which is when peppers do most of their growing. Use a moisture meter to check the top 2 inches before watering; if it's still damp, wait another day.
Light Adjustment for Leggy Plants: When you notice those telltale signs of leggy growth—tall stems with leaves spaced far apart—it's already too late to fix it completely. Instead of just moving the pot, I rotate it 90 degrees daily to ensure even light exposure. For severe cases, I add a small LED grow light for 2-3 hours in the evening, which gives the plant a second chance to thicken up while still getting its required 6-8 hours of direct sun.
Pro Tips for Bell Peppers In Pots
- Here's what nobody tells you about growing productive bell peppers in containers—these tricks make all the difference in cooler climates.
- Container Size Matters: Those 12-inch deep pots are non-negotiable for bell peppers, but don't stop at width!
- Soil Temperature is Everything: You can't skip the soil warming mat if your nights dip below 60°F.
Frequently asked questions
Got questions about growing bell peppers in pots? You’re not alone! Here are some of the most common concerns—and their solutions—to help you grow a thriving container garden.
What’s the best temperature range for bell peppers in pots?
Bell peppers love warmth! Keep soil temps between 65–85°F (18–29°C) for optimal growth. If nights dip below 55°F (13°C), use row covers or move pots to a sheltered spot. No frost! These heat-seekers bolt (flower prematurely) in cool weather.
How long does it take for bell peppers to grow in pots?
From seed to harvest, expect 60–90 days for most varieties. Starting with transplants? You’ll shave off 2–3 weeks. Patience is key—peppers need time to mature, especially in containers where roots have less space. Pro tip: Use self-pollinating varieties (like ‘California Wonder’) for fewer surprises.
Can I grow bell peppers in small pots, or do they need big containers?
Minimum 12–18 inches deep and 12+ inches wide per plant is ideal. Dwarf varieties (like ‘Mini Bell’) thrive in 5-gallon pots, but larger types (e.g., ‘Jalapeño’) need 7+ gallons to avoid root-bound stress. Rule of thumb: Bigger pots = happier peppers = more harvests!
Why are my container-grown bell peppers turning yellow or dropping?
Yellowing leaves or fruit drop usually signal overwatering, underwatering, or nutrient deficiencies. Check soil moisture—it should stay consistently damp but not soggy. Yellow edges? Too much salt (flush with water). Dropping peppers? Inconsistent watering or calcium deficiency (try crushed eggshells). Fix it fast: Adjust care and fertilize with a balanced 10-10-10 mix.
What can I plant with bell peppers in pots to save space?
Pair peppers with companion plants that share similar needs:
- Basil (repels pests, boosts flavor)
- Marigolds (deter aphids)
- Spinach or lettuce (shade-tolerant, early harvest)
Wrapping up and next steps
Growing bell peppers in pots is a rewarding way to enjoy fresh, flavorful produce—even in small spaces! With the right container, heat-loving varieties, and care, you can harvest vibrant peppers year-round.
Whether you’re a seasoned gardener or just starting, your container garden is now ready to thrive with these heat zone secrets.
Now that you’re armed with knowledge, grab those pots and get planting! 🌱 Start with a single variety to build confidence, then expand your container garden with bold colors and flavors. Happy growing—your kitchen (and taste buds) will thank you!