Propagation
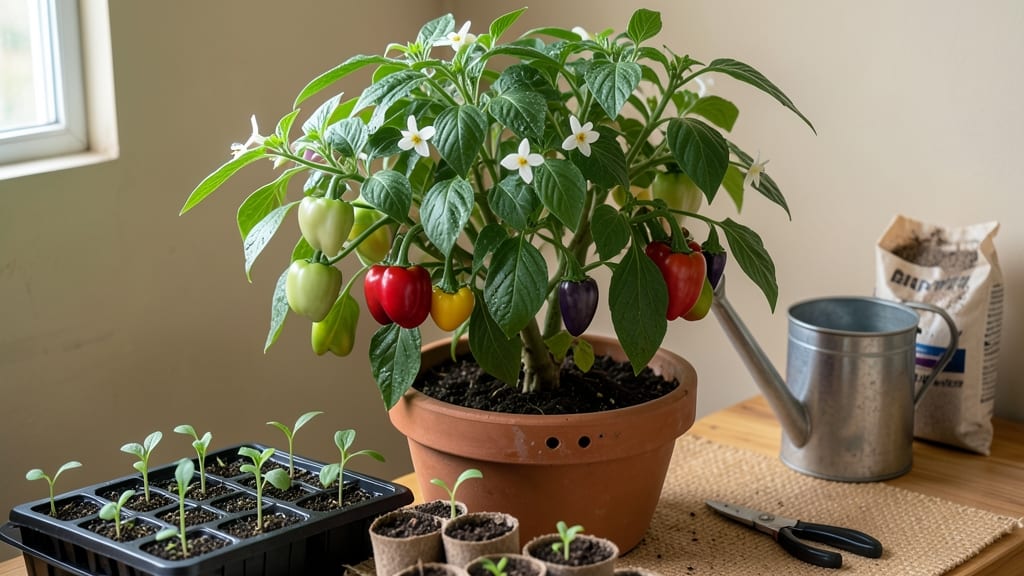
Starting bell pepper seeds indoors requires patience and precise heat control—no shortcuts will work here. 🌱 I’ve learned that skipping the right soil warmth and humidity is how you end up with a sad tray of unhatched seeds.
The secret lies in mimicking their tropical origins: consistent bottom heat, just the right moisture, and a spot where they won’t get cold feet.
You’ll need a seed-starting mix that drains well (no garden soil), small pots or a seed tray, a heat mat (or warm spot near your furnace), and a humidity dome or plastic wrap.
Most importantly, time it right—start them 8-10 weeks before your last frost, because peppers are slow to mature. The payoff? Homegrown peppers that outshine anything you’ll find in stores, with flavors so intense they’ll change how you cook forever.
Once planted, keep those seeds cozy at 75-85°F—any cooler and they’ll sulk for weeks. Water from the bottom to avoid washing them out, and expect germination in 7-21 days. The first true leaves signal it’s time to thin to the strongest seedlings, which will soon outgrow their starter pots.
By transplanting at the right size, you’ll give them a head start that translates to bigger yields come summer.
Here’s the hard truth: if you rush this process, you’ll end up with leggy, weak plants that struggle to produce. But when you nail the heat and timing, those seedlings will transform into robust plants that reward you with buckets of peppers all season.
Trust me—your future self will thank you when you’re snacking on homegrown sweet peppers in July.
📚 In This Guide
- What you need
- Instructions
- Tips and common mistakes
- Wrapping up and next steps
What you need
- ● Bell pepper seeds: Choose heirloom or hybrid varieties (e.g., 'Jalapeño,' 'Sweet Banana,' or 'Cayenne'). Start with 3–5 seeds per container if testing multiple types.
- ● Seed-starting mix: 2–3 cups of a sterile, seed-specific blend (avoid garden soil—it’s too dense!). Look for labels like "peat-based" or "coco coir."
- ● Containers: Biodegradable pots (4–6" deep) or seed trays with cells (2–3" deep)—1–2 per seed type.
- ○ Plastic nursery trays with drainage (optional but handy for humidity control).
- ○ Heat mat (optional but highly recommended): A seedling heat mat (70–80°F) to maintain optimal germination temps.
- ● Grow lights: LED or fluorescent bulbs (2–3 ft above seedlings) for 12–16 hours/day once sprouted.
- ● Spray bottle: For gentle watering to avoid disturbing seeds.
- ● Plastic wrap or humidity dome: To create a mini greenhouse until germination.
- ● Fertilizer: Balanced, water-soluble fertilizer (5-5-5 or 10-10-10) at half-strength after true leaves appear.
- ● Patience: Bell pepper seeds can take 10–21 days to germinate—stay consistent!
- ● Warmth: Seeds need 75–85°F soil temps to sprout. No heat mat? Place containers on a sunny windowsill or near a warm appliance.
- ● Light: Once sprouted, seedlings crave bright, indirect light. South-facing windows or grow lights are ideal.
- ● Space: Thin seedlings to 12–18" apart when transplanting to avoid crowding.
- ● pH test kit: Aim for 6.0–6.8 soil pH—bell peppers are sensitive!
- ● Fungicide (like hydrogen peroxide or copper spray): Prevents damping off in humid conditions.
- ● Label markers: Track varieties and planting dates—bell peppers mature at different rates!
- ● Self-watering trays: Reduces the risk of over/under-watering for beginners.
Step-by-Step instructions for starting bell pepper seeds indoors
Here's the foolproof method I use to get bell peppers off to a strong start—no more slow, weak seedlings!
🌱 Step 1: Prepare Containers and Heat Source
Fill 2-3 inch deep seed trays or small pots with sterile seed-starting mix (never garden soil). Bell pepper seeds need warmth to germinate, so place your containers on a seedling heat mat set to 80-85°F. If you don’t have a heat mat, nestle the pots inside a larger container filled with warm water—this creates a mini greenhouse effect. Press the soil down lightly so it’s firm but not compacted.
The key here is keeping the soil consistently warm. Test it by feeling the back of your hand—it should feel comfortably warm, not hot. If your room runs cooler than 70°F, germination could take 3-4 weeks instead of the usual 7-14 days. I like to place a thermometer near the pots to monitor temperature without guessing.
🌱 Step 2: Sow Seeds at the Right Depth and Moisture
Plant 1-2 seeds per cell at a depth of ½ inch—any deeper and they’ll struggle to push through. I use a toothpick to make small holes, then drop the seeds in gently. Cover them with a thin layer of soil and mist the surface with water until it’s damp but not soggy. Overwatering now can cause the seeds to rot before they even sprout.
Here’s the thing—bell pepper seeds need darkness to germinate. After sowing, loosely cover the tray with a dark plastic bag or aluminum foil. This blocks light and keeps humidity high, which speeds up germination. Check daily for condensation on the inside of the cover—this tells you the moisture level is perfect. Remove the cover as soon as you see the first sprouts pushing through.
☀️ Step 3: Provide Light and Ventilation for Seedlings
Once seedlings emerge, remove all coverings immediately and move them under grow lights or to a south-facing window. Bell peppers need 14-16 hours of light daily to avoid becoming leggy. If using a grow light, keep it 2-3 inches above the seedlings and raise it as they grow. You’ll know your light is strong enough when the seedlings grow sturdy and dark green, not stretched and pale.
Start ventilating the seedlings after 5-7 days by propping the tray in a well-lit spot with a gentle breeze (like near an open window with a screen). This prevents damping-off disease, which causes seedlings to collapse suddenly. Water only when the top inch of soil feels dry—overwatering is the #1 killer of young peppers.
🌿 Step 4: Thin and Harden Off Seedlings
When seedlings have 2-3 true leaves (not the initial seed leaves), thin to the strongest one per cell. Use scissors to snip the weaker seedlings at soil level—this reduces transplant shock. After thinning, fertilize lightly with a diluted fish emulsion or balanced fertilizer to encourage root growth. Avoid heavy feeding now, as it can burn tender roots.
Two weeks before your last frost date, start hardening off the seedlings. Place them outside in a sheltered spot for 1-2 hours the first day, gradually increasing time over 7-10 days. Watch for wilting or leaf burn—if this happens, they’re not ready yet. Hardened-off seedlings will have thick stems and glossy leaves, ready to thrive in the garden.
Tips & tricks for perfect bell pepper seed starting
Real talk: Bell pepper seeds are finicky little things—they won’t germinate right if you don’t nail these details. Here’s what nobody tells you about getting them to sprout strong and fast.
Heat Consistency is Non-Negotiable: That 80-85°F range in Step 1 is critical, but here’s the secret: Use a thermometer to verify your heat mat’s actual output—many run cooler than advertised. I’ve seen them hit only 75°F when set to 85°F, which turns the 7-14 day germination window into a 3-4 week wait. Place your thermometer right in the soil where seeds will sit, not just on the mat surface. If you’re below 70°F, germination will stall completely—consider a second heat source or move pots to a warmer spot like near the oven (turned off) or under a desk lamp with a heat bulb.
The Darkness Trick for Faster Sprouts: In Step 2, when you cover those seeds with foil or plastic, you’re not just blocking light—you’re creating a humid microclimate. Here’s what I do: After covering, place the tray in a ziplock bag (not sealed tight) to trap extra moisture. Check daily for condensation—if you see heavy droplets, you’ve got perfect humidity. The moment you spot tiny green hooks breaking through, remove the cover immediately. Leaving them covered too long after sprouting causes seedlings to get "leggy" and weak.
Lighting Hacks for Healthy Growth: Those 14-16 hours of light in Step 3 are non-negotiable, but here’s the pro move: Use a timer for your grow lights to automate this. I set mine for 16 hours on/8 hours off—consistency matters more than exact hours. For budget setups, place seedlings on a windowsill with an aluminum foil reflector behind them to bounce extra light. Watch for "etiolation" (super tall, pale seedlings)—this means they’re stretching for light. If you see this, move them closer to the light source or increase light duration slightly.
Hardening Off Without Shock: The 1-2 hour outdoor start in Step 4 is where most beginners mess up. Instead of throwing seedlings outside suddenly, I do this: On day 1, place them in a shaded spot (like under a tree) for just 30 minutes. Gradually increase time and sunlight exposure over 7-10 days. The key is to watch for stress signs—if leaves curl or turn yellow, they’re not ready. Hardened-off seedlings should look plump and vibrant, not wilted. This gradual approach prevents transplant shock when you eventually move them to the garden.
Pro Tips for Starting Bell Pepper Seeds
- Real talk: Bell pepper seeds are finicky little things—they won’t germinate right if you don’t nail these details.
- Heat Consistency is Non-Negotiable: That 80-85°F range in Step 1 is critical, but here’s the secret: Use a thermometer to verify your heat mat’s actual output—many run cooler than advertised.
- The Darkness Trick for Faster Sprouts: In Step 2, when you cover those seeds with foil or plastic, you’re not just blocking light—you’re creating a humid microclimate.
Frequently asked questions
Got questions about starting bell pepper seeds? You’re not alone—this heat-loving crop can be tricky for beginners! Here are answers to the most common concerns to help you grow confidently.
When is the best time to start bell pepper seeds indoors?
Start seeds 8–10 weeks before your last frost date (typically mid-March to early April in most climates). Bell peppers need warmth to germinate—waiting too long risks transplant shock, while starting too early means crowded seedlings. Use a seed-starting calendar for your zone to nail the timing!
How warm does it need to be for bell pepper seeds to germinate?
Bell pepper seeds thrive in 75–85°F (24–29°C) soil. Without heat, germination can take 2–4 weeks (or fail entirely!). Use a seedling heat mat (bottom heat) or place trays on top of your fridge. A clear plastic dome or plastic wrap traps humidity and warmth—just remove it once sprouts appear!
What if my bell pepper seeds won’t sprout?
Try these fixes:
- Check moisture: Keep soil consistently damp (not soggy). Mist lightly daily or use a spray bottle.
- Test viability: Soak seeds in warm water for 24 hours—if they sink, they’re likely viable.
- Adjust warmth: Move trays to a warmer spot (e.g., near a sunny window with a heat source).
- Fresh seeds: Bell pepper seeds lose viability after 1–2 years. If older, try a new packet!
Can I start bell pepper seeds in soil or should I use seed-starting mix?
Use a sterile seed-starting mix (not garden soil!) to avoid mold and pests. The mix is lightweight, drains well, and lacks weeds/seeds. Mix in 10–20% perlite or vermiculite for extra aeration. Repot seedlings into individual pots once they have 2–3 true leaves to prevent root binding.
What’s a good alternative if I don’t have a heat mat?
No heat mat? No problem! Try these DIY hacks:
- Refrigerator heat: Place trays on top of your fridge (not inside—it’s too cold!).
- Sunny windowsill: Group trays near a south-facing window with a clear plastic wrap tent to trap heat.
- Incandescent bulb: Hang a 40–60W bulb 6 inches above seeds (turn off at night to avoid overheating).
- Oven trick: Place seed trays in a preheated oven at 70°F (21°C) for 12 hours/day (monitor closely!).
How long until bell pepper seedlings are ready to transplant?
Seedlings are ready for outdoor transplanting when they’re 6–8 inches tall, have 5–7 true leaves, and nighttime temps stay above 55°F (13°C). Harden them off for 7–10 days by gradually exposing them to outdoor conditions. Wait until all danger of frost has passed—bell peppers hate cold!
Wrapping up and next steps
Starting bell pepper seeds is a rewarding journey that unlocks a bounty of vibrant, flavorful harvests—if you embrace their heat-loving nature! With the right warmth, patience, and care, you’ll soon be enjoying homegrown peppers packed with sunshine and spice.
Now that you’re armed with the secrets to successful germination, it’s time to roll up your sleeves and get growing—your garden (and taste buds) will thank you!
🌱 Next step: Mark your calendar for transplanting day (6-8 weeks after germination) and prep your garden beds or containers. Ready to turn those tiny seeds into a summer of crisp, colorful peppers? Dive into our transplant guide to keep the momentum going!