
Companion Plants
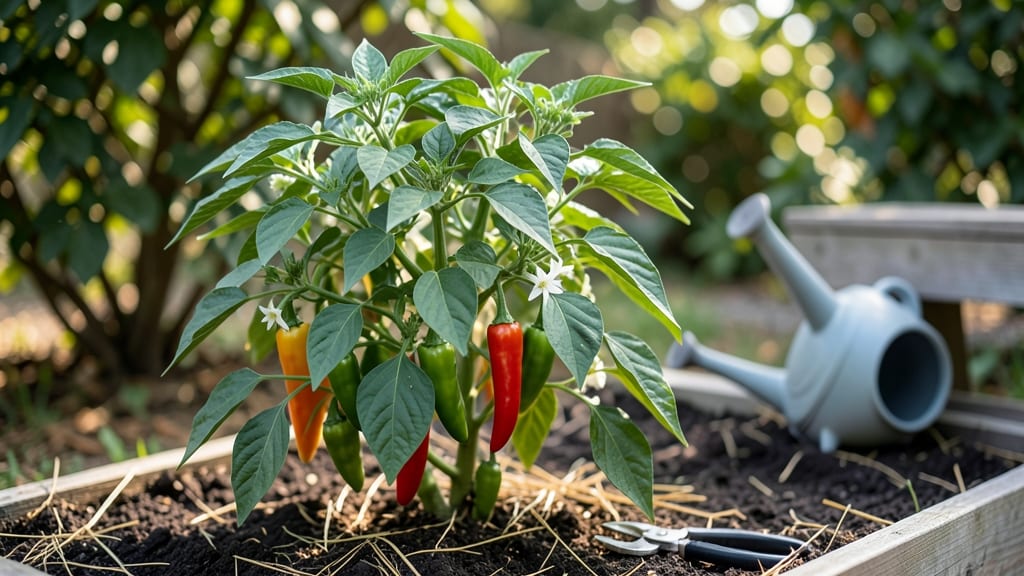
Growing hot chili pepper plants isn't just about heat—it's about transforming your garden into a fiery, fragrant wonderland. 🌶️ I've grown everything from mild jalapeños to blistering habaneros, and the secret lies in mimicking their tropical origins with just the right soil, sunlight, and care.
What starts as a tiny seed can become a bush bursting with color and flavor by midsummer, if you avoid the common pitfalls that turn plants into sad, stunted shadows.
The magic happens in well-draining soil mixed with compost, a spot that bakes under the sun for at least 6-8 hours daily, and water that keeps roots moist but never soggy. Most gardeners overwater these heat-seekers, turning their peppers into mushy disappointments.
The right balance—plus a pinch of balanced fertilizer every few weeks—turns those first flowers into plump, vibrant peppers ready for harvest in 60-90 days after transplanting.
By midseason, you'll be snipping peppers in every shade from golden yellow to deep purple, each one packing the heat you crave. The key is patience: let fruits mature fully on the plant for maximum flavor and potency.
Even if your first batch isn't perfect, the second year becomes effortless—once you understand their needs, these plants reward you with bountiful harvests that outshine anything store-bought.
Whether you're growing in pots on a balcony or rows in the ground, the principles stay the same. Start with disease-resistant varieties like 'Carolina Reaper' for thrill-seekers or 'Jalapeño M' for beginners, and watch your garden transform into a spicy paradise.
The best part? Every harvest teaches you something new about these fiery friends.
📚 In This Guide
- What you need
- Instructions
- Tips and common mistakes
- Wrapping up and next steps
What you need
- ● Hot chili pepper seeds: Choose from varieties like Habanero, Jalapeño, Cayenne, or Ghost Pepper. Buy 5–10 seeds per variety to ensure a diverse harvest.
- ● Seed-starting trays or small pots: 2–4 inch pots (biodegradable or plastic) for seedlings. You’ll need 1–2 trays or 10–20 small pots.
- ● High-quality potting mix: A well-draining, sterile mix (e.g., Miracle-Gro Moisture Control or a cactus/succulent blend). Avoid garden soil—it’s too dense!
- ● Grow lights or sunny windowsill: Seedlings need 12–16 hours of light daily. A full-spectrum LED grow light (like the Samsung LM300) works wonders if natural light is limited.
- ● Fertilizer: A balanced liquid fertilizer (e.g., 10-10-10) or an organic option like fish emulsion. Dilute to half-strength for seedlings.
- ● Spray bottle: For gentle watering to keep seeds moist without drowning them.
- ○ Plastic wrap or humidity dome: To retain moisture while seeds germinate (optional but helpful in dry climates).
- ● Trowel or small shovel: For transplanting seedlings into larger pots or garden beds.
- ● Gloves: Nitrile or rubber gloves—chili peppers can irritate skin, and some varieties (like Ghost Peppers) are extra potent!
- ● Pruning shears: To trim leggy plants and encourage bushier growth.
- ○ Support stakes or cages: (Optional) For taller varieties like Cayenne or Serrano. Use 18–24 inch stakes or tomato cages.
- ● pH testing kit: Chili peppers thrive in slightly acidic soil (pH 6.0–6.8). A simple liquid test kit ensures optimal growing conditions.
- ● Climate zone: Most chili peppers need warmth (70–90°F) and long growing seasons (90–120 days). Start indoors 8–12 weeks before the last frost if planting outdoors.
- ● Sunlight: 6–8+ hours of direct sunlight daily. If growing indoors, a south-facing window or grow lights are a must.
- ● Space: Dwarf varieties need 12–18 inches of space; larger types (like Bell Peppers) may require 24+ inches.
- ● Patience: Chilies are slow starters—germination can take 2–4 weeks! Stay consistent with care.
Step-by-step guide to growing hot chili pepper plants
Here's how to cultivate fiery, productive chili plants that thrive from seed to harvest.
🌱 Step 1: Start Seeds Indoors 8-10 Weeks Before Last Frost
Fill biodegradable seed pots with sterile seed-starting mix and plant 2-3 seeds per pot at a depth of ¼ inch. I like to use peat pots because they eliminate transplant shock when moving to the garden. Keep the soil moist but not soggy—chili seeds need consistent moisture to germinate, but they rot quickly in waterlogged conditions.
Place the pots in a warm location (around 80°F) to encourage germination. A seedling heat mat works wonders here—chili seeds often take 10-20 days to sprout, and warmth speeds up the process. Cover the pots with plastic wrap to retain humidity, but remove it once sprouts appear to prevent mold. You'll know germination is complete when tiny green stems break through the soil—this is your cue to move them to brighter light.
☀️ Step 2: Provide Bright Light and Fertilize Young Plants
Chili seedlings need 12-14 hours of light daily to prevent leggy growth. If natural light is insufficient, supplement with a grow light positioned 2-3 inches above the plants. I've seen seedlings stretch toward the window and become weak—this is a classic sign of light deprivation. Strong seedlings have compact stems and dark green leaves spaced closely together.
Once the first true leaves appear (not the initial cotyledons), fertilize with a balanced liquid fertilizer diluted to half strength. Over-fertilizing at this stage burns tender roots. Water at the soil level to avoid wetting leaves, which can cause fungal diseases. You'll notice healthy growth when new leaves emerge every 7-10 days—this means your seedlings are thriving.
🪴 Step 3: Harden Off and Transplant After All Frost Risk Passes
Two weeks before your last frost date, begin hardening off seedlings by placing them outside in a sheltered, shaded spot for 1-2 hours daily. Gradually increase exposure over 10-14 days, ending with full sun. Chilies are sensitive to cold, so never rush this process—sudden temperature drops shock the plants and stunt growth.
Transplant after the last frost when soil temperatures reach at least 65°F. Space plants 18-24 inches apart in well-draining soil amended with compost. I dig a hole twice as wide as the root ball to encourage root spread. Water deeply after planting to settle the soil and remove the biodegradable pots if used—they'll break down naturally.
✂️ Step 4: Prune and Fertilize for Maximum Heat and Yield
Once plants reach 12-18 inches tall, prune the bottom two sets of leaves to remove any that touch the soil. This improves airflow and reduces disease risk. Pinch off flower buds on the first few nodes to encourage bushier growth—this is called "topping," and it leads to more productive branches. You'll see new side shoots emerge within 7-10 days, signaling stronger plant structure.
Fertilize every 4-6 weeks with a low-nitrogen, high-phosphorus fertilizer to boost flowering and fruiting. Water at the base early in the morning to allow foliage to dry before evening, preventing fungal issues. Chilies love heat, so mulch around the base with straw or grass clippings to retain moisture and regulate soil temperature.
🌿 Step 5: Harvest and Encourage Continuous Production
Harvest peppers when they reach 75% of their mature size for the best flavor and heat. Use clean pruners to avoid damaging the plant. I like to harvest in the morning when peppers are firm and hydrated. Regular harvesting encourages the plant to produce more—if left unchecked, chilies can become overripe and lose potency.
As peppers mature, watch for overcrowding and prune any branches that block sunlight. Remove yellowing or diseased leaves immediately to keep the plant healthy. In warm climates, chilies continue producing until frost. In cooler zones, bring potted plants indoors before the first frost and place them near a south-facing window or under grow lights to extend the season.
Tips & tricks for growing fiery chili plants
A few key strategies will help you grow hot chilies that pack serious heat and vibrant flavor from seed to harvest.
Germination Conditions: Chili seeds need that 80°F warmth to germinate reliably, but consistency matters more than exact temperature. I've found that placing pots on top of refrigerators (with a towel barrier) or using seedling heat mats creates stable conditions. The 10-20 day germination window is wide because some varieties sprout faster than others—don't give up if nothing appears after 10 days.
Light Management: Those 12-14 hours of light daily are non-negotiable for preventing leggy seedlings. I've seen chili plants stretch toward windows and become weak when natural light is insufficient. Position seedlings within 2-3 inches of grow lights to avoid this common mistake—closer is better than farther. Rotate pots daily for even growth.
Transplant Timing: The 65°F soil temperature minimum for transplanting is critical—chilies won't thrive in cooler soils. I've learned to check soil temps with a thermometer rather than relying on air temperature. When transplanting, remove biodegradable pots if they're intact to prevent root circling, but leave them if they've broken down naturally.
Pruning Strategy: The 7-10 day window for new side shoots after topping is your opportunity to shape productive plants. I recommend pinching off only the first few flower buds—this encourages bushier growth that leads to more peppers. Watch for new growth at leaf nodes before removing more buds to maintain balance between structure and production.
Pro Tips for Hot Chili Pepper Plants
- A few key strategies will help you grow hot chilies that pack serious heat and vibrant flavor from seed to harvest.
- Germination Conditions: Chili seeds need that 80°F warmth to germinate reliably, but consistency matters more than ex...
- Light Management: Those 12-14 hours of light daily are non-negotiable for preventing leggy seedlings. I've seen chili...
Frequently asked questions
Got questions about growing your own hot chili pepper plants?
Here are some of the most common queries—plus quick answers to help you cultivate bold, fiery peppers like a pro!
How long does it take for hot chili pepper plants to produce fruit?
Most hot chili peppers take 60–90 days from transplanting to harvest, depending on the variety. Early bloomers like Thai Bird’s Eye may fruit in as little as 70 days, while heirlooms like Carolina Reaper can take up to 120 days. Patience pays off—hotter peppers often need more time to mature!
Can I grow hot chili peppers indoors? What’s the best setup?
Chili peppers thrive indoors with 6–8 hours of sunlight daily (use grow lights if natural light is limited). A south-facing window or LED grow bulbs work well. Keep temps between 70–85°F and use pots with drainage holes. Just avoid drafts—they hate sudden temperature swings!
What pests or diseases should I watch for, and how do I prevent them?
Common culprits include aphids, spider mites, and fungal issues like powdery mildew. Prevent pests with neem oil or insecticidal soap. Boost airflow to deter mildew, and rotate crops yearly to avoid soil-borne diseases. Prune yellowing leaves promptly to keep plants healthy.
Are there any companion plants that help (or hurt) hot chili peppers?
Great companions include basil, marigolds, and onions (they repel pests). Avoid planting near fennel or brassicas (like broccoli), which can stunt growth. Interplanting with herbs also improves flavor and deters bugs naturally—win-win!
Can I save seeds from my hot chili peppers for next year?
Yes! Let peppers fully ripen, then scoop out seeds (including the placenta for maximum heat). Dry seeds on a paper towel for 3–5 days in a warm, dark place. Store in a sealed container in the fridge for up to 2 years. Pro tip: Label varieties—they can vary wildly!
Wrapping up and next steps
Growing hot chili pepper plants is a rewarding journey that brings bold flavors and vibrant beauty to your garden—no matter your climate! Whether you're a seasoned gardener or a curious beginner, these fiery companions thrive with the right care, patience, and a dash of creativity. 🌶️✨
Now that you’re armed with the knowledge to nurture your plants, why not take the next step? Start small with a single variety, experiment with companion planting, or even share your harvest with fellow spice lovers. Your garden—and your taste buds—will thank you!