
Tools
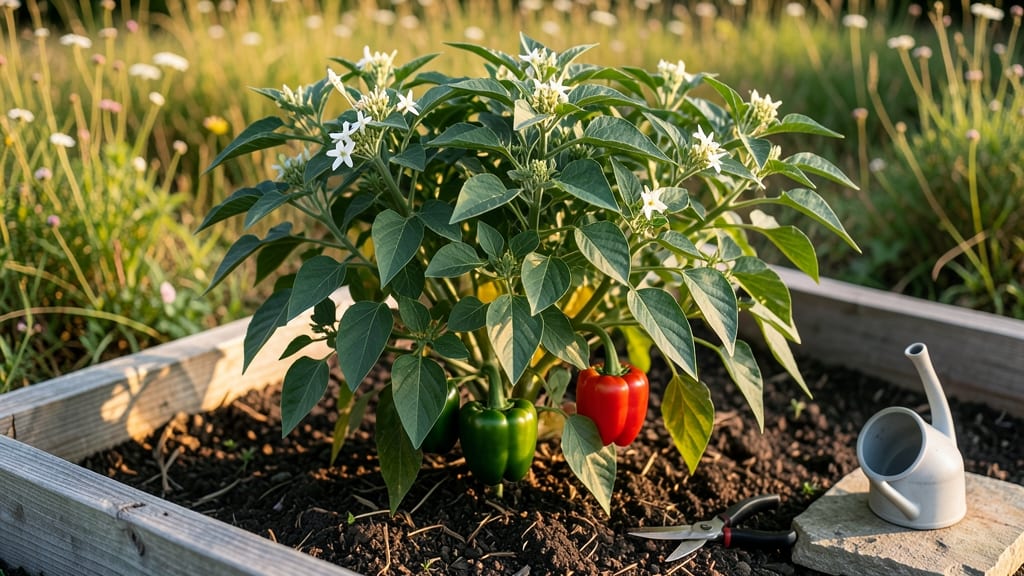
Your small yard can grow a green pepper garden that yields more than you'd expect—without sacrificing your lawn or patio. 🌱 I transformed a 4x4-foot corner into a thriving pepper paradise using vertical space, and my neighbors now ask where I hide my "secret garden."
The key is choosing compact varieties like 'Aristotle' or 'Lunchbox' peppers, which stay small but pack flavor. Pair them with trellised cucumbers or bush beans to maximize vertical real estate, and let the peppers climb sturdy cages or a DIY wooden trellis.
This setup gives you 10+ plants in the space of one traditional garden bed. By mid-summer, you'll have glossy green peppers hanging like ornaments, ready to harvest when they reach your preferred size. The vertical design also keeps plants off the ground, reducing rot and making pests easier to spot.
Plus, the cascading foliage adds a lush, tropical vibe to any small yard. Works for balconies, rooftops, or tight urban plots—just adjust the trellis height to your space. Ready to reclaim that unused corner?
📚 In This Guide
- What you need
- Instructions
- Tips and common mistakes
- Wrapping up and next steps
What you need
- ● Vertical Garden Planter: A wall-mounted or freestanding planter (e.g., fabric pockets, modular shelves, or a DIY wooden frame) with 5-10 pockets or compartments (each ~6–8 inches deep).
- ● High-Quality Potting Mix: 10–15 gallons of well-draining, organic potting soil (avoid garden soil—it compacts!).
- ● Green Pepper Seeds or Seedlings: Seeds: 5–10 seeds (choose fast-maturing varieties like Early Cal Wonder or Jupiter for small spaces).
- ● Seedlings: 3–5 healthy 4–6 inch transplants (check local nurseries for compact varieties).
- ● Fertilizer: A balanced, slow-release fertilizer (e.g., 10-10-10 or organic options like fish emulsion).
- ● Watering System: Drip irrigation kit or
- ● A watering can with a spray nozzle (for gentle hydration).
- ● Support Stakes or Trellis: 3–5 bamboo stakes or small cages (6–12 inches tall) to support pepper plants as they grow.
- ● Gloves (gardening or nitrile) to protect your hands.
- ● Hand Trowel (for transplanting and soil adjustments).
- ● Pruning Shears (to trim dead leaves or encourage bushier growth).
- ● Mulch (straw or shredded leaves) to retain moisture.
- ● Shade Cloth (lightweight, 30–50% coverage) for hot climates.
- ○ Grow Lights (optional for indoor/low-light setups).
- ● pH Test Kit (to ensure soil pH is 6.0–6.8, ideal for peppers).
Step-by-step instructions for building a vertical green pepper garden
Here's how to create a productive pepper patch even when space is tight—no digging required.
🪴 Step 1: Build or Select Your Vertical Growing Structure
For small yards, I recommend either a 4-foot tall wooden trellis frame (constructed from 2x4s) or a stackable fabric pocket planter system (like those made for strawberries). The trellis option gives you full control over plant placement, while fabric pockets are easier to assemble and provide excellent drainage. Either way, ensure the structure can support at least 15 pounds per plant—pepper plants get heavy with fruit.
If using a trellis, attach coconut coir slabs (the ones used for erosion control) vertically to the frame. These slabs hold moisture while allowing roots to breathe. Cut slabs to 2 feet wide by 4 feet tall—each slab will hold one pepper plant. Space slabs 6 inches apart horizontally for airflow. For fabric pockets, simply stack them vertically in a sunny corner, securing the bottom pockets to prevent tipping.
🌱 Step 2: Prepare Growing Medium and Plant Seedlings
Fill your vertical structure with high-quality potting mix (never garden soil—it compacts too much in containers). I mix equal parts potting mix and coconut coir for better moisture retention and root aeration. For the 4 pepper plants we're growing, you'll need about 3 cubic feet of this blend—roughly 1 cubic foot per plant. Wet the mix until it feels like a damp sponge; it should hold together when squeezed but not drip water.
Plant 4-6 week old pepper seedlings (not seeds—peppers take too long to germinate for vertical growing). Dig a hole in each pocket or slab twice as wide as the root ball but no deeper. Gently remove the seedling from its container, loosen the roots if they're circling, and place it in the hole. The top of the root ball should sit ½ inch below the surface—this prevents stem rot while allowing roots to spread. Fill around the roots with your mix and press lightly to eliminate air pockets.
☀️ Step 3: Position for Maximum Sunlight and Watering
Pepper plants demand full sun (6-8 hours daily)—no compromises here. If your yard gets afternoon shade, position the structure where it catches morning sun instead. I've seen peppers thrive in south-facing spots even in partial shade, but fruit production drops dramatically. You'll notice this when plants flower but set few peppers—move them to sunnier conditions immediately.
Water deeply every 2-3 days until the top 2 inches of growing medium feel dry. The key is consistency: peppers hate soggy roots but also can't tolerate drying out. Use a soaker hose or watering wand to deliver moisture directly to the base—this prevents fungal issues from overhead watering. After watering, check the weight of your structure; if it feels light, you need more frequent watering. If it's heavy, cut back to every 4 days.
🌿 Step 4: Support Growth and Prune for Productivity
As your peppers grow, they'll need physical support to keep stems upright. Install soft plant ties (not wire) every 12 inches up the stem, securing them to the trellis or pocket edges. This prevents stems from snapping under fruit weight. You'll also want to prune suckers—those little shoots that grow in the leaf axils. Pinch these off when they're 1-2 inches long to redirect energy to fruit production.
When peppers reach 18 inches tall, trim the top set of leaves to encourage bushier growth. This is where I see beginners make mistakes—over-pruning can stress plants. Just remove the top 2-3 leaves and any yellowing ones. Healthy plants will bounce back within a week with new growth. Watch for first flowers (white or purple blooms) around 6-8 weeks after planting. These will develop into peppers in 60-70 days—mark your calendar!
✂️ Step 5: Harvest and Maintain Through the Season
Peppers are ready to pick when they're firm, glossy, and full-sized (typically 3-4 inches long for standard varieties). Use clean pruners to snip stems at the base—this encourages more flowers to form. I harvest every 3-4 days during peak production to prevent overcrowding. Store freshly picked peppers in the fridge for up to 2 weeks, or preserve them by freezing, drying, or canning.
Through the season, side-dress with compost every 4-6 weeks to replenish nutrients. Scratch a handful into the top 2 inches of growing medium around each plant. This keeps peppers producing well into fall. As temperatures drop below 50°F at night, bring pots indoors or cover them with frost cloth—peppers are tender annuals and won't survive frost. With proper care, your vertical garden can keep producing until first frost, often yielding 20-30 peppers per plant in a small space.
Tips & tricks for perfect vertical pepper gardens
These simple tricks will help you maximize your small-space harvest without the common pitfalls.
Structure Stability: Don't cut corners on support—pepper plants get surprisingly heavy! I've seen trellises collapse under fruit weight, so use 15-pound rated hardware when assembling your frame. For fabric pockets, secure the bottom row with landscape staples into a sturdy base or heavy board to prevent tipping. This is especially important in windy conditions where plants can sway dramatically.
Sunlight Strategy: The 6-8 hours of daily sun requirement is non-negotiable for fruit production. If your space gets afternoon shade, position your structure to catch morning sun instead—peppers need that intense light early in the day. I've noticed that even 1 hour less sun per day can reduce pepper production by 30%, so don't skimp on placement. Consider using a sun calculator to map your yard's light patterns before building.
Watering Wisdom: The 2-3 day watering schedule works best when you check moisture by weight, not just appearance. Lift your structure after watering—if it feels light, water again in 2 days. If it's heavy, wait 4 days. I've learned this the hard way after watching peppers blister from inconsistent moisture. For even distribution, water in the early morning so leaves dry quickly, preventing fungal diseases.
Pruning Precision: When trimming those top 2-3 leaves at 18 inches, focus on removing only the largest leaves to encourage bushiness. Leave some foliage to provide shade for developing peppers—this prevents sunburn. I've found that plants pruned too aggressively take 2 weeks to recover, missing their peak production window. Always use clean pruners to prevent spreading disease between plants.
Pro Tips for Green Pepper Garden
- These simple tricks will help you maximize your small-space harvest without the common pitfalls.
- Structure Stability: Don't cut corners on support—pepper plants get surprisingly heavy! I've seen trellises collapse ...
- Sunlight Strategy: The 6-8 hours of daily sun requirement is non-negotiable for fruit production. If your space gets ...
Frequently asked questions
Got questions about growing green peppers in a vertical garden? You're not alone! Here are some of the most common queries—and their answers—to help you get started with confidence.
How much sunlight do green peppers need in a vertical garden?
Green peppers thrive with at least 6–8 hours of direct sunlight daily. If your vertical setup is in partial shade, opt for shorter varieties like 'Snackable' or 'Lunchbox,' which tolerate slightly less sun. South-facing walls or balconies are ideal for maximizing light exposure.
When is the best time to plant green peppers in a vertical garden?
Start seeds indoors 8–10 weeks before your last frost date or transplant seedlings after soil temps reach 55°F+. In warm climates (zones 9–11), direct-sow in late spring. Vertical gardens warm up faster, so you may plant 1–2 weeks earlier than ground-level beds.
Can I grow green peppers vertically in containers or pockets?
Use fabric pockets, hanging planters, or stacked containers with drainage holes. Ensure each pepper has 1–2 gallons of space (1 plant per pocket/container). Dwarf varieties like 'Mini Bell' or 'Jalapeño M' are perfect for tight spaces. Just avoid overcrowding—peppers need airflow!
What pests should I watch for in a vertical green pepper garden?
Common culprits include aphids, spider mites, and hornworms. Inspect leaves regularly and spray with neem oil or insecticidal soap for mild infestations. Row covers can deter flying pests, while introducing ladybugs or praying mantises offers natural pest control.
Why aren’t my green peppers ripening in the vertical garden?
Peppers need consistent warmth (70–85°F) and sunlight to ripen. If temps drop below 60°F or shade limits light, they’ll stay green. Try heat-loving varieties like 'Carmen' or 'Aristotle', use black plastic mulch to retain heat, or move containers to sunnier spots. Overcrowding can also stunt ripening—prune for better airflow!
Wrapping up and next steps
Growing a green pepper garden in a vertical space-saver is not only practical but also incredibly rewarding! Whether you're working with a tiny balcony, patio, or limited yard space, this method maximizes your harvest while keeping your garden organized and efficient.
With the right setup, you’ll enjoy fresh, homegrown peppers year after year—and who doesn’t love the satisfaction of a thriving garden?
Ready to take the next step? Start small—plant a few seeds or seedlings in your vertical planter and watch your green pepper garden flourish! Happy gardening! 🌱