Shrubs
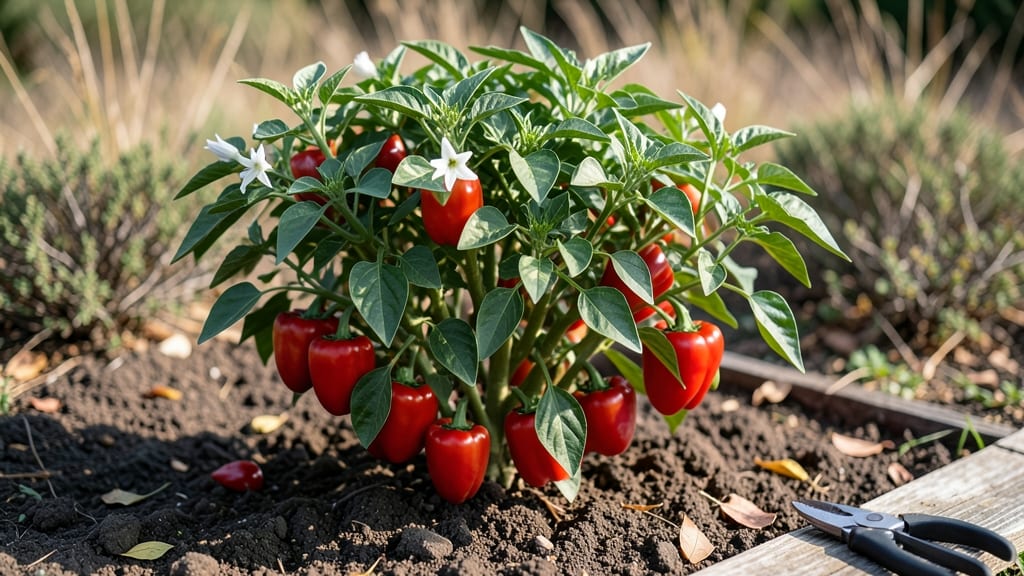
Growing red bell peppers that actually turn vibrant red is easier than you think—especially when you start with the right variety and container setup. 🌱 I’ve grown enough peppers to know the difference between a sad, pale fruit and the deep, glossy red ones that make summer salads shine.
The secret? Warm soil, consistent sunlight, and patience (those red peppers need time to ripen!).
You’ll need a 5-gallon container minimum for each plant, well-draining potting mix, and a spot that gets at least 6-8 hours of direct sun daily. Red bell peppers are heavy feeders, so I add compost at planting and fertilize every 3-4 weeks with a balanced organic feed.
Pruning suckers (those little side shoots) keeps energy focused on fruit production, not leafy growth.
By mid-summer, you’ll see the first green peppers forming—and if you keep them watered consistently (but not soggy) and fertilized, they’ll slowly deepen to that showstopping red by late summer or fall.
The payoff? Homegrown peppers that outshine store-bought in flavor and color, plus the satisfaction of growing something that starts as a tiny seed.
Works for balconies, patios, or even sunny windowsills with grow lights. Whether you’re in a short-season climate or a warm-weather zone, these tips ensure your peppers ripen red—no matter where you grow. Let’s get those seeds started!
📚 In This Guide
- What you need
- Instructions
- Tips and common mistakes
- Wrapping up and next steps
What you need
- ● Red Bell Pepper Seeds or Seedlings: Choose disease-resistant varieties like ‘Lunchbox’, ‘Carmen’, or ‘King of the North’ (6-8 seeds or 3-4 seedlings).
- ○ Optional: Start seeds indoors 8-10 weeks before last frost for a head start!
- ● Containers (if growing in pots): 5-gallon containers or larger (minimum 12" deep and wide).
- ○ Optional: Self-watering pots or fabric grow bags for better drainage.
- ● Potting Mix: High-quality, well-draining organic potting mix (avoid garden soil—it compacts!).
- ○ Optional: Add 20% perlite or vermiculite for extra aeration.
- ● Fertilizer: Balanced organic fertilizer (10-10-10 or 5-5-5) or compost.
- ○ Optional: Slow-release granules or liquid seaweed extract for a nutrient boost.
- ● Tools: Trowel or small shovel for transplanting.
- ● Garden gloves (to protect your hands!).
- ● Watering can or hose with a gentle spray nozzle.
- ○ Optional: Mulch (straw or shredded leaves) to retain moisture.
- ● Sunlight: Full sun (6-8+ hours daily). Containers can be moved for optimal light!
- ● Temperature: Warm soil (70°F/21°C+) and air (above 55°F/13°C). Use row covers if needed.
- ● Water: Consistent moisture (1-1.5 inches per week). Drought = stress = fewer peppers!
- ○ Support (Optional): Small stakes or cages if plants grow tall (red bell peppers can reach 2-3 feet!).
Step-by-step instructions for growing red bell peppers in containers
Here's how to grow bold, sweet red peppers in pots—no garden required!
🌱 Step 1: Start Seeds Indoors Early
Begin seeds indoors 8-10 weeks before your last frost date. Fill a seed tray with sterile seed-starting mix and plant seeds ¼ inch deep, spacing them 1 inch apart. Keep the soil consistently moist but not soggy—red pepper seeds need warmth to germinate, so place the tray on a seedling heat mat set to 75-85°F. You'll see sprouts in 7-14 days, depending on your home's humidity.
Once seedlings emerge, move them to a sunny windowsill or under grow lights for 14-16 hours of light daily. Watch for the first set of true leaves (not the initial seed leaves) to appear—this signals it's time to fertilize lightly with a diluted, balanced fertilizer. Thin seedlings to the strongest one per cell, gently snipping weaker stems at the base with clean scissors.
☀️ Step 2: Transplant to Larger Containers
When seedlings have 4-6 true leaves and are 6-8 inches tall, move them to 5-gallon containers filled with well-draining potting mix. Red peppers need room to grow, so choose pots with at least 12 inches of depth. Make a small hole in the center of the container, place the seedling in, and fill around the roots with soil, pressing gently to eliminate air pockets. Water thoroughly until water runs out the drainage holes.
Place containers in a spot that gets full sun (6-8 hours daily). If you're still dealing with cooler weather, protect young plants with a lightweight row cover or cold frame. You'll know they're adjusting well when new leaves appear and the stems firm up. Avoid transplant shock by keeping the soil evenly moist during this transition—let the top inch dry out between waterings.
💧 Step 3: Support and Fertilize for Fruit Production
As plants grow, install a sturdy cage or trellis to support their weight. Red bell peppers can get heavy with fruit, and a support system prevents stems from breaking. Pinch off any flower buds that appear in the first 2-3 weeks after transplanting—this lets the plant focus on leaf and stem growth first. Once the plant is established, fertilize every 2-3 weeks with a balanced, water-soluble fertilizer to encourage flowering and fruiting.
Water at the base of the plant in the morning to avoid wetting leaves, which can lead to fungal diseases. Red peppers are sensitive to inconsistent moisture—keep the soil evenly damp but not waterlogged. You'll see the first flowers appear in 6-8 weeks after transplanting, and small peppers will form shortly after. Here's the fun part: watch as those green peppers gradually turn red over 60-90 days!
✂️ Step 4: Prune and Harvest for Continued Production
Regular pruning keeps your red pepper plant productive. Remove any suckers (those small shoots that grow in the crotch between the main stem and branches) to direct the plant's energy toward fruit production. Prune any yellow or diseased leaves immediately to keep the plant healthy. When peppers reach 3-4 inches long and are fully red, it's time to harvest—this encourages the plant to produce more fruit.
Use clean pruning shears or scissors to cut the stem just above the fruit. Harvest in the morning when peppers are firm and crisp. Store harvested peppers in the refrigerator for up to 2 weeks to maintain their flavor and texture. If you notice peppers turning red but staying small, your plant may need more sunlight—move it to a sunnier spot or supplement with a grow light for 12-14 hours daily.
Tips & tricks for growing red bell peppers in containers
Here's what nobody tells you about growing these vibrant peppers successfully in pots.
Seedling Heat Secret: Those 75-85°F heat mat temperatures are non-negotiable for red pepper seeds. I learned this the hard way after waiting weeks for germination at room temperature. If you don't have a heat mat, place the seed tray on top of your refrigerator—it stays consistently warm. The key is maintaining that warmth until sprouts appear, which typically happens within 7-14 days. Once you see those first true leaves, you can gradually reduce the heat to room temperature.
Lighting Upgrade: The 14-16 hours of light requirement is where most container growers fail. South-facing windows might give you 6-8 hours of direct sun, but you'll need supplemental lighting for the remaining time. LED grow lights are my go-to—they're energy-efficient and provide the full spectrum red peppers need. Position lights just 6 inches above the seedlings and adjust as they grow. Remember, peppers need more light than most vegetables to produce those signature red fruits.
Container Size Matters: Don't skimp on pot size! While the instructions mention 5-gallon containers, I recommend going up to 7 gallons if possible. Red peppers develop extensive root systems, and larger containers prevent root binding that stunts growth. Make sure your pots have drainage holes—peppers hate soggy feet. If you're using decorative containers without drainage, create a false bottom with gravel or broken pottery to prevent waterlogging.
Fertilizer Timing: The 2-3 week fertilization schedule is perfect, but here's the trick: switch to a higher-phosphorus fertilizer when you see flower buds forming. Look for a ratio like 5-10-10 or 10-20-10 to encourage blooming and fruiting. I also recommend using a liquid fertilizer rather than granules—it's easier to control the dosage and ensures your container plants get consistent nutrition. Always water thoroughly before fertilizing to prevent root burn.
Pro Tips for Bell Pepper Red
- Here's what nobody tells you about growing these vibrant peppers successfully in pots.
- Seedling Heat Secret: Those 75-85°F heat mat temperatures are non-negotiable for red pepper seeds.
- Lighting Upgrade: The 14-16 hours of light requirement is where most container growers fail.
Frequently asked questions
Got questions about growing red bell peppers?
You’re not alone! Here are answers to the most common queries to help you cultivate a thriving harvest—even in containers.
How long does it take for red bell peppers to mature and turn red?
Red bell peppers need 60–90 days from transplanting to turn red, depending on the variety and growing conditions. Start with seedlings indoors 8–10 weeks before your last frost, then transplant outdoors after soil warms to 60°F+. Patience pays off—ripe red peppers pack the most flavor and nutrients!
Why aren’t my bell peppers turning red?
Peppers may stay green or yellow if they’re harvested too early, lack sunlight (6–8 hours daily), or face cool temperatures (<50°F). Ensure consistent warmth, full sun, and proper fertilization (high in phosphorus). If peppers stop ripening, check for pests or nutrient deficiencies (like nitrogen overload).
Can I grow red bell peppers in containers, and what size pot do I need?
Use a 5-gallon pot or larger (at least 12–18 inches deep) with drainage holes. Choose compact varieties like ‘Cherry Belle’ or ‘Lunchbox.’ Ensure pots get morning sun and use lightweight potting mix. Prune lower leaves to prevent rot and fertilize weekly with a balanced 10-10-10 mix.
What’s the best temperature range for growing red bell peppers?
Peppers thrive in 70–90°F daytime temps and 60°F+ at night. Avoid planting until soil is warm (test with a thermometer). If nights dip below 55°F, use row covers or grow peppers in containers near your home for warmth. Heatwaves? Mulch to retain moisture and provide afternoon shade if needed.
Can I substitute red bell peppers with other varieties if they don’t ripen?
Yes! Swap unripe peppers for yellow or orange bell peppers (same nutrients, milder taste) or jalapeños/poblano peppers for heat. For sweetness, try tomatoes or zucchini—though texture and flavor differ. If you’re short on peppers, roast or grill them to concentrate sweetness.
Pro Tip:
Want bigger, redder peppers? Hand-pollinate flowers with a paintbrush on cloudy days (peppers rely on bees but can self-pollinate). Remove side shoots to focus energy on fruit production.
Wrapping up and next steps
Growing red bell peppers in containers is a rewarding journey that brings vibrant color, bold flavor, and a bountiful harvest right to your doorstep! 🌱 With the right mix of sunlight, soil, and care, you’ll enjoy fresh, homegrown peppers that outshine store-bought varieties.
Whether you’re a beginner or a seasoned gardener, the key is patience and consistency—watch those peppers turn from green to stunning red as they ripen.
Now that you’re armed with all the tips and tricks, roll up your sleeves and get planting! Start with a single container or expand your garden—either way, you’re on your way to a delicious, homegrown harvest. Happy gardening! 🌿