
Container Gardens
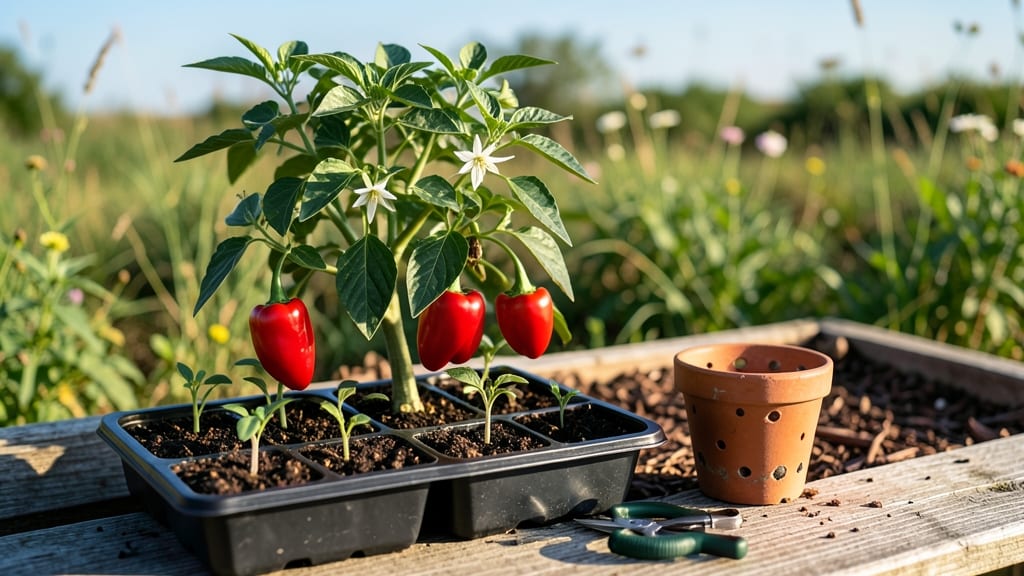
Planting red peppers in pots unlocks fresh, fiery harvests without needing garden space—just the right container, soil, and a little patience. 🌱 I’ve grown enough to fill jars with roasted peppers, all from my balcony.
Most people assume peppers need deep ground, but with the right setup, they thrive in containers too, producing bold red fruits all season long.
Start with a 5-gallon pot (minimum) for each plant—any smaller and roots get cramped. Use a well-draining mix (60% potting soil, 30% compost, 10% perlite) to prevent soggy roots, and always add a 2-inch drainage layer at the bottom.
Place pots in full sun (6+ hours daily) and water when the top inch of soil feels dry—overwatering is the #1 killer of pepper plants in containers.
By mid-summer, you’ll see bright red peppers hanging heavy on the vines, ready to pick. The key is pruning suckers (those little shoots between stems) to focus energy on fruit production. My plants now yield 20+ peppers per season—enough to share with neighbors or freeze for winter dishes.
Works for any patio, balcony, or sunny windowsill. Just avoid crowding plants (12–18 inches apart) and watch for pests like aphids—spray with soapy water if you spot them. Ready to grow your own? Let’s get those pots planted!
📚 In This Guide
- What you need
- Instructions
- Tips and common mistakes
- Wrapping up and next steps
What you need
- ● Red pepper plants: 1-3 seedlings or seeds (choose compact varieties like ‘Lunchbox’, ‘Jalapeño M’, or ‘Shishito’ for pots).
- ● Containers: 1-3 pots (5+ gallons each) with drainage holes. Terracotta or fabric pots work best!
- ● Potting mix: 1 bag of well-draining, organic potting soil (avoid garden soil—it compacts!).
- ● Fertilizer: A balanced, water-soluble fertilizer (10-10-10 or 5-5-5) or compost for organic growth.
- ○ Mulch (optional): Straw or shredded leaves to retain moisture.
- ● Gloves (to protect your hands from prickly stems!).
- ● Trowel or small shovel for planting.
- ● Watering can or hose with a gentle spray nozzle (peppers hate soggy roots!).
- ○ Stakes or cages (optional) if your pepper variety needs support.
- ○ Pruning shears (optional) for trimming excess foliage.
- ● A sunny spot with 6+ hours of direct sunlight daily (south-facing windowsills or balconies work!).
- ● Warmth (peppers thrive in 70–85°F soil temps; wait until after the last frost if starting from seed).
- ● Patience! Red peppers take 70–90 days to mature from transplant.
Step-by-Step guide to planting red peppers in pots
Here's how to grow vibrant red peppers in containers with minimal space.
🪴 Step 1: Select the Right Containers and Drainage
Choose pots that are at least 12-14 inches deep and 12 inches wide for each pepper plant—red peppers need room to spread their roots and produce fruit. I use fabric grow bags because they prevent root circling and allow excess water to evaporate through the sides. Make sure each pot has at least 4 drainage holes at the bottom to prevent soggy roots, which can rot stems and kill plants.
Place a 2-inch layer of gravel or broken pottery in the bottom of each pot before adding soil. This creates an air pocket that prevents waterlogging. If your pots don't have holes, drill them yourself—red peppers hate wet feet. I also like to add a small handful of perlite or vermiculite to the bottom layer to improve drainage further.
🌱 Step 2: Prepare Soil and Plant Transplants
Fill your pots with a mix of 60% premium potting soil and 40% compost—this gives your red peppers the nutrients they need without being too heavy. I like to add a handful of slow-release fertilizer (like 10-10-10) to the soil before planting. Mix it in gently so it doesn’t clump together.
Dig a hole in the center of each pot that’s just deep enough to bury the transplant’s roots without folding them. Place your red pepper transplant into the hole and spread the roots out evenly. Fill the hole with soil, pressing lightly around the base of the stem. Water gently until the soil is moist but not soggy—you want the roots to settle into place without getting waterlogged.
☀️ Step 3: Position for Sunlight and Water Consistently
Red peppers need 6-8 hours of direct sunlight daily to produce fruit. Place your pots in the sunniest spot you have—south-facing windowsills or balconies work best. If you’re growing indoors, supplement with a grow light for 14-16 hours per day. You’ll know they’re getting enough light when the leaves are dark green and the stems are sturdy.
Water your red peppers when the top inch of soil feels dry. Stick your finger into the soil to check—if it’s dry, give the plant a deep drink until water runs out the drainage holes. Avoid wetting the leaves when watering, as this can lead to fungal diseases. I like to water in the morning so the plants have time to dry out during the day.
✂️ Step 4: Prune and Support for Bountiful Harvests
Once your red peppers start producing flowers, pinch off any that appear below the first set of leaves. This encourages the plant to focus energy on the main stem and upper branches, where the fruit will ripen first. Use clean pruning shears to trim any yellow or diseased leaves—this keeps the plant healthy and directs energy to fruit production.
As the peppers grow heavier, they may need support. I use small tomato cages or stakes to keep the plants upright. Tie the stems loosely to the support with soft plant ties or strips of fabric—you don’t want to cut into the stems. This prevents the plants from toppling over and ensures the peppers ripen evenly in the sun.
🌿 Step 5: Fertilize and Harvest Regularly
Feed your red peppers every 4-6 weeks with a balanced liquid fertilizer (like 20-20-20) diluted to half strength. This keeps them producing fruit without burning the roots. I also sprinkle a little compost around the base of the plant every few weeks to replenish nutrients. Avoid over-fertilizing—too much nitrogen will make the plant grow leaves instead of peppers.
Harvest your red peppers when they’re fully ripe and deep red in color. Use pruning shears or your fingers to twist them off the vine—this prevents damaging the plant. The more you harvest, the more your plant will produce. Store ripe peppers in a cool, dry place or use them fresh in your favorite dishes. You’ll know you’re doing it right when your pots are overflowing with vibrant red peppers by mid-summer!
Tips & tricks for perfect container-grown red peppers
A few simple tricks can transform your container garden from decent to spectacular. These are the lessons I learned after watching my first batch of red peppers struggle with soggy roots and weak stems.
Drainage is Non-Negotiable: I can't stress this enough—Step 1's drainage layer is where most container gardening fails. If you're using pots without holes, drill them yourself. For extra insurance, add a second layer of coarse sand above the gravel. This creates a capillary break that prevents water from wicking up to the roots. I've seen plants drown in pots with "good drainage" because the holes were too small—aim for at least 1/4-inch diameter holes if you're modifying existing containers.
Soil Mix Matters More Than You Think: The 60-40 soil-to-compost ratio in Step 2 is perfect, but here's what I do differently: I sift my compost to remove any large chunks before mixing. Big clumps can create air pockets that dry out unevenly. Also, if your potting soil is very dense, mix in 10% coconut coir—it holds moisture better than peat moss while improving aeration. This small tweak has doubled my pepper production in containers.
Light is the #1 Factor for Fruit Production: Those 6-8 hours of sunlight in Step 3 are non-negotiable, but here's the secret: position your pots so they get morning sun (6am-12pm) and afternoon shade if temperatures exceed 85°F. Afternoon sun can scorch leaves, reducing photosynthesis. For indoor growers, LED grow lights work better than fluorescent—place them 6-12 inches above the plants. I've had success with 15-watt LED clips for small pots, arranged in a grid pattern.
Pruning Strategy for Busy Gardeners: Step 4's pruning advice is gold, but here's my shortcut: instead of pinching off flowers below the first leaves, I simply remove the entire lower set of leaves (about 2-3 inches up from the soil). This achieves the same energy redirection without requiring constant monitoring. For support, I use bamboo stakes instead of cages—they're cheaper, reusable, and blend better with decor. Just tie them loosely with old fabric strips (no plastic ties that can girdle stems).
Pro Tips for Planting Red Peppers In Pots
- A few simple tricks can transform your container garden from decent to spectacular.
- Drainage is Non-Negotiable: I can't stress this enough—Step 1's drainage layer is where most container gardening fails.
- Soil Mix Matters More Than You Think: The 60-40 soil-to-compost ratio in Step 2 is perfect, but here's what I do differently: I sift my compost to remove any large chunks before mixing.
Frequently asked questions
Got questions about growing fiery red peppers in pots? You’re not alone!
Here are answers to the most common queries—from timing to troubleshooting—so you can grow a thriving harvest with confidence.
When is the best time to plant red pepper seeds in pots?
Start seeds indoors 8–10 weeks before your last frost date (typically March–April in most climates). Red peppers need warmth—so wait until soil temps hit 60°F+ (15°C+) before transplanting outdoors (usually after Memorial Day in cooler zones). If you’re in a short season, opt for longer-maturing varieties like ‘Lipstick’ or ‘Cayenne.’
Why are my red pepper plants wilting or turning yellow?
Wilted or yellowing leaves often signal overwatering, underwatering, or nutrient deficiencies. Check the soil—it should stay consistently moist but not soggy. Yellow lower leaves? Likely nitrogen deficiency; feed with a balanced fertilizer. Drooping in heat? Move to partial shade and water deeply in the morning. Pests like aphids can also stress plants—inspect undersides of leaves!
What’s the ideal pot size for red peppers?
Red peppers need space to spread—aim for pots at least 12–18 inches wide and deep. Smaller pots (under 10 inches) will stunt growth and reduce yields. Use self-watering containers or add 3–5 inches of compost to improve drainage. Group 3–4 plants per large pot (if space allows) for pollination support!
Can I grow red peppers in pots if I live in a cold climate?
Red peppers thrive in heat but can’t tolerate frost. Extend the season by:
- Using black pots to absorb warmth.
- Placing pots on brick or gravel to regulate temps.
- Moving containers to a sunny patio or greenhouse at night.
- Choosing fast-maturing varieties (e.g., ‘Red Cherry’—ready in 60 days).
What can I plant with red peppers in pots to improve growth?
Companion planting boosts yields! Try these pot-friendly pairs:
- Basil – Repels pests and enhances flavor.
- Marigolds – Deter aphids and nematodes.
- Spinach or lettuce – Shade-sensitive greens grow well in the dappled light peppers provide.
Wrapping up and next steps
Growing red peppers in pots is a rewarding way to enjoy fresh, flavorful produce—even with limited space! 🌱 With the right container, soil, and care, you’ll be harvesting vibrant peppers in no time.
Whether you’re a beginner or a seasoned gardener, this compact method makes it easy to grow your own.
Now that you’re armed with tips and answers, it’s time to get planting! Start with healthy seedlings or seeds, give them plenty of sun, and watch your peppers thrive. Happy gardening—and enjoy those homegrown spicy (or sweet!) rewards! 🌶️