
Planting
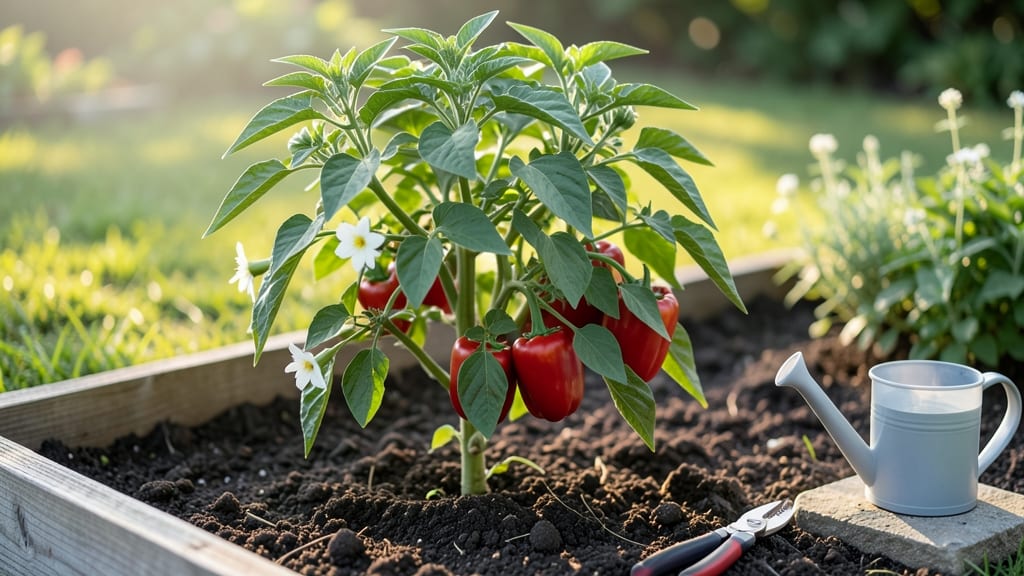
Growing a big red pepper plant like 'Big Red' bell peppers or 'Red Jalapeño' means bigger harvests and sweeter flavors—but only if you nail the heat zone and growing conditions. 🌶️ I’ve learned that these varieties demand warmth, consistent moisture, and just the right soil mix to thrive, and skipping any step means smaller peppers or bitter flavors.
The good news? With the right approach, you can enjoy fresh peppers from summer through fall (and even winter in warmer climates).
Start with well-draining soil rich in compost—these plants hate soggy roots—and plant them in a spot that gets at least 6-8 hours of direct sunlight daily.
In cooler zones, use black plastic mulch or a cold frame to extend the season, and always wait until after the last frost when soil temps hit 60°F+.
Water deeply but infrequently (about 1 inch per week), letting the soil dry slightly between waterings to prevent blossom-end rot, a common issue with big red peppers.
By mid-summer, you’ll see those signature glossy red peppers forming, and with proper care, one plant can yield 20+ peppers—enough to share with neighbors. The key is consistent feeding with a balanced fertilizer (like 10-10-10) every 4-6 weeks and pruning suckers to focus energy on fruit production.
Even if pests like aphids show up, a strong spray of water or neem oil usually keeps them in check.
For year-round success, extend the season with row covers in fall or move potted plants indoors near a sunny window when temps drop below 50°F. The payoff? Homegrown peppers that beat store-bought in flavor, size, and freshness—no matter the season. Ready to grow yours?
📚 In This Guide
- What you need
- Instructions
- Tips and common mistakes
- Wrapping up and next steps
What you need
- ● Big Red Pepper Seeds or Seedlings: Choose Capsicum annuum varieties like 'Big Red' or 'Red Bell Pepper' (seeds or 6-8" seedlings from a nursery).
- ● Potting Mix or Garden Soil: 10–20 lbs of well-draining, organic potting mix (or amend garden soil with compost for better fertility).
- ● Containers or Garden Bed: For containers: 5-gallon pots or larger (minimum 12" diameter) with drainage holes.
- ● For in-ground planting: A sunny, warm spot (6+ hours of sunlight daily) with loose, fertile soil.
- ● Fertilizer: A balanced 10-10-10 or 5-10-10 fertilizer (or organic options like compost tea or worm castings).
- ● Mulch: Straw, wood chips, or black plastic mulch (to retain heat and moisture).
- ● Garden Gloves (to protect hands from thorns and soil).
- ● Trowel or Spade (for planting and soil prep).
- ● Watering Can or Hose with Adjustable Nozzle (peppers hate soggy roots!).
- ● Pruning Shears (for trimming dead leaves or overgrowth).
- ○ Thermometer (Optional but Helpful) (to monitor heat zones, especially for indoor growers).
- ○ Row Covers or Greenhouse (Optional) (for extending the growing season in cooler climates).
- ● Heat Tolerance: Big red peppers thrive in USDA Zones 9–11 or with protection in cooler zones (e.g., greenhouses).
- ● Patience: They need 70–90 days to mature from seed (longer for seedlings).
- ● Consistency: Peppers love warmth (70°F+) and regular watering (1–1.5 inches per week).
Instructions: planting and cultivating a thriving big red pepper plant
Here's how to turn a single seed into a prolific pepper plant that keeps producing through the seasons.
🌱 Step 1: Start Seeds Indoors 8-10 Weeks Before Last Frost
Fill seed trays with sterile seed-starting mix and press it down gently until firm. Plant 1-2 seeds per cell at a depth of ¼ inch, covering lightly with additional mix. The key here is warmth—pepper seeds need soil temperatures of 75-85°F to germinate reliably. Place trays on a seedling heat mat or in a warm spot like on top of the fridge.
Cover the trays with a humidity dome or plastic wrap to retain moisture, then wait. Germination can take 10-20 days, depending on your heat zone. You'll know it's working when you see the first tiny green shoots pushing through the soil. Once 50% of seeds have sprouted, remove the dome immediately to prevent damping-off disease.
☀️ Step 2: Provide Full-Spectrum Light and Prevent Leggy Growth
The moment those first leaves appear, move seedlings under grow lights for 14-16 hours daily. A south-facing window won't cut it—pepper seedlings stretch desperately toward weak light, creating weak stems that can't support heavy fruit. Position lights 2-4 inches above the plants and raise them as seedlings grow to maintain that distance.
Strong seedlings have thick stems, deep green leaves, and compact spacing between nodes. If yours look pale and stretched, you're too far away. You'll also want to rotate the trays a quarter turn daily so plants grow straight instead of leaning toward the light source.
🪴 Step 3: Transplant to Larger Containers When Seedlings Are 4-6 Inches Tall
Choose 5-gallon containers for each plant since peppers are heavy feeders and need room to develop strong root systems. Fill pots with well-draining potting mix mixed with compost for nutrients. Dig a hole twice as wide as the seedling's root ball and place the plant in, covering roots completely but leaving the stem slightly above soil level.
Water deeply right after transplanting to settle the soil around roots. Place pots in a sheltered spot outdoors for 1-2 hours the first day, gradually increasing exposure over 10-14 days until they're ready for full sun. This hardening-off process prevents transplant shock that can stunt growth.
✂️ Step 4: Maintain Soil Moisture and Fertility for Continuous Harvests
Pepper plants need consistent moisture—water when the top 1-2 inches of soil feel dry. Let the soil dry slightly between waterings to prevent blossom-end rot, but never to the point of wilting. Use a balanced fertilizer every 2-3 weeks during the growing season, following package instructions for dilution.
Prune suckers (the small shoots that form in the leaf axils) to direct energy toward fruit production. You'll also want to remove any leaves touching the soil to improve airflow and reduce disease risk. The goal is a plant that looks bushy but not overcrowded—this ensures maximum sunlight reaches developing peppers.
🌿 Step 5: Extend the Season in Cooler Climates
In heat zones below 8, protect plants from early frosts using row covers or move containers to a sheltered location. For year-round harvests, bring potted plants indoors before the first frost and place them near a south-facing window or under grow lights. Reduce watering slightly in winter as growth slows, but keep soil lightly moist.
You'll notice new growth slow down in cooler months, but don't prune aggressively—pepper plants store energy in their roots. With proper light and care, you can coax another harvest cycle from them in late winter or early spring before transplanting back outdoors.
Tips & tricks for perfect big red pepper growth
Growing big, bold red peppers that thrive through multiple seasons takes a few clever strategies—here's what I've learned after years of trial and error.
Warmth is Non-Negotiable: Those 75-85°F soil temperatures in Step 1 aren't just suggestions—they're essential. I've seen germination fail completely when soil was below 70°F. If your home runs cooler, place trays on a heating pad or even a sunny windowsill with a clear plastic bag tented over them to trap heat. The moment you see those first sprouts, move them to the warmest spot possible—even a garage with a space heater works in a pinch.
Lighting Hack for Leggy Seedlings: The 14-16 hours of grow light in Step 2 is critical, but here's the trick: position your lights just 2-3 inches above the seedlings at first, then raise them as they grow. Too far away and you'll get those sad, stretched plants that can't support heavy peppers. I use a simple LED grow bulb on a timer—it's cheaper than fancy setups and works perfectly. Pro tip: rotate your trays every 8 hours (not just daily) to prevent leaning toward the light source.
Transplanting Success Secret: When moving to 5-gallon containers in Step 3, I make the hole twice as wide as the root ball but only half as deep as the container. This encourages roots to spread outward rather than grow downward, which gives you a stronger, more productive plant. After transplanting, give them a 10-minute soak in water to help settle the soil around roots—this prevents air pockets that can cause shock.
Winter Survival Strategy: For that year-round harvest in Step 5, I've found that row covers work best for early frosts, but for indoor overwintering, use a south-facing window with a heat mat underneath (even a small one works). The key is maintaining 60°F minimum temperatures—any colder and growth will stall. Reduce watering to every 10-14 days in winter since plants are dormant, but keep the soil lightly moist to prevent root damage.
Pro Tips for Big Red Pepper Plant
- Growing big, bold red peppers that thrive through multiple seasons takes a few clever strategies—here's what I've lea...
- Warmth is Non-Negotiable: Those 75-85°F soil temperatures in Step 1 aren't just suggestions—they're essential. I've s...
- Lighting Hack for Leggy Seedlings: The 14-16 hours of grow light in Step 2 is critical, but here's the trick: positio...
Frequently asked questions
Got questions about growing your own big red pepper plant?
You’re in the right place! Here are answers to the most common queries—from planting to harvest—so you can enjoy a bountiful, fiery crop all year.
When is the best time to plant big red pepper seeds?
Start indoors 8–10 weeks before your last frost date (typically early spring). Transplant seedlings outdoors after soil reaches 60–65°F (15–18°C) and all frost risk has passed. For year-round harvests, stagger plantings every 2–3 weeks in warm climates.
How long does it take for big red peppers to mature?
Big red peppers (like Capsicum annuum) take 75–90 days from transplant to harvest. Patience pays off—peppers won’t ripen if temps drop below 55°F (13°C), so use row covers or grow them in containers for flexibility.
Can I grow big red peppers in containers or indoors?
Use 5-gallon pots with well-draining soil and place them in full sun (6+ hours/day). For indoors, a south-facing window or grow lights (12–14 hours/day) work. Just ensure humidity levels stay high (pepper plants love it!).
Why are my big red pepper plants wilting or dropping flowers?
Common culprits: underwatering, overwatering, heat stress (above 90°F/32°C), or nutrient deficiencies. Check soil moisture (top inch dry = water time), mulch to retain moisture, and fertilize with balanced 10-10-10 every 3–4 weeks. Yellow leaves? Flush with water to check for over-fertilization.
How do I know when big red peppers are fully ripe?
Big red peppers turn a deep, glossy red when ripe—like a traffic light! They’ll also feel slightly softer and smell sweeter. For maximum heat, let them stay on the vine until fully colored. Pro tip: Harvest in the morning for the freshest flavor!
What can I plant alongside big red peppers to boost growth?
Try companion planting with:
- Basil – Repels pests and enhances flavor.
- Marigolds – Deter aphids and nematodes.
- Onions/garlic – Naturally reduce fungal diseases.
Avoid planting near fennel or brassicas (like cabbage), as they stunt pepper growth.
Wrapping up and next steps
Growing a thriving big red pepper plant is entirely within reach—whether you're a seasoned gardener or just starting out! By choosing the right heat zone, providing proper care, and troubleshooting common issues, you can enjoy a bountiful harvest all year long. 🌶️✨
Ready to take the next step? Start by selecting your perfect pepper varieties based on your local climate, then dive into planting with confidence. Happy gardening—your kitchen (and taste buds) will thank you!