
Pests and Diseases
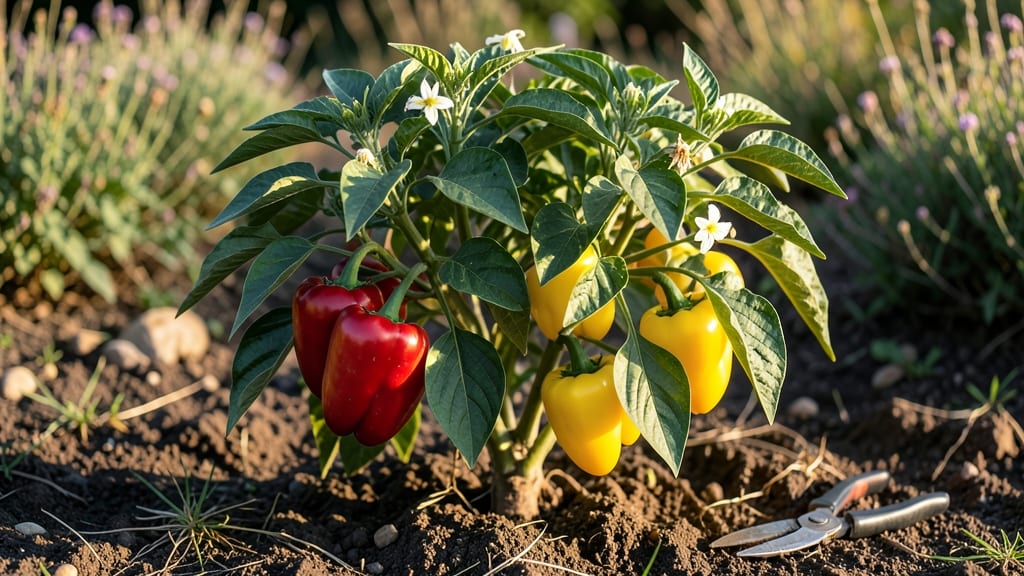
Growing red and yellow peppers that burst with color starts with the right heat zone timing—your secret weapon for vibrant harvests. 🌶️ I’ve learned that planting too early in cool zones means stunted growth, while waiting too long risks shorter seasons.
The key is matching varieties like ‘Red Knight’ or ‘Yellow Banana’ to your last frost date, ensuring they get enough warm days to ripen fully.
Once you’ve picked the perfect spot with 6+ hours of sun and well-draining soil, the rest is about consistency: watering deeply but infrequently, feeding with balanced fertilizer every 4-6 weeks, and watching for pests like aphids. Blossom end rot? Crushed eggshells in the soil can prevent it. Slow ripening?
Try a black plastic mulch to warm the roots—it works like magic in cooler climates.
📚 In This Guide
- What you need
- Instructions
- Tips and common mistakes
- Wrapping up and next steps
What you need
- ● Seeds or seedlings: Red/yellow bell pepper seeds (e.g., ‘Lipstick,’ ‘Golden California Wonder,’ or ‘NuMex Sandia’)
- ● Quantity: 3–5 seeds per pot (or 1 seedling per plant if buying transplants)
- ● Growing containers or garden bed: Containers: 12–18" deep pots (1 plant per container)
- ● Garden bed: Well-draining soil with full sun (6+ hours/day)
- ● High-quality potting mix: 1 bag (50 lbs) of organic, well-draining mix (add perlite/vermiculite for aeration)
- ● Fertilizer: Balanced 10-10-10 or 5-10-10 fertilizer (or compost for organic growers)
- ● Slow-release granules or liquid feed (follow package rates)
- ● Mulch: Straw or black plastic mulch (to retain heat and moisture)
- ● Basic tools: Trowel or small shovel
- ● Gloves (to protect from thorns)
- ● Watering can or hose with gentle spray nozzle
- ○ Support structures (optional): Cages or stakes (for tall varieties like ‘Jupiter’)
- ○ Pest/disease prevention (optional but recommended): Neem oil or insecticidal soap (for aphids/spider mites)
- ● Copper fungicide (if fungal risks are high in your zone)
- ○ pH testing kit (optional): Ensure soil pH is 6.0–6.8 (peppers prefer slightly acidic soil)
How to grow red and yellow peppers in your heat zone
Peppers thrive with the right timing—here's how to sync their growth with your climate for bold harvests.
🌱 Step 1: Start Seeds Indoors at the Right Time
Peppers need warmth to germinate, so begin seeds indoors 8-10 weeks before your last frost date. Use 70-80°F soil temperatures for best results—I place my seed trays on a heating mat to ensure consistent warmth. Fill small pots with seed-starting mix (not garden soil) and plant seeds ¼ inch deep, two per pot. Cover lightly with mix and mist until damp.
Keep the soil consistently moist but never soggy. A humidity dome helps, but remove it once sprouts appear to prevent fungal issues. You'll see tiny green shoots in 7-14 days—this is your cue to move them to bright light. Without enough light, seedlings stretch and weaken, making them prone to disease.
☀️ Step 2: Harden Off and Transplant After Warmth Arrives
When nighttime temperatures stay above 55°F and all frost risk has passed, it's time to transplant. First, harden off seedlings by placing them outside in partial shade for 1-2 hours the first day, gradually increasing to full sun over 7-10 days. This adjustment prevents shock and helps them toughen up.
Choose a sunny spot with 6-8 hours of direct sunlight daily—peppers need heat to develop their vibrant colors. Bury seedlings deeper than their pots, covering half the stem to encourage root growth. Space plants 18-24 inches apart to allow airflow, which reduces disease risk. Water deeply at the base to settle soil around roots.
💧 Step 3: Water and Feed for Colorful Fruits
Peppers hate soggy soil but need consistent moisture. Water 1 inch per week, letting the top 2 inches of soil dry between waterings. I use drip irrigation to keep leaves dry, which prevents fungal spots. Mulch around plants with 2-3 inches of straw to retain moisture and regulate soil temperature.
Fertilize every 2-3 weeks with a balanced vegetable fertilizer (10-10-10) once flowers appear. Yellowing leaves signal a need for nitrogen, while small peppers that drop off mean phosphorus is lacking. Red peppers, in particular, need consistent feeding to develop their rich color—skip this, and you'll get pale, bland fruits.
✂️ Step 4: Prune and Harvest for Continuous Production
Remove any suckers (side shoots) that form in the leaf axils to direct energy to fruit production. Pinch off the first few flowers if your plants are small—this helps them grow stronger before bearing heavy loads. Once peppers form, harvest regularly to encourage more production. Red peppers ripen fully on the plant, while yellow varieties often need picking when they turn color.
Harvest with a sharp knife or pruners, cutting the stem just above the fruit. This prevents damage to the plant and keeps it producing. Store peppers in a cool, dry place—unripened peppers will continue to color if left on the vine in warm conditions. A single plant can yield 10-20 peppers, depending on variety and care.
Tips & tricks for growing vibrant red and yellow peppers
Took me years to figure out these secrets—here's how to grow peppers that burst with color and flavor.
Soil Temperature is Everything: That 70-80°F soil temperature range in Step 1 isn't just a suggestion—it's non-negotiable for germination. I've tried cooler temps and ended up with patchy sprouting. Use a soil thermometer to confirm before planting, and keep those seed trays on a heating mat until you see those first green shoots. The 7-14 day window for sprouting gives you flexibility, but if you're not seeing anything after 14 days, check your soil temperature—it might be too cool.
Harden Off Gradually: The 1-2 hours to full sun progression in Step 2 is crucial for preventing transplant shock. I learned this the hard way by moving seedlings too quickly and losing half my plants. Start with just 1 hour in partial shade on day one, and increase by 30 minutes each day. Watch your plants closely—if leaves start wilting, they're getting too much sun too soon. This gradual approach also helps them develop thicker cell walls, making them more resilient once planted.
Watering Wisdom: The 1 inch per week guideline in Step 3 is perfect, but timing matters just as much. Water in the morning so leaves have all day to dry, preventing fungal diseases. I use a rain gauge to track weekly totals, and always water at the base rather than overhead. That 2-inch dry topsoil rule helps prevent rot while ensuring roots grow deep. For container growers, check soil moisture daily—containers dry out much faster than garden beds.
Fertilizer Timing: Those 2-3 week intervals for fertilizer in Step 3 are key, but watch your plants' signals. Yellowing leaves mean nitrogen, but if you're getting lots of leaves but no peppers, you might need more phosphorus. Red peppers especially need consistent feeding—skip it, and you'll get pale, watery fruits. I switch to a phosphorus-heavy fertilizer (like 5-10-10) when flowers first appear, then back to balanced when fruits form.
Pro Tips for Red And Yellow Peppers
- Took me years to figure out these secrets—here's how to grow peppers that burst with color and flavor.
- Soil Temperature is Everything: That 70-80°F soil temperature range in Step 1 isn't just a suggestion—it's non-negoti...
- Harden Off Gradually: The 1-2 hours to full sun progression in Step 2 is crucial for preventing transplant shock. I l...
Frequently asked questions
Got questions about growing red and yellow peppers? You’re not alone! Whether you're a first-time gardener or a seasoned pro, these common queries can help you troubleshoot, plan, and maximize your harvest. Dive into the answers below—your spicy success starts here!
How long does it take for red and yellow peppers to mature from seed?
Most pepper varieties take 60–90 days to reach maturity from seed, but color changes (like turning red or yellow) can add another 30–60 days. Start seeds indoors 8–10 weeks before your last frost date for a head start. Pro tip: Check the seed packet for specific days-to-maturity—some heat-loving varieties need extra time!
What are the most common pests for red and yellow peppers, and how do I prevent them?
Peppers often attract aphids, spider mites, and hornworms. To prevent pests:
- Use row covers early in the season to block flying insects.
- Rotate crops yearly to disrupt pest life cycles.
- Handpick hornworms (they’re easy to spot!) or introduce beneficial nematodes for soil-dwelling pests.
- Avoid overwatering—wet foliage attracts aphids.
Can red and yellow peppers survive a light frost, or should I bring them inside?
Peppers are frost-sensitive—even a light frost (32°F/0°C) can damage leaves and fruit. If frost is forecasted:
- Cover plants with frost blankets or row covers.
- Move potted peppers indoors to a sunny windowsill or under grow lights.
- Harvest ripe peppers first—they won’t recover but can still be used.
Why are my red/yellow peppers turning bland or losing flavor?
Bland peppers often result from overwatering, low sunlight, or excessive nitrogen. To fix it:
- Reduce watering—peppers prefer dry soil between waterings.
- Ensure 6–8 hours of direct sunlight daily (they’re sun-worshippers!).
- Fertilize with phosphorus/potassium (like a 5-10-10 blend) to boost flavor.
- Let peppers ripen fully on the vine—off-the-vine green peppers are less flavorful.
What can I plant instead of peppers if my climate isn’t warm enough?
If your heat zone (below 8) struggles with peppers, try these pepper-like alternatives:
- Shishito peppers (milder, tolerates cooler temps).
- Tomatoes (cherry or heirloom varieties for similar sun needs).
- Eggplants (plant in late spring for a short season).
- Jalapeños or serranos (faster-maturing than bell peppers).
Wrapping up and next steps
Growing red and yellow peppers is a rewarding journey that brings vibrant flavors and colors to your garden—and your plate! 🌱 By understanding your heat zone, selecting the right varieties, and staying vigilant against pests and diseases, you’ll be well on your way to a bountiful harvest.
Whether you’re a beginner or a seasoned gardener, every seed planted is a step toward fresh, homegrown goodness.
Now that you’re armed with the know-how, it’s time to roll up your sleeves and get growing! Start by marking your calendar for planting dates based on your zone, and don’t forget to check out our pro tips for maximizing success. Happy gardening—your future meals will thank you! 🌶️✨