
Pests and Diseases
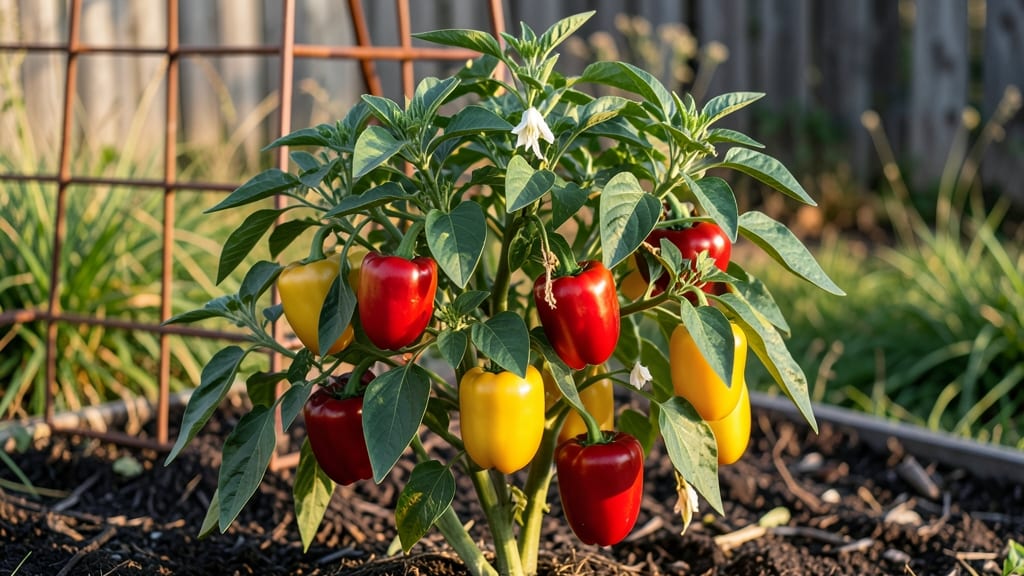
Growing red and yellow bell peppers that burst with flavor starts with choosing the right heat zone varieties. 🌶️ After years of trial and error, I’ve learned that the difference between a handful of peppers and a garden full of them often comes down to matching your plants to your climate’s heat tolerance—especially in zones 8 and up, where the heat can turn sweet peppers bitter if you’re not careful.
The secret isn’t just the seeds—it’s the soil, water, and timing. Too much heat without shade can stunt growth, while inconsistent moisture leads to cracked peppers or blossom end rot.
But get these basics right, and you’ll be harvesting glossy, vibrant peppers all season long, with reds ripening from yellows right on the vine.
📚 In This Guide
- What you need
- Instructions
- Tips and common mistakes
- Wrapping up and next steps
What you need
- ● Red & Yellow Bell Pepper Seeds: Choose disease-resistant varieties like ‘Lunchbox’ (red) or ‘Lemon Drop’ (yellow). Aim for 3-5 seeds per plant (start 2-3 seeds per pot for better success).
- ● Seed Starting Mix: 1-2 10-inch pots or a seed tray with sterile, well-draining soil (avoid garden soil—it’s too dense!).
- ● Grow Lights or Sunny Window: A fluorescent or LED grow light (12-16 hours/day) if natural light is 2-4 inches above seedlings.
- ● Transplant Pots: 3-inch biodegradable pots or 4-inch plastic pots for hardening off seedlings.
- ● Fertilizer: Seedling Stage: Balanced 5-10-10 fertilizer (diluted to half-strength).
- ● Transplanting: Compost or organic fertilizer (e.g., fish emulsion or 10-10-10).
- ● Fruiting Stage: High-phosphorus fertilizer (e.g., 3-4-6) to boost blooms.
- ● Mulch: Straw or black plastic mulch (1-2 inches thick) to retain moisture and suppress weeds.
- ● Hand Trowel or Transplant Spade (for planting seedlings).
- ● Watering Can or Hose with Adjustable Nozzle (gentle watering prevents seedling damage).
- ● Pruning Shears (for removing suckers and dead leaves).
- ● Garden Gloves (to protect hands from thorns and soil-borne pests).
- ● pH Test Kit (ideal soil pH: 6.0–6.8 for peppers).
- ○ Row Cover or Shade Cloth (optional, for frost protection or heat zones 1-5).
- ● Heat Zone Compatibility: Bell peppers thrive in zones 9–11 year-round. For cooler zones (3–8), plant after last frost (75°F+ soil temp) or use a greenhouse.
- ● Sunlight: 6–8+ hours of direct sunlight daily (south-facing spot is ideal).
- ● Water Access: Consistent moisture (peppers hate soggy roots but dry spells cause blossom-end rot).
- ○ Pest/Disease Prevention: Neem oil or copper fungicide (optional but recommended for zones prone to aphids or powdery mildew).
Step-by-step instructions for growing red and yellow bell peppers
Here's how to coax those sweet, colorful peppers from seed to harvest—even in tough climates.
🌱 Step 1: Start Seeds Indoors 8-10 Weeks Before Last Frost
Fill seed trays with the seed-starting mix and plant seeds ½ inch deep—they need darkness to germinate. I use a heating mat set to 75-80°F because bell peppers germinate best in warm soil. Keep the soil consistently moist but never soggy; a humidity dome helps maintain even moisture without drowning the seeds.
Place the tray in bright indirect light until sprouts appear, which takes 7-14 days. You'll know germination is working when tiny green leaves push through the soil. Once the first true leaves appear (not the initial seed leaves), move seedlings to a sunny windowsill or under grow lights for 14-16 hours daily.
☀️ Step 2: Harden Off Seedlings Before Transplanting
Two weeks before your last frost date, start hardening off seedlings by placing them outside in a sheltered spot for 1 hour the first day. Gradually increase their outdoor time by 1 hour daily until they can handle a full day outside. This process teaches them to adapt to wind, sun, and temperature swings—critical for peppers, which are heat-lovers but can get stressed by sudden changes.
Watch for leaves that look slightly wilted but perk up after watering. If you see this, your plants are adjusting well. By the time you transplant, they'll be tough enough to handle the garden's conditions. I always transplant on a cloudy afternoon to reduce transplant shock.
🪴 Step 3: Plant in Full Sun With Warm Soil
Choose a location that gets at least 6-8 hours of direct sun daily—bell peppers need plenty of warmth to thrive. Amend the soil with compost to improve drainage and fertility, since peppers hate soggy roots. Plant seedlings 12-18 inches apart in rows 24 inches apart to give them room to spread and avoid competition.
Dig a hole slightly deeper than the seedling's root ball and place the plant in, covering the roots with soil up to the first set of leaves. Press gently around the base to eliminate air pockets, then water deeply to settle the soil. Mulch around the base with straw or shredded leaves to retain moisture and keep roots cool.
💧 Step 4: Water Deeply and Fertilize Regularly
Water peppers at the base 1-2 inches deep per week, letting the soil dry slightly between waterings. Overwatering leads to blossom-end rot, while underwatering causes peppers to turn bitter. I water in the morning so the foliage has time to dry before evening, which helps prevent disease.
Feed plants every 2-3 weeks with a balanced fertilizer (like 10-10-10) once they start flowering. You'll notice new blooms forming within a week of fertilizing. Yellowing leaves signal either overwatering or nutrient deficiency—adjust accordingly. Peppers are heavy feeders, so don't skimp on fertilizer.
✂️ Step 5: Prune and Harvest for Maximum Yield
Remove any suckers (side shoots) that form in the leaf axils to direct the plant's energy into fruit production. Prune back any leggy growth to encourage bushier plants. I also pinch off the first few flowers if you want larger peppers later—this redirects energy to the remaining blooms.
Harvest peppers when they reach their mature color but are still firm to the touch. Red and yellow bells ripen at different rates, so check plants every 3-5 days once they start coloring. Use pruning shears to cut stems cleanly, leaving a small stub. Regular harvesting encourages more fruit to form—don't wait until peppers are overripe or they'll stop producing.
Tips & tricks for perfect bell pepper growth
These little tricks will help you grow vibrant red and yellow bell peppers that outshine the grocery store variety.
Germination Boost: Don't rush the 7-14 day germination window—bell peppers need consistent warmth at 75-80°F to sprout reliably. I've found that wrapping the seed tray in plastic wrap creates a mini greenhouse effect, keeping humidity high while maintaining that perfect temperature. Just remember to remove it once sprouts appear to prevent mold.
Lighting Strategy: Once your seedlings have their first true leaves, move them to 14-16 hours of light daily. If using grow lights, position them just 2-3 inches above the seedlings—they'll grow toward the light if they're too far away. I use a timer to automate this so I don't forget, especially during shorter winter days.
Transplant Timing: The gradual hardening off process is crucial, but don't skip the cloudy afternoon transplant tip. I've learned this the hard way—transplanting on sunny days can shock seedlings, causing them to wilt dramatically even if they recover. The cooler afternoon light gives them a gentler introduction to outdoor conditions.
Soil Secrets: For the 6-8 hours of daily sun requirement, make sure your soil stays warm by planting after the last frost date when ground temperatures reach at least 60°F. I add a thick layer of black plastic mulch a week before transplanting to warm the soil faster—this gives your peppers a head start in cooler climates.
Pro Tips for Red And Yellow Bell Pepper
- These little tricks will help you grow vibrant red and yellow bell peppers that outshine the grocery store variety.
- Germination Boost: Don't rush the 7-14 day germination window—bell peppers need consistent warmth at 75-80°F to sprout reliably.
- Lighting Strategy: Once your seedlings have their first true leaves, move them to 14-16 hours of light daily.
Frequently asked questions
Got questions about growing red and yellow bell peppers?
You’re not alone! Here are answers to the most common queries—from pests to harvest timing—so you can grow vibrant, healthy peppers like a pro.
How do I tell if my bell peppers are red or yellow?
Red and yellow bell peppers start green and ripen to their signature colors. Red peppers turn deep crimson when fully ripe, while yellow peppers develop a bright golden hue. Check for smooth skin and a slight softness—they’re ready to pick! Pro tip: Yellow peppers often ripen faster than reds, so monitor them closely.
What pests should I watch for, and how do I stop them?
Common pests include aphids, spider mites, and hornworms. For aphids, spray with soapy water; for mites, introduce beneficial predators like ladybugs. Hornworms? Handpick them (they’re huge and easy to spot!) or use Bt (Bacillus thuringiensis) for organic control. Prevention tip: Healthy plants resist pests better—keep soil moist and fertilize regularly.
How long does it take for bell peppers to turn red or yellow?
After transplanting, green peppers take 60–90 days to ripen to red or yellow, depending on the variety and heat. Yellow peppers often ripen 1–2 weeks earlier than reds. Grower hack: Use a plant marker to track days from transplanting—this helps you predict harvests!
Can I grow red/yellow bell peppers in containers?
Yes! Choose compact varieties like ‘Lunchbox’ or ‘Sweet Banana.’ Use a 5-gallon pot with well-draining soil and place in full sun (6+ hours/day). Container tip: Add compost for nutrients and water consistently—containers dry out faster.
What’s the best way to store harvested peppers?
Store peppers in the fridge (40–45°F) for up to 1 week (green) or 3–5 days (red/yellow). For longer storage, freeze them whole or slice (blanch first to preserve texture). Storage pro tip: Keep stems on—they slow moisture loss!
Why are my bell peppers turning white or blotchy?
White or blotchy spots often signal fungal issues (like powdery mildew) or calcium deficiency. Improve airflow, avoid overhead watering, and add crushed eggshells to soil for calcium. Quick fix: Spray with neem oil for fungal prevention.
Wrapping up and next steps
Growing red and yellow bell peppers is a rewarding journey that brings vibrant flavors and colors to your garden—and your plate! 🌱 With the right heat zone strategies, soil prep, and pest-disease defenses, you’re well on your way to a bountiful harvest. Remember, consistency in care and quick action against issues like aphids or blight will keep your peppers thriving.
Ready to put your green thumb to work? Start by planting your seeds or seedlings this season, and soon you’ll be enjoying homegrown peppers straight from your garden. Happy growing! 🌶️