
Picking
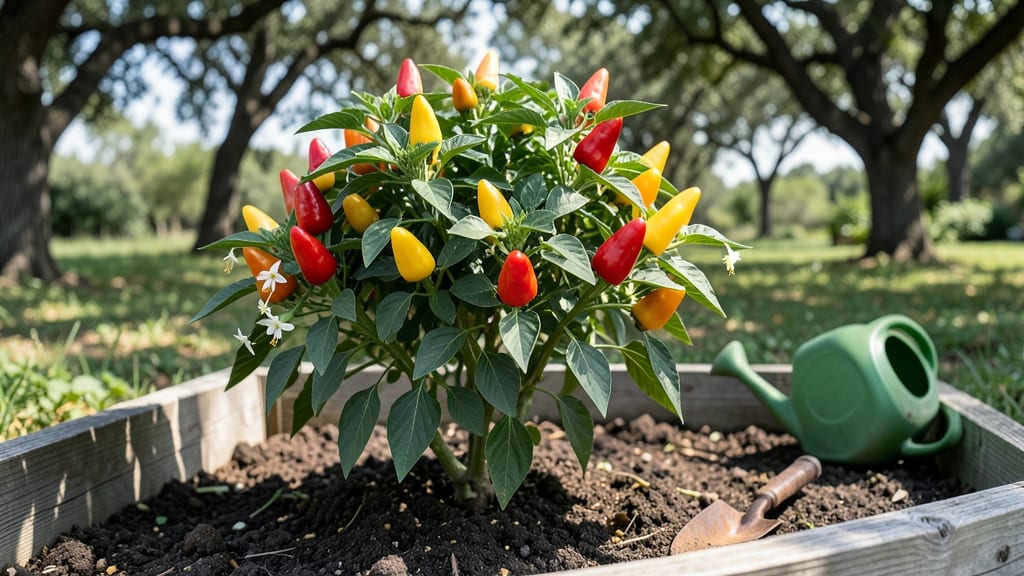
Growing Chilly Chili ornamental peppers turns your garden into a spicy-sweet showstopper. 🌶️ These peppers aren’t just for looks—they’re edible too, with a mild heat that’s perfect for pickling or garnishes. The secret to their vibrant colors and glossy skins?
A balance of sun, warmth, and just the right amount of patience. Start with seeds indoors 8-10 weeks before your last frost, or plant young seedlings after all danger of frost has passed.
They thrive in full sun (6-8 hours daily) and well-draining soil, but don’t overwater—these peppers hate soggy roots. A 5-gallon container works great for patios, or plant them directly in the ground with 18-24 inches between plants.
By midsummer, you’ll see clusters of peppers in fiery reds, oranges, and yellows that last well into fall. Prune back leggy stems to encourage bushier growth, and pinch off early blooms if you want bigger, bolder peppers later. The best part?
They keep producing until frost—so harvest often to encourage more fruit. Use them fresh in salads, ferment them into spicy pickles, or dry them for winter decorations. Even the leaves add a mild heat to dishes, and the plants themselves make stunning cut flowers.
With just a little care, you’ll have a harvest that’s as beautiful as it is delicious.
📚 In This Guide
- What you need
- Instructions
- Tips and common mistakes
- Wrapping up and next steps
What you need
- ● Seeds: 5–10 chilly chili ornamental pepper seeds (choose a variety like ‘Lunchbox,’ ‘Apache,’ or ‘Black Pearl’ for vibrant colors and heat).
- ● Seed-starting mix: 1–2 gallons of sterile, well-draining potting soil (look for a blend labeled for seed starting or seedling growth).
- ● Containers: 3–4 small pots (4–6 inches wide) or a seed tray with individual cells for seedlings.
- ● Grow lights or sunny windowsill: A full-spectrum LED grow light (12–16 hours/day) or a south-facing window with 6+ hours of direct sunlight.
- ● Watering can or spray bottle: With a fine mist setting for gentle hydration.
- ● Fertilizer: A balanced, water-soluble fertilizer (5-10-5 or 10-10-10 NPK ratio) for seedlings and mature plants.
- ● Transplant pots or garden space: Larger pots (12–18 inches wide) or a sunny garden bed with well-draining soil (pH 6.0–6.8).
- ● Pruning shears or scissors: For trimming leggy seedlings or harvesting peppers.
- ● Plant labels: To track varieties and planting dates.
- ○ Glove: Optional but handy for handling spicy peppers (especially when harvesting or cooking!).
- ● Mulch: Organic mulch (straw or shredded leaves) to retain moisture and regulate soil temperature.
- ○ Support (optional): Small stakes or cages for varieties that grow tall or heavy with fruit.
- ● A warm, sunny spot (indoors or outdoors) with temperatures between 70–85°F (21–29°C) for germination and growth.
- ● Patience! Ornamental peppers take 60–90 days to mature from seed, depending on the variety.
- ● Consistency in watering—keep soil evenly moist but not soggy to avoid root rot.
Step-by-step instructions for growing ornamental peppers
Here’s how to grow vibrant, heat-packed ornamental peppers that double as edible accents.
🌱 Step 1: Start Seeds Indoors for an Early Head Start
Fill a seed tray with sterile seed-starting mix and plant seeds ¼ inch deep, spacing them 1 inch apart. Ornamental peppers need warmth to germinate, so place the tray on a seedling heat mat set to 75-80°F. Keep the soil consistently moist but not soggy—water just enough so the top layer feels damp to the touch.
Cover the tray with plastic wrap or a humidity dome to trap heat and moisture. Check daily for condensation—if it’s heavy, lift the cover for 10 minutes to prevent mold. Germination usually takes 7-14 days, but some varieties may take longer. Once sprouts appear, remove the cover immediately to avoid damping-off.
☀️ Step 2: Provide Bright Light and Prevent Leggy Growth
Move seedlings under grow lights or to a south-facing window as soon as they sprout. Ornamental peppers need 12-14 hours of light daily to stay compact. If you notice stems stretching toward the light (leggy growth), lower the lights or move the plants closer—ideal distance is 2-3 inches above the tallest seedling.
Rotate the tray a quarter turn every few days so plants grow evenly. Strong seedlings will have thick stems and deep green leaves. If leaves yellow between veins, it’s a sign of too much water—let the soil dry slightly between waterings.
🪴 Step 3: Transplant Outdoors After Last Frost
Wait until nighttime temperatures stay above 55°F before moving seedlings outside. Harden them off by placing them in a sheltered spot for 1-2 hours the first day, gradually increasing time over 7-10 days. Choose a location with full sun (6+ hours daily) and well-draining soil—ornamental peppers hate soggy roots.
Plant seedlings 18-24 inches apart in rows 2 feet apart to allow airflow. Dig holes slightly deeper than the root ball and firm soil around the base. Water deeply right after transplanting to help roots establish. Mulch with 2-3 inches of organic mulch to retain moisture and regulate soil temperature.
✂️ Step 4: Prune and Fertilize for Bushy Growth
Pinch off the first few flower buds if you want larger, more colorful peppers later. This redirects energy to foliage and root growth. Use a balanced 10-10-10 fertilizer every 4-6 weeks during the growing season, but reduce nitrogen in late summer to encourage fruiting.
Watch for pests like aphids or spider mites—spray with neem oil if you spot them early. Ornamental peppers are drought-tolerant once established, but water 1 inch per week during dry spells. You’ll know they’re happy when they produce bright, glossy peppers in shades of red, yellow, purple, or orange.
🌿 Step 5: Harvest and Enjoy the Dual Rewards
Peppers ripen in 60-90 days depending on the variety. Harvest when fully colored for the best flavor and ornamental appeal. Wear gloves—some varieties pack serious heat! Cut stems with pruners to avoid damaging the plant. You can eat them fresh, dry them for seasoning, or use them in decorative arrangements.
After the first frost, pull up remaining plants and compost them. Save seeds from your favorite peppers for next year—just let them dry on the plant before storing in a cool, dark place. With proper care, your ornamental peppers will reward you with both beauty and spice!
Tips & tricks for growing ornamental peppers
Real talk: Growing these fiery beauties takes patience, but these tricks will help you avoid the most common pitfalls and grow peppers that'll make your garden the envy of the neighborhood.
Germination Warmth: That 75-80°F heat mat is non-negotiable for germination—cold soil will delay sprouting for weeks. I've seen seeds take up to 21 days when kept at room temperature (around 68°F), but with consistent warmth, you'll see sprouts in that 7-14 day window. Pro tip: Place a thermometer in the tray to monitor—if it dips below 70°F, your seeds might never wake up.
Light Distance Matters: Those 2-3 inches between your seedlings and grow lights might seem like a small detail, but it's the difference between sturdy plants and weak, leggy stems. I learned this the hard way after growing plants that collapsed under their own weight. Adjust the lights as your seedlings grow—you want them just close enough to touch the leaves if you reach up.
Transplanting Timing: Don't rush the hardening off process! That gradual 7-10 day increase is crucial for preventing transplant shock. I once moved seedlings outside after just 3 days and lost half of them to stress. Start with those 1-2 hours in sheltered spots, then gradually increase exposure—your plants will thank you with stronger roots and faster establishment.
Fertilizer Strategy: That 10-10-10 fertilizer recommendation is spot-on, but timing is everything. Apply it when you see new growth appearing—usually about 2-3 weeks after transplanting. Too early and you'll burn tender roots; too late and your plants won't have the nutrients they need when they start flowering. And remember to reduce nitrogen in late summer to shift energy from leaves to fruit production.
Pro Tips for Chilly Chili Ornamental Pepper
- Real talk: Growing these fiery beauties takes patience, but these tricks will help you avoid the most common pitfalls...
- Germination Warmth: That 75-80°F heat mat is non-negotiable for germination—cold soil will delay sprouting for weeks....
- Light Distance Matters: Those 2-3 inches between your seedlings and grow lights might seem like a small detail, but i...
Frequently asked questions
When is the best time to plant Chilly Chili ornamental peppers?
Start seeds indoors 8–10 weeks before your last frost date (typically March–April in most climates). Transplant seedlings outdoors after soil warms to 60°F+ and all frost risk has passed. If your growing season is short, opt for container gardening to extend the season!
Why aren’t my Chilly Chili peppers turning red?
Color change depends on sunlight, temperature, and maturity. Peppers need full sun (6+ hours/day) and warm temps (70°F+). If they’re still green, they may need more time—some varieties take 90–120 days to ripen. Check your seed packet for exact timing!
Can I eat Chilly Chili ornamental peppers, or are they just for looks?
While bred for show, Chilly Chili peppers are edible and delicious. Use them raw in salsas, roasted for snacks, or dried for heat. Just note: they’re hotter than they look—start with a tiny taste test!
How do I protect my peppers from pests like aphids or hornworms?
Prevent pests with neem oil sprays or row covers. Handpick hornworms (look for green caterpillars with white stripes!). For aphids, blast them off with water or introduce ladybugs. Healthy plants with balanced fertilizer resist pests better too!
What can I do if my Chilly Chili plants flower but don’t produce peppers?
Lack of peppers often means stress, poor pollination, or over-fertilizing with nitrogen. Try these fixes:
- Hand-pollinate by gently shaking plants or using a paintbrush.
- Switch to a low-nitrogen, high-phosphorus fertilizer (like 5-10-10).
- Ensure consistent watering—drought stress can halt fruit set.
Wrapping up and next steps
Growing chilly chili ornamental peppers is a rewarding journey that blends beauty, heat, and flavor into one stunning package! Whether you’re drawn to their vibrant colors, fiery kick, or unique culinary potential, these peppers bring a touch of excitement to any garden or kitchen.
Now that you’re armed with the right knowledge—from seed to harvest—why not take the next step and plant your own batch? Start small, experiment with varieties, and enjoy the process of nurturing these fiery beauties into something extraordinary. Happy growing! 🌱🔥