
Picking
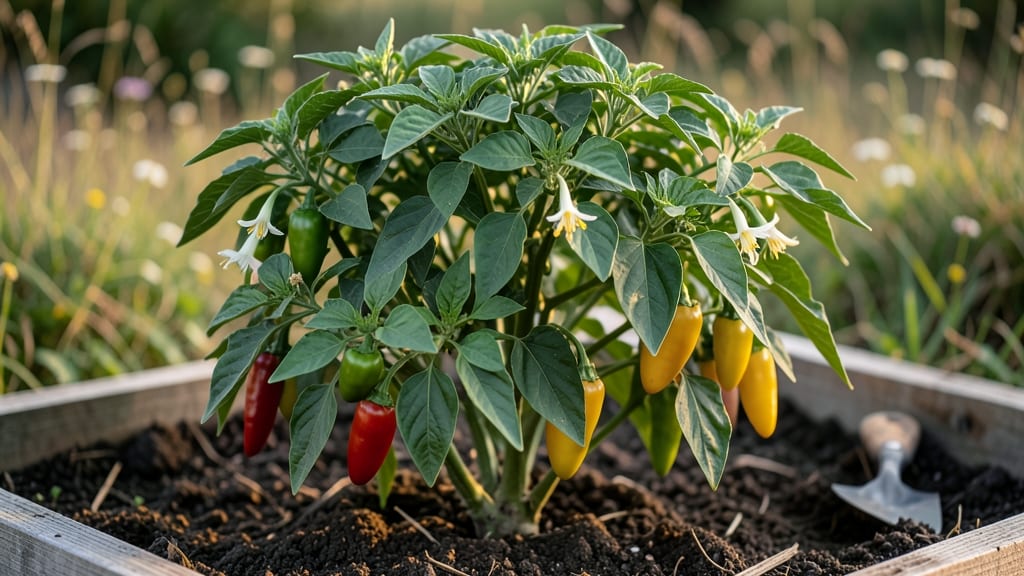
The cultivation of chili peppers from seed to harvest is one of the most rewarding gardening experiences—especially when you bite into your own fiery jalapeños or sweet banana peppers just 90 days after planting. 🌱 I’ve grown everything from mild poblano to blazing habanero, and the secret isn’t just patience—it’s knowing the tiny details that turn seedlings into spice factories.
The right soil mix, consistent warmth, and a little pruning trick I’ll share later make all the difference between a handful of peppers and a bounty that’ll have neighbors asking for cuttings.
Start with seeds or transplants, but here’s the game-changer: chilis thrive in well-draining, slightly acidic soil (think 6.0–7.0 pH) mixed with compost. They’re sun worshippers—6–8 hours daily—and hate soggy roots, so raised beds or containers with drainage holes work wonders.
Most varieties need warm soil (70°F+) to germinate, which is why I always start mine indoors 8–10 weeks before the last frost or buy sturdy transplants from a nursery.
Fertilize lightly with a balanced 10-10-10 mix at planting, then switch to a low-nitrogen, high-phosphorus feed when flowers appear to boost fruit production.
By midseason, you’ll notice those first blossoms—and that’s when the magic (and mistakes) happen. Prune suckers (those little shoots in the joint between stem and branches) to focus energy on peppers, and hand-pollinate if your garden lacks bees.
Watch for blossom end rot (calcium deficiency) and fix it with crushed eggshells in the soil. With the right care, you’ll harvest dozens of peppers per plant, from tiny piquins to foot-long monsters, all packed with heat (or sweetness, if you prefer). The first taste is the best payoff.
This method works for any chili variety, from beginner-friendly jalapeños to heat-loving ghost peppers, and adapts to containers or ground beds. Whether you’re growing for salsa, drying, or just the thrill of watching them ripen from green to red, the key is consistency.
Let’s get those seeds planted—or transplants in the ground—before the heat sets in!
📚 In This Guide
- What you need
- Instructions
- Tips and common mistakes
- Wrapping up and next steps
What you need
- ● Chili pepper seeds: Choose heat-resistant varieties like Jalapeño, Cayenne, or Habanero (10–20 seeds per plant). Opt for organic, non-GMO seeds for best results.
- ● Seed-starting mix: 5–10 lbs of lightweight, sterile potting soil (e.g., Miracle-Gro Seed Starting Potting Mix). Avoid garden soil—it’s too dense!
- ● Containers: Seedling trays (50+ cells) or small pots (3–4 inches deep).
- ● Larger pots (5-gallon minimum) or garden beds (6+ inches deep) for mature plants.
- ● Grow lights or sunny window: 12–16 hours of light daily (LED grow lights work great for indoor setups).
- ● Watering can or spray bottle: Fine mist for seedlings; a gentle stream for mature plants.
- ● Fertilizer: Balanced liquid fertilizer (10-10-10 or 5-5-5) or organic options like fish emulsion or compost tea.
- ● Stakes or cages: 3–4 ft bamboo stakes or tomato cages to support vining varieties.
- ● Pruning shears: Small, sharp scissors for trimming (sterilize with rubbing alcohol!).
- ● Heat mat: For seedlings in cool climates (70–80°F keeps roots cozy!).
- ● pH test kit: Keep soil pH between 6.0–7.0 (chilis love slightly acidic soil).
- ● Insect netting: Protects against pests like aphids or spider mites.
- ● Drip irrigation system: Automates watering for busy growers.
- ● Journal or app: Track planting dates, watering schedules, and pepper progress!
Step-by-Step guide to cultivating chili peppers
Here’s how I turn tiny seeds into fiery harvests—no shortcuts, just reliable results.
🌱 Step 1: Start Seeds Indoors Under Warmth
Chili seeds need 75-85°F soil to germinate, so begin them indoors 8-10 weeks before your last frost. Fill small seed-starting trays with sterile seed-starting mix—never garden soil, which can harbor diseases. Press each seed ¼ inch deep into the mix, spacing them 1 inch apart to avoid overcrowding. I use a toothpick to make the hole, then tap it gently to settle the seed.
Cover the tray with a clear plastic dome or plastic wrap to trap warmth and moisture. Place it on a seedling heat mat (or a warm spot like atop the fridge) until sprouts appear in 7-14 days. Chili seeds vary—some sprout in a week, others take two. Don’t water until you see condensation on the dome; overwatering now drowns seeds before they wake up.
☀️ Step 2: Provide Light and Prevent Legginess
Once seedlings emerge, remove the dome immediately to prevent damping-off. Place them under grow lights (14-16 hours daily) within 2-3 inches of the foliage. Without enough light, seedlings stretch toward the sun, growing weak and spindly. You’ll know they’re getting enough light when the stems are thick and dark green, not pale and elongated.
Rotate the trays quarter-turn daily so plants grow straight, not lopsided. After 4-6 weeks, when seedlings have 3-4 true leaves, transplant them into 4-inch pots with fresh potting mix. Handle them by the leaves—never the stems—to avoid damaging roots. This is when I add a balanced fertilizer (half-strength) to encourage sturdy growth.
🪴 Step 3: Harden Off and Transplant Outdoors
Two weeks before your last frost, start hardening off seedlings by placing them outside in a sheltered spot for 1-2 hours the first day. Gradually increase their outdoor time over 10-14 days, ending with a full day in the sun. Chilies are tender—rushing this step burns leaves and stunts growth. On the final day, leave them out overnight to test their resilience.
Transplant after all danger of frost has passed and soil is at least 60°F. Space plants 18-24 inches apart in full sun (6+ hours daily). Bury stems deeper than the pot—up to the first set of leaves—to encourage stronger root systems. Water deeply at transplanting to settle soil around roots, then let the top inch dry before watering again. Mulch with 2-3 inches of straw to retain moisture and regulate soil temperature.
✂️ Step 4: Prune and Fertilize for Maximum Yield
When plants are 12-18 inches tall, pinch off the top set of leaves to encourage bushier growth. This redirects energy to side branches, where most peppers form. Remove any suckers (small shoots in the leaf axils) to keep the plant’s energy focused on fruit production. I prune in the morning so wounds have all day to heal—never prune after dark.
Feed plants every 2-3 weeks with a low-nitrogen, high-phosphorus fertilizer (like 5-10-10) to boost flowering and fruiting. Over-fertilizing with nitrogen produces lush leaves but few peppers. Watch for yellowing leaves—a sign of overwatering or nutrient burn. Adjust watering so soil stays evenly moist but never soggy. Drip irrigation or soaker hoses work best to keep foliage dry and prevent disease.
🌿 Step 5: Harvest and Store for Long-Term Use
Peppers ripen in 60-90 days after transplanting, depending on the variety. Harvest when they reach full color and firm texture—green, red, yellow, or purple, depending on the type. Use clean scissors or pruners to cut stems, leaving ¼ inch of stem attached to the pepper. This prevents disease from entering the plant. I harvest every 2-3 days during peak season to encourage more production.
For fresh use, store peppers in the fridge for up to 2 weeks. To dry, hang them in a well-ventilated, dark place (like a pantry) for 1-2 weeks until leathery. Once dry, remove seeds and stems, then grind into powder or store whole in airtight containers. Frozen peppers retain flavor for 6-12 months—blanch whole peppers in boiling water for 2 minutes, then freeze in bags.
Tips & tricks for perfect chili pepper cultivation
Here's what I've learned after growing fiery chilies for years—these tricks make all the difference between a decent harvest and a spectacular one.
Soil Temperature Secret: That 75-85°F soil temperature range in Step 1 is non-negotiable for germination. I use a seedling heat mat set to 80°F and place it on top of my fridge to maintain consistent warmth. If your home runs cold, consider a small greenhouse setup with a heat lamp—chili seeds won't germinate reliably below 70°F. The condensation test is your friend: wait until you see it form on the dome before watering, which typically takes 3-5 days after planting.
Lighting Technique: The 14-16 hours of daily light in Step 2 is crucial, but distance matters just as much as duration. I position my grow lights 2-3 inches above the seedlings and adjust them as plants grow. Watch for that color shift—healthy seedlings should be dark green, not pale yellow. If you notice leggy growth, move the lights closer immediately. LED grow lights are my top recommendation—they're energy-efficient and produce less heat than fluorescent bulbs, which can scorch tender seedlings.
Harden Off Gradually: The 10-14 day hardening off period in Step 3 is where most growers rush and regret it. I start with just 1-2 hours of shade protection on day one, then increase by 1-2 hours daily. On cloudy days, I extend the outdoor time since indirect light is gentler. The overnight test is critical—if leaves show any frost damage after that final night, your plants will struggle to recover and may produce fewer peppers. Chilies are tropical plants at heart, so take your time with this transition.
Pruning Strategy: When you reach Step 4 and pinch off those top leaves, you're not just shaping the plant—you're directing its energy. I prune just above a leaf node where side branches will emerge. For maximum yield, focus on removing suckers (those shoots in the leaf axils) rather than just the main stem. These suckers compete with your pepper production, so the more you remove, the more peppers you'll get. Always use clean, sharp scissors to prevent disease transmission between plants.
Pro Tips for Chili Pepper Cultivation
- Here's what I've learned after growing fiery chilies for years—these tricks make all the difference between a decent harvest and a spectacular one.
- Soil Temperature Secret: That 75-85°F soil temperature range in Step 1 is non-negotiable for germination.
- Lighting Technique: The 14-16 hours of daily light in Step 2 is crucial, but distance matters just as much as duration.
Frequently asked questions
How long does it take for chili peppers to grow from seed?
Most chili varieties take 60–90 days from transplanting to harvest, but germination starts in 7–14 days if kept warm (70–85°F). Smaller peppers like jalapeños mature faster (60–75 days), while larger ones like bell peppers or habaneros need 90+ days. Patience pays off—hotter peppers often take longer!
When is the best time to plant chili peppers?
Start seeds indoors 8–12 weeks before your last frost date (use grow lights if needed). Transplant after soil warms to 60°F+—typically 2–3 weeks after the last frost. In warm climates (zones 9–11), direct-sow seeds in spring for year-round harvests. Pro tip: Use black plastic mulch to speed up soil warming!
Why are my chili plants wilting or turning yellow?
Wilting often means underwatering or root stress, while yellow leaves signal overwatering, nutrient deficiency, or pests. Check soil moisture (top inch should be dry), ensure proper drainage, and inspect for aphids or spider mites. Adjust watering (1–1.5 inches/week) and fertilize with a balanced 10-10-10 mix if leaves look pale. Pro tip: Mulch to retain moisture and prevent temperature swings!
Can I grow chili peppers in containers? What’s the best pot size?
Use pots at least 12–18 inches deep (bigger for bushier varieties like bell peppers). Ensure drainage holes and a well-draining soil mix (cactus/succulent blend works). Dwarf varieties (e.g., ‘Shishito’ or ‘Lunchbox’) thrive in 5-gallon containers, while larger plants need 20+ gallons. Place pots in full sun (6+ hours/day) and fertilize every 2–3 weeks.
How do I know when chili peppers are ready to harvest?
Harvest when peppers reach their full color and size (green, red, yellow, or purple, depending on the variety). For hotter peppers, wait until they’re firm and glossy—some varieties (like habaneros) turn red when fully ripe. Use pruning shears to avoid damaging the plant. Pro tip: Pick regularly to encourage more production!
What are some easy chili pepper varieties for beginners?
Start with these low-maintenance, fast-growing varieties:
- Jalapeño – Mild heat, prolific producer (60–75 days).
- Shishito – Sweet with occasional heat; great for stir-fries (60 days).
- Cherry Bomb – Tiny but fiery (50–60 days).
- Banana Pepper – Sweet, mild, and versatile (75–80 days).
- Thai Hot – Compact and spicy (70–80 days).
All thrive in warm climates and are disease-resistant!
Wrapping up and next steps
Growing your own chili peppers is a rewarding journey that brings bold flavors and fiery satisfaction straight to your kitchen! With the right seeds, soil, and a little patience, you can transform tiny plants into spicy harvests in just 90 days.
Whether you're a seasoned gardener or a curious beginner, this process connects you to the earth—and the heat—like nothing else.
Ready to take the next step? Start small—plant a few seeds or seedlings this season and watch your confidence (and heat tolerance!) grow. Then, expand your garden, experiment with varieties, or even share your harvest with fellow spice lovers. Your chili adventure begins now—let’s make it spicy! 🌶️🔥