
Pruning
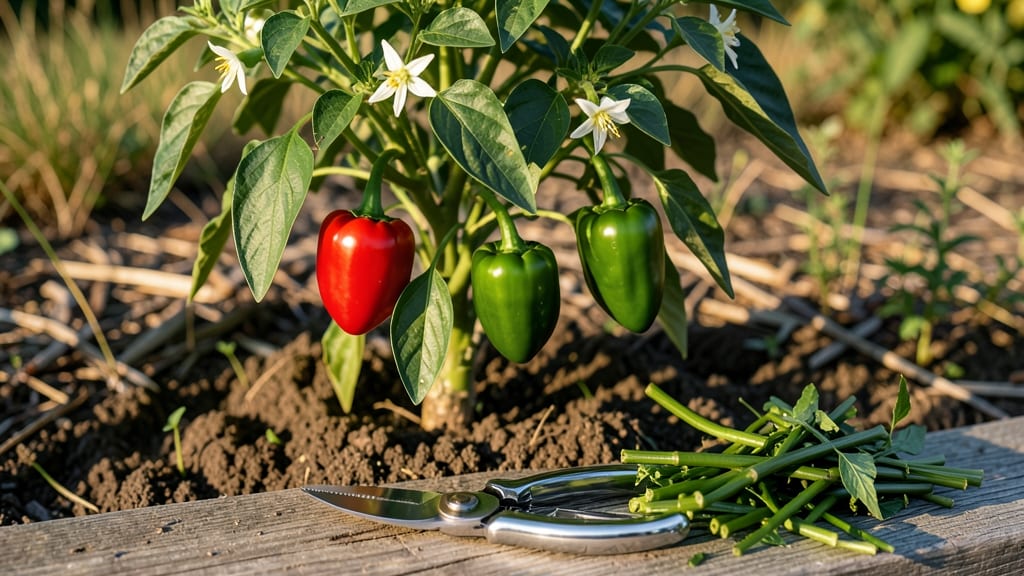
Pruning bell peppers isn't just about trimming—it's about unlocking bushier plants and bigger harvests you didn't know were possible. 🌱 I used to skip it entirely, thinking my peppers would just produce without extra effort. Then I learned the simple cuts that transform a scraggly plant into a fruit-producing powerhouse.
The difference is night and day: more air circulation means fewer diseases, and strategic pruning directs energy where it matters most—into those sweet, thick-walled peppers you'll be snapping off all summer.
You only need three tools: clean pruning shears, a small pair of scissors for finer cuts, and a spray bottle of diluted bleach water to sterilize your blades between cuts.
Timing matters too—wait until plants are at least 12 inches tall and have developed their first few leaves, usually 4-6 weeks after transplanting.
The goal isn't to hack away but to shape the plant: remove suckers (those little shoots in the leaf axils) and any leaves touching the soil to keep everything dry and healthy.
What you'll end up with is a plant that looks like it was designed for maximum production: thicker stems, more branches, and fruit that ripens evenly. The peppers themselves stay cleaner, reducing rot, and you'll notice 20-30% more harvest by midseason.
Even my neighbor's "too-busy-to-garden" friend saw results after trying this—proof it works for anyone willing to make a few precise cuts.
This method adapts to containers, raised beds, or in-ground gardens, and works for all bell pepper varieties—from sweet California Wonder to spicy Jalapeño. The key is consistency: check your plants weekly once they start flowering, and you'll be rewarded with a harvest that keeps coming until frost.
Ready to try it?
📚 In This Guide
- What you need
- Instructions
- Tips and common mistakes
- Wrapping up and next steps
What you need
- ● Bypass pruning shears – Sharp, clean, and sterilized (1 pair, 4-6" blades for precision cuts). Avoid dull tools—they crush stems instead of cleanly snipping!
- ○ Hand pruners or garden shears – For thicker stems (optional but helpful for mature plants). Choose bypass-style to prevent tearing.
- ● Rubbing alcohol (70% or higher) – Small bottle (4-8 oz) for sterilizing tools between cuts (prevents disease spread).
- ● Disposable gloves – Nitrile or latex (1 pair) to protect against thorns and bacteria.
- ○ Garden twine or plant ties – 3-5 ft roll (optional, for supporting pruned branches if needed).
- ● Small bucket or bag – For collecting pruned debris (1 medium-sized container).
- ○ Sharpie or permanent marker – Fine-tip (optional, for marking plants if tracking growth stages).
- ● Healthy bell pepper plants – At least 6-8 weeks old and showing new growth (prune after flowering for best results).
- ● Sunny, dry day – Avoid pruning when soil is wet or plants are stressed (wait for morning or late afternoon).
- ● Basic knowledge of pepper plant anatomy – Familiarize yourself with main stems, suckers, and fruit-bearing branches (a quick Google search helps!).
Step-by-step instructions for pruning bell peppers
Here's how I transform leggy, sparse pepper plants into bushy, fruit-loaded powerhouses—no guesswork involved.
✂️ Step 1: Identify and Remove Suckers for Stronger Growth
Suckers are those small shoots that form in the leaf axils where branches meet the main stem. These energy vampires drain your plant instead of fueling fruit production. I use sharp, sterilized pruning shears to snip them off at the base, just above the leaf. Always cut at a 45-degree angle to prevent water from pooling and rotting the wound.
Start checking for suckers when your plant reaches about 12 inches tall. You'll see them as tiny, upward-growing stems between the main stem and side branches. Remove them weekly—consistent pruning prevents overgrowth and directs energy to existing fruit. If you hesitate, the sucker will grow into a weak branch that steals resources from your peppers.
🌿 Step 2: Prune Lower Leaves to Improve Airflow and Light Penetration
Remove all leaves from the bottom 6-8 inches of the plant stem. This isn't just about aesthetics—it prevents soil-borne diseases like damping-off and improves airflow, which keeps your plant healthier. Use your fingers to gently twist off smaller leaves or your shears for tougher ones. Never tear leaves, as this damages the plant tissue.
Focus on yellowing or diseased leaves first—they're already compromising your plant's health. After pruning, step back and visualize light hitting all sides of the plant. You want the canopy to look open, not dense. If your plant is still leggy after this step, it's getting insufficient light. Move it to a sunnier spot or supplement with a grow light for 14-16 hours daily.
☀️ Step 3: Thin Fruit Clusters to Maximize Size and Quality
When your plant sets fruit, you'll notice clusters of 3-5 peppers forming at each node. Leave only 1-2 of the largest, healthiest peppers per cluster and prune the rest. This might seem counterintuitive, but it forces the plant to invest all its energy into fewer, larger peppers. Use your fingers to gently twist off excess peppers at the stem—no need for shears here.
Watch for peppers that are misshapen or smaller than others in the cluster. These are the first to go. You'll see the remaining peppers swell noticeably within 7-10 days of thinning. If you're growing for commercial purposes, aim for 8-10 ounces per pepper—this level of thinning achieves that. For home gardens, 4-6 ounces is plenty, but the principle remains: fewer peppers mean bigger, sweeter results.
⏰ Step 4: Prune for Shape and Health During the Growing Season
Every 2-3 weeks, do a quick health check of your plant. Look for branches that cross or rub against each other—these create wounds where diseases can enter. Use your shears to trim one of the branches back to a leaf node. Also, remove any branches growing downward or inward, as they block light and airflow. You're sculpting the plant, not just hacking it.
Pay special attention to the top of the plant. If it grows too tall and leggy, pinch off the top 1-2 inches to encourage bushier growth. This is called "topping," and it's a game-changer for compact, productive plants. After pruning, give your plant a light application of balanced fertilizer (like 10-10-10) to support new growth. You'll see new side shoots emerge within 7-10 days—these will bear your next round of fruit.
Tips & tricks for precision bell pepper pruning
These game-changing insights will help you transform your pepper plants into productive, bushy powerhouses without sacrificing a single harvest.
Tool Selection: Sterilize your pruning shears with rubbing alcohol between cuts to prevent spreading disease. I've seen entire pepper plants decline from contaminated tools—don't make my mistake! For suckers, use clean shears to make precise cuts at the base, but for leaves and fruit, your fingers work perfectly to avoid unnecessary damage. The right tool for each job makes all the difference in plant recovery.
Growth Stage Timing: Begin checking for suckers when your plants hit 12 inches—this is when they start diverting energy away from fruit production. In Step 1, I recommend weekly checks because suckers grow rapidly. If you're in a hot climate, you might need to check bi-weekly instead. The key is consistency—once a sucker establishes itself, it's too late to remove it effectively.
Light Optimization: After pruning lower leaves in Step 2, rotate your plants every 2-3 days to ensure even light exposure. This simple habit prevents one-sided growth and ensures all branches receive sunlight. Insufficient light is the #1 reason peppers stay small—your 14-16 hours of daily light exposure should hit all sides of the plant, not just one. Think of it like giving your plant a full-body massage of sunlight.
Post-Pruning Care: After any significant pruning session, water deeply in the evening to help the plant recover. The 7-10 days mentioned for fruit swelling and new growth to appear is your window to monitor for stress signs. Yellowing leaves after pruning? That's normal initially, but if it persists beyond a week, your plant needs more nutrients. A light application of balanced fertilizer (like 10-10-10) after topping helps kickstart new growth—just follow the package instructions for application rates.
Pro Tips for Pruning Bell Peppers
- These game-changing insights will help you transform your pepper plants into productive, bushy powerhouses without sa...
- Tool Selection: Sterilize your pruning shears with rubbing alcohol between cuts to prevent spreading disease. I've se...
- Growth Stage Timing: Begin checking for suckers when your plants hit 12 inches—this is when they start diverting ener...
Frequently asked questions
Got questions about pruning bell peppers? You’re not alone! Here are answers to the most common queries to help you master the art of trimming for a bountiful harvest.
When is the best time to prune bell peppers?
Prune your bell peppers early in the morning when the plants are still cool and hydrated. Avoid pruning during heatwaves or late in the day, as this can stress the plant. Focus on pruning young plants (6-8 inches tall) to encourage bushier growth, and continue light pruning throughout the growing season to remove damaged or overcrowded foliage.
How do I know which parts to prune off my bell pepper plant?
Look for three key areas to prune:
- Suction shoots: Small shoots growing from the main stem or branches—remove these to redirect energy to fruit production.
- Damaged or diseased leaves: Yellow, wilted, or spotted leaves should be trimmed immediately to prevent spread.
- Overcrowded branches: If branches are rubbing together or blocking sunlight, prune back slightly to improve airflow.
Can I prune bell peppers in hot or humid weather?
Pruning in extreme heat or humidity can stress your plants, making them more susceptible to disease. If you must prune during these conditions, do so early in the morning or late afternoon and avoid heavy pruning. Opt for light maintenance like removing only damaged leaves until temperatures stabilize.
Will pruning reduce my bell pepper yield?
Not if done correctly! Pruning encourages a healthier plant with more fruit by improving airflow and sunlight penetration. However, over-pruning (removing more than 25% of the foliage at once) can reduce yields. Focus on strategic trimming—removing only what’s necessary—to keep your plant productive.
What’s an alternative to pruning if I’m not comfortable cutting my plant?
If pruning feels too risky, try these low-maintenance alternatives:
- Thinning: Gently remove smaller peppers to allow the remaining fruit to grow larger.
- Supporting vines: Use stakes or cages to elevate branches and improve airflow naturally.
- Fertilizing: A balanced fertilizer can boost plant health without the need for pruning.
My bell pepper plant looks sad after pruning—what went wrong?
Don’t panic! A few signs of stress are normal, but watch for these red flags:
- Wilting or yellowing: Likely due to shock—water deeply and avoid pruning for a week.
- No new growth: You may have pruned too aggressively. Focus on smaller trims moving forward.
- Pests or mold: Pruning too late in the day can invite issues—always prune early and sterilize tools.
Wrapping up and next steps
Mastering the art of pruning bell peppers is your ticket to a bountiful, healthier harvest—and you’ve got all the tools to make it happen! 🌱 By removing suckers, shaping plants, and timing cuts just right, you’re not just trimming; you’re investing in bigger, tastier peppers.
Now that you’re armed with knowledge, grab those shears and get pruning—your future meals (and bragging rights!) will thank you.
Next step? Start small—pick one plant this week and practice your technique. Before you know it, your garden will be a bell pepper powerhouse! 🚀