
Picking
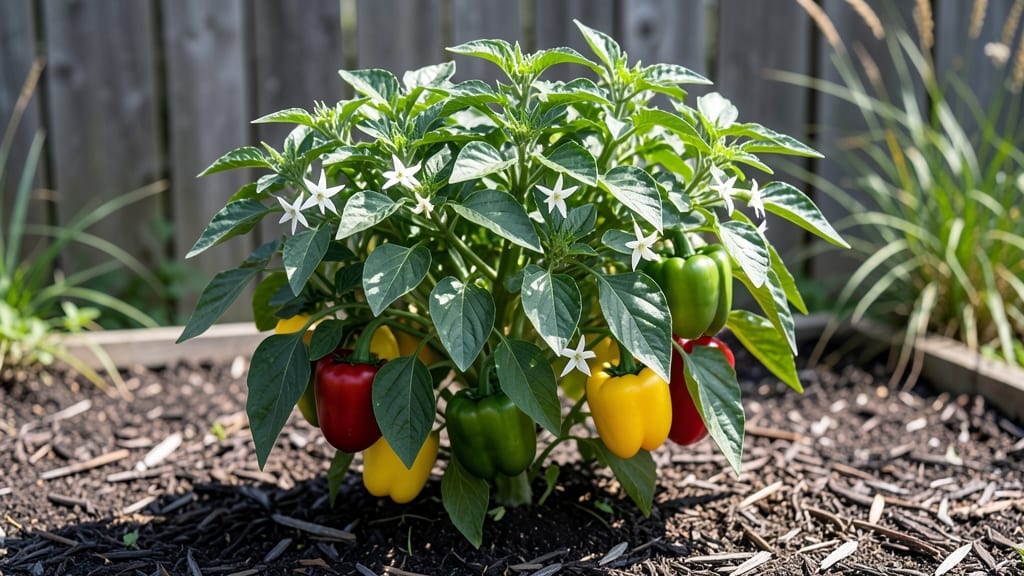
Square foot gardening turns bell peppers into a space-efficient powerhouse. 🌱 I used to think peppers needed acres—until I crammed four plants into a single square foot and harvested 20+ peppers from that tiny patch last summer.
The secret isn’t just spacing; it’s how you prep the soil, pair plants, and manage water in those tight squares.
Start with high-quality potting mix (no garden soil—it compacts) and add compost for nutrients. Plant one pepper per square foot, but use companion plants like basil or marigolds in the same bed to repel pests and attract pollinators.
A 5-gallon bucket of water keeps roots consistently moist without drowning them, and a drip irrigation line makes it effortless. Sunlight is non-negotiable: 6+ hours of direct light daily, or your peppers will bolt or stay small.
By mid-summer, you’ll be snipping glossy, firm peppers straight from the vine—no store-bought blandness here. The key to maximizing yield is pruning (remove suckers) and harvesting regularly (peppers set more fruit when picked young).
Even in small patios or balconies, this method works if you follow the spacing rules. I’ve grown 30+ peppers in a 4’x4’ bed—imagine what you can do!
Troubleshoot blossom-end rot with calcium supplements and aphids by spraying neem oil. The biggest mistake? Overcrowding. Stick to one plant per square (or 4 per square for tiny varieties like ‘Lunchbox’), and you’ll avoid stunted growth.
Ready to turn your tiny space into a pepper paradise? Let’s get those squares planted!
📚 In This Guide
- What you need
- Instructions
- Tips and common mistakes
- Wrapping up and next steps
What you need
- ● Square foot garden box: 4’ x 4’ wooden frame (minimum 6–12" deep) with hardware cloth bottom for pest protection.
- ● High-quality soil: 1 cubic foot of mel’s mix or a blend of 1/3 peat moss, 1/3 vermiculite, and 1/3 composted manure.
- ● Bell pepper seedlings: 1 plant per square foot (9 plants max for a 4’ x 4’ box). Choose disease-resistant varieties like Jupiter or California Wonder.
- ● Organic fertilizer: Slow-release 5-5-5 or composted chicken manure (1 tbsp per square foot).
- ● Mulch: Straw or shredded leaves (2–3" layer) to retain moisture and suppress weeds.
- ● Garden trowel or small shovel for planting.
- ● Watering can with a fine rose (or drip irrigation for precision).
- ● Pruning shears to trim suckers and encourage bushier growth.
- ○ Plant labels (optional but helpful for tracking varieties).
- ○ Row covers (optional, for early-season frost protection).
- ○ Cage or stakes (optional, for larger pepper varieties).
Step-by-Step instructions for square foot gardening bell peppers
Here's how I pack maximum flavor into minimal space—bell peppers thrive with this precise layout.
🌱 Step 1: Prepare Your Square Foot Grid
Divide your raised bed into a 1-foot square grid using string or wooden stakes. Bell peppers need 1 plant per square foot for optimal air circulation and sunlight access. I always mark the center of each square with a small wooden peg to guide planting depth—this ensures roots grow straight down instead of spreading sideways.
Work in high-quality compost mixed with 1 cup of balanced fertilizer (10-10-10) per square foot. Turn the soil with a hand fork until it's loose and crumbly, breaking up any compacted layers. The goal is soil that feels like a damp sponge—light enough for roots to penetrate but still able to hold moisture.
☀️ Step 2: Plant Transplants at the Right Depth
Choose healthy transplants with 4-5 leaves and no signs of disease. Dig a hole in each square just deep enough to bury the plant up to its first set of true leaves—this prevents stem rot while encouraging strong root development. Gently remove the plant from its container and tease the roots apart if they're circling tightly.
Place each pepper plant in its square, then fill the hole with soil until the base is firm. Water immediately with 1 pint of water per plant to settle the soil and eliminate air pockets. I like to use a watering wand for precision—no splashing leaves, which can spread fungal spores. After watering, add 1 inch of mulch around each plant (but not touching stems) to conserve moisture.
💧 Step 3: Maintain Moisture and Fertility
Water deeply every 2-3 days until the top inch of soil feels dry to the touch. Bell peppers are thirsty but hate soggy roots, so I check soil moisture daily during hot spells. The best time to water is in the morning—this gives foliage time to dry before evening, reducing disease risk. You'll see crisp, vibrant leaves when moisture is just right.
Feed plants with ½ cup of liquid fertilizer (20-20-20) every 2 weeks starting when flowers appear. I mix it with water and apply it directly to the soil, not the leaves. Too much nitrogen now will produce lush foliage but few peppers—focus on phosphorus and potassium for fruiting. Watch for yellowing leaves; this usually means it's time to feed again.
✂️ Step 4: Prune and Support for Maximum Yield
Remove any suckers (small shoots forming in the leaf axils) to direct energy toward fruit production. I use clean pruning shears to snip these off at the base—never tear them, which can damage the main stem. Leave the first 2-3 leaves intact to maintain photosynthesis while still encouraging upward growth.
Install small tomato cages or stakes around each plant as peppers begin to form. Gently tie the main stem to the support when it reaches 12 inches tall—this prevents toppling and makes harvesting easier. You'll see heavier fruit set when plants are properly supported, and peppers stay cleaner, reducing rot risk.
🌿 Step 5: Harvest at Peak Ripeness
Pick peppers when they reach full color and firm texture—this encourages more production. Use pruning shears to cut stems cleanly, leaving a small portion attached to the plant. I harvest every 3-4 days during peak season to prevent overcrowding and disease. Store peppers in the fridge for up to 1 week or preserve them immediately for maximum flavor.
After the first frost, pull up remaining plants and compost them (unless disease is present). Clean the grid thoroughly with a 10% bleach solution to prevent soil-borne pathogens from overwintering. Mark your squares for next season—this layout will yield 8-12 peppers per plant when done right.
Tips & tricks for square foot gardening bell peppers
Real talk: Square foot gardening transforms limited space into a pepper powerhouse—but only if you nail these key details.
Soil Prep Secret: In Step 1, don't just mix compost—create a "sponge layer" by adding perlite or coarse sand to your compost mixture. This improves drainage while retaining moisture, which bell peppers crave. I use a 70/30 compost-to-perlite ratio for perfect texture. The pegs marking planting depth are genius too—just ensure they're at least 2 inches deep to accommodate root growth without crowding.
Transplant Technique: When planting in Step 2, gently squeeze the root ball to encourage roots to spread outward. This helps them establish faster in their new square. After placing each plant, press soil firmly around the base to eliminate air pockets—this prevents transplant shock. The 1 pint of water per plant is non-negotiable; it's the only way to ensure full root-to-soil contact immediately.
Watering Wisdom: The 2-3 day watering schedule in Step 3 works perfectly in moderate climates, but adjust for your conditions. In hotter areas, water every 1-2 days and always check soil moisture before watering—bell peppers wilt dramatically when thirsty. Morning watering is critical because it allows foliage to dry completely before evening, which prevents fungal diseases like powdery mildew that can devastate your crop.
Fertilizer Timing: The 2-week feeding schedule in Step 3 is ideal, but watch for these signs: if leaves develop dark green veins with yellow between them, that's phosphorus deficiency—time to feed. For organic growers, fish emulsion works beautifully as a phosphorus-rich fertilizer. And never apply fertilizer when soil is dry—always water first to prevent root burn.
Pro Tips for Square Foot Gardening Bell Peppers
- Real talk: Square foot gardening transforms limited space into a pepper powerhouse—but only if you nail these key details.
- Soil Prep Secret: In Step 1, don't just mix compost—create a "sponge layer" by adding perlite or coarse sand to your compost mixture.
- Transplant Technique: When planting in Step 2, gently squeeze the root ball to encourage roots to spread outward.
Frequently asked questions
Got questions about growing bell peppers in a square foot garden?
You’re not alone! Here are answers to the most common queries to help you grow a thriving, space-efficient harvest.
How many bell pepper plants can I fit in a 1-square-foot square?
For square foot gardening, you can fit 1 bell pepper plant per square foot when using the grid method. Bell peppers need room to spread, so spacing them 12–18 inches apart ensures good airflow and prevents disease. If you’re growing smaller varieties, like 'Mini Bell,' you might squeeze in 2 plants per square—but don’t overcrowd!
When is the best time to plant bell peppers in a square foot garden?
Bell peppers are warm-weather lovers, so wait until after the last frost and soil temps reach at least 60°F (15°C). Start seeds indoors 8–10 weeks before transplanting (usually late winter/early spring) or buy young plants from a nursery. In most climates, May or June is ideal for direct planting.
What’s the easiest way to troubleshoot yellowing leaves on my bell peppers?
Yellowing leaves usually signal overwatering, underwatering, or nutrient issues. Check the soil—it should be moist but not soggy. If the yellowing starts at the bottom, it’s often overwatering or poor drainage. If it’s yellow with brown edges, underwatering or salt buildup may be the culprit. Adjust watering and consider a balanced fertilizer (like 10-10-10) if growth stalls.
Can I grow other peppers (like jalapeños or habaneros) in the same square foot garden?
Hot peppers (jalapeños, habaneros, etc.) thrive in the same conditions
as bell peppers and can share a square foot garden. However, space them 1 plant per square for optimal growth. Just note that hot peppers may produce smaller yields in tight spaces. If you’re short on room, try interplanting with fast-growing greens (like lettuce) in early spring.
How do I protect my bell peppers from pests in a small garden?
Pests like aphids, spider mites, and hornworms love bell peppers! Prevent issues with:
- Row covers (lightweight fabric to deter flying pests).
- Neem oil or insecticidal soap for soft-bodied bugs.
- Handpicking hornworms (they’re easy to spot!).
- Companion planting with basil, marigolds, or onions to repel pests.
Wrapping up and next steps
Square foot gardening is your secret weapon for growing bell peppers in small spaces—proving that big yields don’t need big plots! 🌱 By mastering this method, you’ll enjoy fresh, homegrown peppers all season long, whether you’re a city dweller or just working with limited yard space.
Start small, stay consistent, and watch your tiny garden thrive.
Ready to harvest the rewards? Your next step? Plant a few seeds or seedlings today—then share your progress with fellow gardeners! 🌟 Happy growing!