
Shrubs
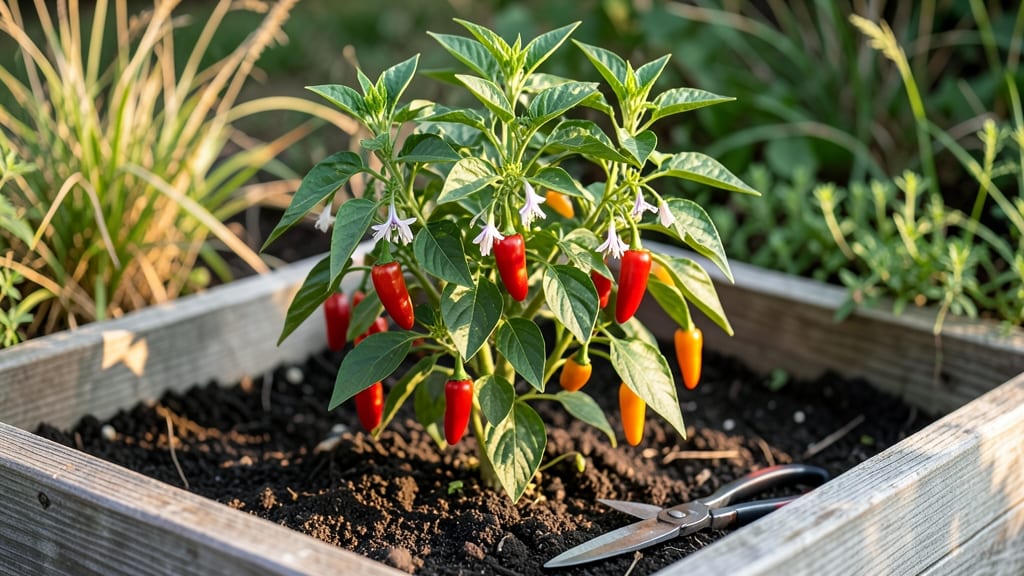
Growing small hot chili peppers like Bird’s Eye or Pequin delivers fiery flavor in tiny packages—perfect for containers, windowsills, or small gardens. 🌶️ I’ve grown these fiery friends for years, and they reward patience with heat levels that put store-bought peppers to shame.
The secret? Mimicking their tropical roots while keeping care simple enough for beginners. These peppers thrive in full sun (6+ hours daily), well-draining soil, and warm temperatures (70-85°F). Start seeds indoors 8-10 weeks before last frost or buy sturdy transplants.
Containers need at least 5-gallon pots with drainage—root-bound plants produce less heat. Water consistently (but never soggy), and fertilize lightly with balanced plant food every 4-6 weeks. Harvest begins when peppers turn red, orange, or stay green—pick regularly to encourage more production.
The first harvest might be small (10-20 peppers per plant), but each one packs serious heat. Dried peppers last months, and fresh ones add zing to salsas, stir-fries, or even cocktails. Don’t let pests or overwatering ruin your harvest.
Watch for aphids (spray with soapy water) and prune leggy growth to focus energy on peppers. With the right care, these compact plants deliver bold flavor in minimal space—ideal for urban gardeners or spice lovers with limited room.
📚 In This Guide
- What you need
- Instructions
- Tips and common mistakes
- Wrapping up and next steps
What you need
- ● Small hot chilli pepper seeds: 5–10 seeds (choose varieties like Thai Bird’s Eye, Habanero, or Carolina Reaper for extra heat!)
- ● Seed-starting mix: 1 small tray (10–12 cell) or 2–3 biodegradable pots (2–3 inches deep)
- ● Growing containers: 5–6 inch pots (1 per plant) or a garden bed with well-draining soil
- ● Organic potting soil: 1 bag (designed for vegetables or peppers)
- ● Spray bottle: For gentle watering (16 oz with a fine mist nozzle)
- ● Grow lights or sunny windowsill: 6+ hours of direct light daily (or a full-spectrum LED grow light)
- ● Fertilizer: Balanced liquid fertilizer (e.g., 10-10-10) or compost tea
- ● Pruning shears: Small, sharp pair for trimming (sterilize with rubbing alcohol!)
- ● Gloves: Nitrile or rubber (chilli peppers can irritate skin!)
- ○ Heat mat (optional): For seed germination (70–85°F range)
- ● Humidity dome: To retain moisture while seeds sprout
- ● Support stakes or cages: For taller varieties (e.g., 12–18 inch stakes)
- ● pH test kit: To monitor soil acidity (ideal: 6.0–6.8)
- ● Insect spray (neem oil): For pest control (pre-mixed spray bottle)
Step-by-step guide for growing thriving small hot chili peppers
Here's how I grow fiery, productive chili plants—whether you're working with seeds or seedlings.
🌱 Step 1: Start with Warm Soil and Plenty of Light
Chili peppers love warmth and need soil temperatures above 70°F to germinate properly. If starting from seed, soak them in warm water for 12 hours first—this softens the outer coating and speeds up sprouting. Fill your containers with well-draining potting mix (avoid garden soil, which can harbor diseases) and plant seeds ¼ inch deep, spacing them 1 inch apart in rows.
Place the containers in a warm spot, like on top of a refrigerator or under a heat mat. Cover with plastic wrap to retain moisture and warmth, but remove it as soon as sprouts appear—usually within 7-14 days. Once seedlings emerge, move them to a sunny window or under grow lights for 14-16 hours daily. Without enough light, seedlings stretch and weaken, making them prone to disease.
☀️ Step 2: Transplant When Strong and Ready
Wait until seedlings have 4-6 true leaves and are at least 4 inches tall before transplanting. Harden them off first by placing them outside in a shaded area for 1-2 hours the first day, gradually increasing exposure over 7-10 days. This helps them adjust to outdoor conditions without shock.
Choose a location with full sun (6+ hours daily) and soil that drains well. If planting in containers, use pots at least 12 inches deep and wide—chilis need room for strong roots. Bury the seedlings slightly deeper than they were in their starter pots, up to the first set of leaves. This encourages stability and prevents them from toppling over later.
💧 Step 3: Water Deeply and Feed Regularly
Chilis hate soggy soil but need consistent moisture. Water deeply once a week, allowing the top 2 inches of soil to dry out between waterings. Overwatering leads to root rot, while underwatering causes blossom-end rot. Use a drip irrigation system or water at the base of the plant to keep leaves dry—this prevents fungal diseases like powdery mildew.
Start fertilizing when flowers appear with a balanced, water-soluble fertilizer (like 10-10-10) diluted to half strength. Feed every 2-3 weeks during the growing season, but reduce feeding in late summer to encourage ripening. Yellowing leaves? You’re overdoing it—flush the soil with water and cut back.
✂️ Step 4: Prune and Support for Maximum Yield
Pinch off the first few flowers that appear to encourage bushier growth. This redirects energy to the plant’s structure, resulting in more branches and fruit later. Once the plant is established, prune any leggy or weak stems to improve airflow and reduce disease risk. Use clean, sharp pruners to avoid damaging the plant.
Stake or cage your chilis early—even small varieties can get top-heavy with fruit. A 5-foot bamboo stake or tomato cage works well. Tie the main stem loosely to the support as it grows to prevent breaking. Remove any suckers (side shoots) that form in the leaf axils unless you’re growing a bushier variety—these divert energy from fruit production.
🌶️ Step 5: Harvest and Encourage More Fruit
Pick peppers when they reach 75% of their mature size for the best flavor and heat. Use clean scissors or fingers to twist them off gently—never pull or you might damage the plant. Harvesting regularly stimulates the plant to produce more fruit. If your chilis stop flowering in hot weather, reduce water slightly and provide afternoon shade to lower stress.
Save seeds from your favorite peppers by fermenting them in a jar of water for 3-5 days, then drying them on a paper towel. Store in a cool, dark place for next year’s crop. As fall approaches, let peppers fully ripen on the plant—they’ll develop deeper color and more intense heat. Once frost threatens, bring potted plants indoors to a sunny window and keep them alive until harvest.
Tips & tricks for perfect small hot chili peppers
Common pitfalls—and how to sidestep every one—when growing fiery, productive chili plants.
Germination Strategy: The 12-hour soak in warm water isn't just about speed—it's about breaking the seed's natural dormancy. I use a small bowl of warm (not hot) water and gently swirl the seeds to ensure they're fully submerged. After soaking, pat them dry with a paper towel before planting. This prevents mold and ensures even moisture distribution in the soil.
Lighting Secret: Those 14-16 hours daily of light aren't negotiable for strong seedlings. If your natural light isn't sufficient, invest in a basic LED grow light—even a 12-inch fluorescent bulb placed 6 inches above seedlings works wonders. I've seen leggy, weak seedlings transform into sturdy plants within days after adding proper lighting. Watch for leaves touching the light source; if they do, you're too close.
Transplanting Technique: When hardening off seedlings, I start with just 1-2 hours in shade on day one, then gradually increase exposure. The key is to mimic outdoor conditions without shocking the plant. On cloudy days, you can extend the hardening period since the sunlight is less intense. Always harden off in the morning—plants have time to recover overnight if stressed.
Fertilizer Wisdom: That 10-10-10 fertilizer should be diluted to half strength—full strength can burn tender chili roots. I mix it with water in a spray bottle for even distribution, focusing on the soil around the base rather than the leaves. During late summer, I switch to a lower-nitrogen fertilizer (like 5-10-10) to encourage ripening rather than leafy growth. The yellowing leaves warning is real—if you see them, flush the soil immediately.
Pro Tips for Small Hot Chilli Pepper
- Common pitfalls—and how to sidestep every one—when growing fiery, productive chili plants.
- Germination Strategy: The 12-hour soak in warm water isn't just about speed—it's about breaking the seed's natural dormancy.
- Lighting Secret: Those 14-16 hours daily of light aren't negotiable for strong seedlings.
Frequently asked questions
about small hot chili peppers—because spice lovers (and gardeners!) always have questions. Here’s what you need to know before diving into these fiery friends.How long does it take for a small hot chili pepper plant to bear fruit?
Most small hot chili varieties, like Thai Bird’s Eye or Habanero, take 60–90 days to produce fruit after transplanting—assuming they’re planted in warm soil (60°F+) and get full sun. Dwarf or container-grown peppers may fruit slightly faster (45–60 days) since they focus energy on production. Patience is key—rushing with fertilizer can delay fruiting!
Can small hot chili peppers survive winter outdoors?
Nope! These tropical divas cannot tolerate frost—even a light freeze (below 32°F) will kill them. If you’re in a cold climate, grow them in containers and move them indoors before the first frost. Overwinter them in a sunny window or under grow lights (6–8 hours/day) with temps above 50°F. Pro tip: Use a heat mat to keep roots cozy!
Why are my small hot chili peppers turning yellow or dropping?
Yellowing leaves or premature fruit drop usually signal stress. Common culprits:
- Underwatering: Soil should stay consistently moist (not soggy). Stick your finger 1 inch deep—if dry, water deeply.
- Overwatering: Root rot is sneaky! Ensure pots have drainage holes and avoid soggy soil.
- Nutrient deficiency: Yellowing between veins? Add a balanced fertilizer (like 10-10-10) every 4–6 weeks.
- Too much heat: If temps exceed 90°F, peppers may drop fruit. Provide afternoon shade in extreme heat.
Are there milder alternatives to small hot chili peppers?
If you love the flavor but not the heat, try these low-scoville small peppers:
For maximum spice, harvest when peppers are fully ripened (color depends on the variety—red, orange, or yellow). However, if you want fresh heat sooner, you can pick them green, though flavor may be less developed. Use sterilized scissors or pruners to snip stems, leaving a tiny bit attached. Pro tip: Wear gloves—those fingers will thank you!
How should I harvest small hot chili peppers for maximum heat?
Wrapping up and next steps
Growing your own small hot chili pepper plants is a rewarding journey that brings bold flavors and fiery excitement to your kitchen! 🌶️ From selecting the right variety to mastering care techniques, every step ensures a thriving harvest.
Whether you're a seasoned gardener or a curious beginner, these tips will help you cultivate heat—and confidence—with ease.
Ready to take the next step? Start small—plant a few seeds or seedlings today and watch your spicy adventure unfold! Share your progress or spice up your favorite dishes with homegrown peppers. Happy growing! 🌱