
Planting
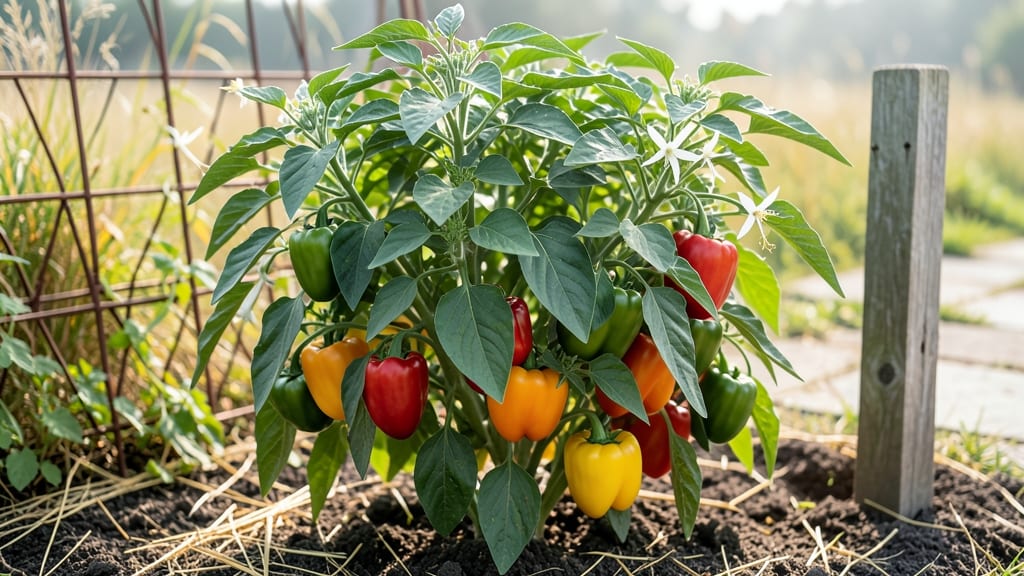
Growing rainbow bell pepper plants transforms your garden into a living rainbow. 🌈 These colorful heirlooms aren’t just pretty—they’re packed with sweet, crisp flavor and produce prolifically when given the right conditions.
My first harvest had me snapping photos of every shade from deep purple to bright yellow, and I’ve been hooked ever since. The secret to their success? Warm soil, consistent moisture, and plenty of sunlight.
Unlike finicky store-bought peppers, these thrive in containers or garden beds as long as they get 6+ hours of direct sun daily and well-draining soil. Even in small spaces, a single plant can yield 20-30 peppers per season if you keep up with watering and fertilization.
You’ll know they’re ready to harvest when the peppers turn their final color and feel firm to the touch. The first pick is always a celebration—nothing beats biting into a pepper that’s still warm from the sun.
With proper care, you’ll enjoy fresh peppers from mid-summer until frost, and saved seeds mean you can grow this vibrant variety forever.
Here’s the thing—rainbow peppers need consistent moisture but hate soggy soil. I learned that the hard way when my first batch developed blossom end rot from uneven watering. A 5-gallon container works well for one plant, and adding compost at planting time gives them a nutrient boost without overfeeding.
Pollination isn’t usually an issue, but if you’re growing indoors, a gentle shake of the plants can encourage fruit set.
Watch for common pests like aphids or spider mites, especially in hot, dry weather. A strong spray of water or neem oil keeps them at bay, and healthy plants resist disease better than stressed ones.
The real magic happens when you see those first tiny bell-shaped peppers—each one a promise of the colorful harvest to come.
📚 In This Guide
- What you need
- Instructions
- Tips and common mistakes
- Wrapping up and next steps
What you need
- ● Rainbow bell pepper seeds – Choose heirloom or hybrid varieties (e.g., 'Rainbow Mix,' 'Colorado,' or 'Lunchbox'). Quantity: 3-5 seeds per container or 1 seed per garden spot (thin seedlings later).
- ● Well-draining potting mix – Opt for a seed-starting mix (for seedlings) or a light, fertile garden soil (amended with compost). Quantity: Enough to fill containers (5+ gallons) or garden beds (12+ inches deep).
- ● Containers (if applicable) – Use 5-gallon pots or larger (minimum 12" diameter) with drainage holes. Quantity: 1 per plant.
- ● Balanced fertilizer – A 10-10-10 or 5-10-10 NPK fertilizer (organic or synthetic). Quantity: Follow label instructions (typically 1 tbsp per gallon of water or per plant).
- ● Mulch – Straw, shredded leaves, or wood chips to retain moisture and suppress weeds.
- ○ Gloves – Protective gardening gloves (optional but recommended).
- ● Trowel or transplanting spade – For digging and planting.
- ● Watering can or hose with a gentle nozzle – Avoid overwatering seedlings.
- ● Plant labels – To track varieties (especially useful for rainbow mixes!).
- ○ Grow lights or sunny windowsill – Optional for seedlings: 12-16 hours of light daily (LED grow lights work well).
- ○ Pruning shears – For trimming excess foliage or deadheading (optional).
- ● Sunlight – Full sun (6-8+ hours daily) for containers or partial shade in hot climates.
- ● Warmth – Soil temperature should be at least 60°F (15°C) for planting (use a soil thermometer if needed).
- ● Patience – Rainbow bell peppers take 70-90 days to mature!
Step-by-step instructions for growing rainbow bell pepper plants
Here's how I grow vibrant, productive rainbow bell peppers—whether in pots or garden beds.
🌱 Step 1: Start Seeds Indoors 8-10 Weeks Before Last Frost
Fill 2-3 inch deep seed starting trays with sterile seed-starting mix. Press the soil down lightly to remove air pockets, then moisten it until damp but not soggy. Plant 1-2 seeds per cell at a depth of ¼ inch—just enough to cover them lightly. I like to use a toothpick to make small holes for precise placement.
Cover the trays with a humidity dome or plastic wrap to retain warmth and moisture. Place them in a warm spot, ideally 75-85°F, which speeds up germination. You'll see sprouts in 7-14 days. Once they emerge, remove the dome immediately to prevent damping-off disease, which can kill seedlings overnight.
☀️ Step 2: Provide Bright Light and Fertilize Seedlings
Move the seedlings under grow lights or to a south-facing window as soon as they sprout. Rainbow bell peppers need 14-16 hours of light daily to grow strong and compact. If you notice leggy seedlings—thin, pale stems reaching toward the light—your light source is too far away. Adjust it to stay 2-4 inches above the plants.
When the first true leaves appear (not the initial cotyledons), fertilize with a balanced liquid fertilizer diluted to half strength. I use a 10-10-10 mix every 2 weeks to encourage steady growth. Keep the soil consistently moist but never waterlogged—let the top inch dry out between waterings.
🪴 Step 3: Transplant Seedlings to Containers or Garden Beds
After 4-6 weeks and when seedlings have 3-4 true leaves, it’s time to transplant. If growing in containers, choose pots at least 12 inches deep and wide—rainbow bell peppers need room to spread their roots. Fill the pots with well-draining potting mix and dig a hole twice as wide as the root ball but the same depth.
Gently remove the seedlings from their trays, being careful not to disturb the roots. Place them in the prepared holes and firm the soil around the base. Water deeply to settle the roots and encourage new growth. If transplanting outdoors, wait until nighttime temperatures stay above 55°F—peppers are sensitive to cold and won’t thrive in cooler conditions.
✂️ Step 4: Prune and Support for Maximum Yield
Once the plants reach 12-18 inches tall, pinch off the tips of the main stems to encourage bushier growth. This helps the plant focus energy on producing more branches and flowers. I also remove any suckers—those small shoots that grow in the leaf axils—unless you’re growing a bush-type variety, as they can divert energy from fruit production.
Use cages or stakes to support the plants as they grow. Rainbow bell peppers can get heavy with fruit, so providing support prevents stems from snapping. Mulch around the base with 2-3 inches of organic mulch to retain moisture, suppress weeds, and keep roots cool. Water at the base in the morning to avoid wetting the leaves, which can lead to fungal diseases.
🌿 Step 5: Harvest and Encourage Continuous Production
Rainbow bell peppers are ready to harvest when they reach their full color and are firm to the touch. I pick them in the morning when the skin is cool and crisp. Use pruning shears to cut the stem, leaving a small portion attached to encourage more fruit to grow in its place.
After harvesting, fertilize the plants again with a low-nitrogen, high-phosphorus fertilizer to promote flowering and fruiting. Keep the soil consistently moist but not waterlogged, and continue pruning to remove any dead or diseased leaves. With proper care, your rainbow bell pepper plants will keep producing vibrant peppers all season long!
Tips & tricks for perfect rainbow bell pepper plants
Took me a while to figure these out, so here's what actually works for growing rainbow bell peppers that burst with color and flavor.
Germination Warmth: Place your seed trays on a heating mat set to 75-85°F for faster germination. I've seen sprouts appear in just 5-7 days when using this method, rather than waiting for the full 7-14 days. The consistent warmth mimics tropical conditions where these peppers originated. Just make sure the soil stays damp but not soggy during this critical phase.
Lighting Strategy: If using grow lights, position them 2-4 inches above the seedlings and use a timer for those 14-16 hours of light daily. I've found that LED grow lights are most energy-efficient, but fluorescent lights work too. The key is maintaining consistent light intensity—if you notice seedlings stretching toward the light, they need to be closer. Rotate the trays daily for even growth.
Transplanting Timing: Wait until nighttime temperatures consistently stay above 55°F before transplanting outdoors. I've learned this the hard way—cold snaps can shock the plants and stunt their growth. For container gardening, use pots with drainage holes and saucers to catch excess water. The 12-inch depth requirement is non-negotiable for these peppers to develop strong root systems.
Pruning Precision: When pinching off the main stem tips at 12-18 inches, leave about 1/4 inch of growth above a leaf node. This encourages branching while maintaining the plant's natural growth pattern. For suckers, remove them when they're about 2 inches long—this prevents energy drain from fruit production. I always use clean pruners to avoid introducing diseases.
Pro Tips for Rainbow Bell Pepper Plant
- Took me a while to figure these out, so here's what actually works for growing rainbow bell peppers that burst with c...
- Germination Warmth: Place your seed trays on a heating mat set to 75-85°F for faster germination. I've seen sprouts a...
- Lighting Strategy: If using grow lights, position them 2-4 inches above the seedlings and use a timer for those 14-16...
Frequently asked questions
Got questions about growing rainbow bell pepper plants?
You’re not alone! Here are answers to the most common queries to help you grow vibrant, colorful peppers with ease.
How long does it take for rainbow bell pepper plants to produce fruit?
Rainbow bell pepper plants typically take 60–90 days from transplanting to harvest, depending on the variety and growing conditions. Early-maturing types (like ‘Rainbow’ or ‘Colorado’) may fruit sooner, while heirlooms can take longer. Pro tip: Ensure consistent warmth (above 60°F) and full sun to speed up fruiting!
How often should I water rainbow bell pepper plants?
Water deeply 1–2 times per week, aiming for 1–1.5 inches of water per week. Avoid wetting leaves to prevent disease—use drip irrigation or soaker hoses instead. Watch for: Drooping leaves (underwatering) or yellowing (overwatering). Mulch helps retain moisture!
Can rainbow bell peppers grow in containers, and what size pot do they need?
Rainbow bell peppers thrive in containers as long as the pot is at least 12–18 inches deep and wide, with drainage holes. Use a well-draining potting mix and fertilize every 2–3 weeks. Bonus: Containers let you move plants to optimize sunlight or protect from pests!
What are common pests for rainbow bell pepper plants, and how do I treat them?
Watch for aphids, spider mites, and hornworms. For mild infestations, spray with neem oil or insecticidal soap. Preventative tip: Introduce beneficial insects like ladybugs or lacewings. Remove damaged leaves promptly to stop spread.
Why aren’t my rainbow bell peppers changing color?
Color development slows if peppers are harvested too early or lack sunlight. Ensure they get 6+ hours of direct sun daily and wait until fully ripe (colors deepen naturally). Fun fact: Some varieties (like ‘Rainbow’ F1) mature faster—check seed packets for specifics!
Wrapping up and next steps
Growing rainbow bell pepper plants is a rewarding journey that brings vibrant colors, fresh flavors, and a sense of accomplishment to your garden or container. Whether you’re a seasoned gardener or just starting out, these versatile plants thrive with the right care—sunlight, well-draining soil, and patience. 🌈
Now that you’re armed with tips and answers to common questions, it’s time to roll up your sleeves and plant! Start small if you’re new, or expand your harvest for a bounty of sweet, crunchy peppers to enjoy all season.
Happy growing—your future meals (and Instagram-worthy plants!) will thank you. 🌱