Picking
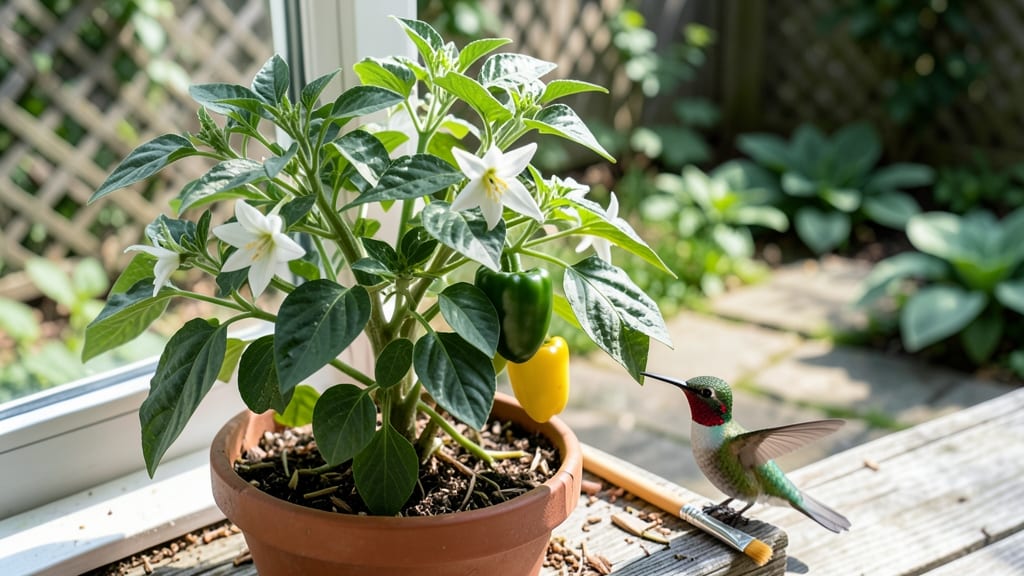
Pollinating bell peppers isn't just a gardening trick—it's the secret to turning every flower into a plump, glossy fruit. 🌱 I learned this the hard way after watching my pepper plants bloom beautifully but produce almost nothing.
The solution? A simple, gentle brush method that works even when bees stay away.
You only need two things: a small paintbrush or cotton swab, and a calm morning when flowers are fresh. The best time to pollinate is between 8 AM and 10 AM, when pollen is most active.
Gently tap the center of each flower with your brush—this transfers pollen from male to female parts, triggering fruit development.
Successful pollination shows up in 3-5 days as tiny bumps where the fruit will form. A well-pollinated pepper plant can produce 2-3 times more fruit than one left to chance. The key is consistency: check flowers every 2-3 days during peak blooming season.
Even in small spaces or containers, this method works—no special tools or fancy techniques required. Just a little attention and your pepper plants will reward you with a bountiful harvest. Here's how to do it right the first time.
📚 In This Guide
- What you need
- Instructions
- Tips and common mistakes
- Wrapping up and next steps
What you need
- ● Bell pepper plants – Healthy, flowering plants (preferably in the morning when blooms are open).
- ● Soft-bristle paintbrush (or a clean, dry cotton swab) – Avoid stiff brushes to protect delicate flowers.
- ○ Water spray bottle – For light misting (optional but helpful for humidity-sensitive blooms).
- ● Notebook & pen – To track pollinated flowers and monitor progress.
- ● Hand lens/magnifying glass – To inspect flowers for pollen or pests.
- ● Fine-mist sprayer – For post-pollination hydration if blooms seem dry.
- ● Gloves – If you’re sensitive to plant sap or working with multiple varieties.
- ● Timer – To ensure you spend just 2–3 minutes per plant (over-pollination can stress flowers!).
Step-by-step instructions for hand-pollinating bell peppers
Here's the simple method I use to boost pepper production—no fancy tools, just a soft touch.
🌿 Step 1: Identify Flowers Ready for Pollination
Focus on healthy, open flowers with fully exposed stamens (the male parts) and pistils (the central female cone). The best time to pollinate is mid-morning when flowers are freshest and humidity is low. Look for flowers that have been open for 24-48 hours—they'll have vibrant petals and no visible signs of wilting.
Gently shake the plant first—sometimes the wind does the job. If no pollen falls, you'll need to assist. I always check the underside of the flower for tiny yellow pollen grains clinging to the stamens. These are your cues that the flower is ready for manual pollination.
✂️ Step 2: Gather a Soft Brush or Cotton Swab
Use the small paintbrush or cotton swab to collect pollen. Gently tap the brush against the stamens of one flower until you see yellow dust clinging to the bristles. Avoid pressing too hard—you want to dislodge pollen, not damage the flower. I like to work with 2-3 flowers at a time to maintain consistency in pollen transfer.
If your brush isn't available, a clean fingertip works in a pinch. Just be sure to wash your hands between plants to prevent cross-contamination. The goal is to mimic natural pollen distribution while ensuring every flower gets a chance to set fruit.
🌱 Step 3: Transfer Pollen to the Pistil
Take the pollen-laden brush and lightly touch the central pistil of another flower. The pistil is the green, cone-shaped structure in the center. Gently drag the brush upward from the base to the tip, ensuring pollen coats the entire surface. You'll see a fine yellow dusting—this is your confirmation that pollination has occurred.
I repeat this process for 3-5 flowers per plant to maximize fruit set. Avoid over-pollinating one flower, as excess pollen can lead to poor fruit development. Focus on flowers that are fully open and show no signs of stress or pest damage.
☀️ Step 4: Monitor Flowers for Fruit Development
After pollination, watch for the flower to wilt and drop within 2-3 days. This is normal and indicates successful fertilization. The area where the flower was attached will begin to swell into a small pepper within 7-10 days. I keep a notebook to track which flowers I pollinated so I can monitor progress.
If a flower doesn't wilt or drop, it may not have been pollinated effectively. In this case, I repeat the process the following day. Consistent pollination is key—especially in low-humidity or indoor growing conditions where natural pollinators are absent.
💧 Step 5: Support Fruit Development with Care
Once fruit begins to form, ensure the plant receives consistent watering—keep the soil evenly moist but not soggy. I water at the base in the morning to prevent fungal issues. Fertilize with a balanced, water-soluble fertilizer every 2-3 weeks to support fruit growth, but avoid over-fertilizing, which can lead to bitter peppers.
Prune any suckers or excess foliage to direct the plant's energy toward fruit development. I also provide support stakes for taller plants to prevent breakage as peppers grow heavy. With proper care, you'll see mature peppers ready for harvest in 60-90 days, depending on the variety.
Tips & tricks for hand-pollinating bell peppers
These subtle techniques will help you maximize fruit set without stressing your plants.
Timing Secret: The 24-48 hour window for flower readiness is your golden opportunity. I've found that flowers pollinated in the morning hours (before 10 AM) yield the highest success rates because humidity is typically lower, allowing pollen to adhere better to the pistils. If you're working with multiple plants, prioritize the freshest flowers first—those with fully unfurled petals and no visible wilting.
Tool Technique: When using a paintbrush, I've learned that a gentle "dab-and-drag" motion works better than pressing directly on the stamens. The goal is to create a fine dusting of pollen on the brush bristles—think of it like dusting powder rather than applying foundation. For cotton swabs, twist the tip gently against the stamens to collect pollen without damaging the delicate structures. Remember, you're mimicking nature's wind pollination, so be as light as possible.
Visual Confirmation: After transferring pollen to the pistil, look for a faint yellow dusting that should appear along the entire length of the central cone. This visual cue confirms successful pollination. I've noticed that sometimes the dusting is so light it's barely visible—don't be discouraged if it's subtle. The key is consistency: repeat the process for 3-5 flowers per plant to ensure adequate fruit development across your harvest.
Post-Pollination Care: The 2-3 day wilting period is crucial for tracking success. I keep a small notebook by my growing area to record which flowers I pollinated and when. This helps me monitor progress and identify any flowers that might need a second attempt. During this time, avoid shaking the plants or disturbing the area where the flowers were attached—this prevents accidental dislodging of the developing fruit.
Pro Tips for Pollinate Bell Peppers
- These subtle techniques will help you maximize fruit set without stressing your plants.
- Timing Secret: The 24-48 hour window for flower readiness is your golden opportunity.
- Tool Technique: When using a paintbrush, I've learned that a gentle "dab-and-drag" motion works better than pressing directly on the stamens.
Frequently asked questions
Got questions about pollinating bell peppers? You’re not alone! Here are some of the most common concerns—and straightforward answers—to help you grow a bountiful harvest.
How do I know if my bell peppers need pollination?
If your pepper flowers aren’t producing fruit, they likely need pollination. Look for open flowers that haven’t developed into peppers after 3–5 days. Pro tip: Flowers that drop without forming fruit are a clear sign to step in!
When is the best time of day to pollinate bell peppers?
Pollinate in the morning when flowers are fully open and humidity is low. This reduces the risk of mold and ensures bees (or your brush) can work efficiently. Avoid midday heat or evening dampness—ideal conditions are key!
Can I pollinate bell peppers without bees or a brush?
Yes! If you’re growing indoors or lack bees, try gentle tapping the flower stems or using a small fan on low speed near the plants. Just avoid overdoing it—bell peppers thrive on light, natural pollination.
Why aren’t my pollinated flowers turning into peppers?
Several factors could be at play: temperature extremes (below 55°F or above 90°F), poor nutrition (lack of phosphorus/potassium), or pests/disease damaging flowers. Check for wilted blooms or signs of stress—adjust care and repollinate if needed!
Does pollinating bell peppers work in all climates?
Yes, but timing matters! In hot climates, pollinate early to avoid flower drop. In cool climates, wait until mornings are warm (above 60°F) to prevent stunted growth. Container growers may need extra attention—keep plants healthy and pollinate consistently!
Wrapping up and next steps
You’ve got the tools—and now you’ve got the know-how! 🌱 Pollinating bell peppers is simple once you understand the gentle brush method, and soon you’ll be rewarded with bountiful harvests of sweet, vibrant peppers.
Whether you’re a seasoned gardener or just starting out, every little effort makes a difference in your garden’s success.
Ready to take the next step? Monitor your plants daily for signs of pollination (like tiny white flowers turning into buds) and keep up the care they need. Happy gardening—your future meals (and bragging rights!) are waiting. 😊