Planting
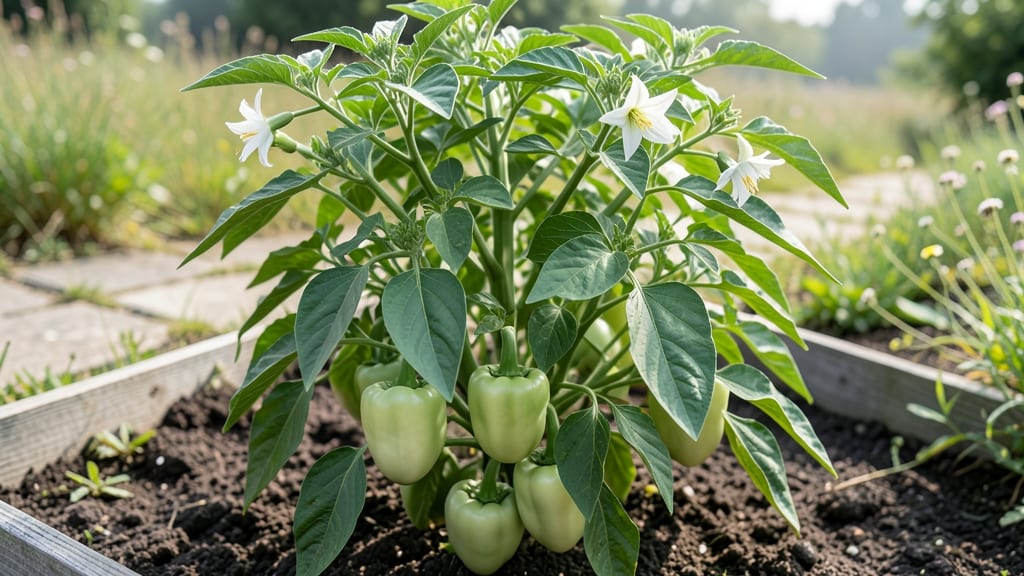
Your green pepper plants need fast root establishment—and the secret lies in heat zones and timing. 🌱 I’ve learned the hard way that planting too early in cool soil means weak roots and stunted growth, while waiting too long cuts the harvest short.
The right timing turns a gamble into a guaranteed harvest.
Start seeds indoors 8-10 weeks before your last frost, using well-draining soil and bottom heat (around 70°F). Once soil warms to 60°F+, transplant seedlings outdoors—roots establish best when daytime temps stay above 75°F.
Varieties like bell peppers thrive in zones 9-11 year-round, but cooler climates need early starts or season extenders.
Keep soil consistently moist (not soggy) and mulch to retain heat—this speeds root growth and prevents blossom-end rot. Within 2-3 weeks, you’ll see sturdy plants ready to produce. The payoff? A longer harvest window and peppers that taste sweeter and fresher than store-bought.
For beginners, focus on morning sun and evening shade in hot zones to avoid stress. Troubleshoot slow starts with a soil thermometer—cool roots mean weak plants. With the right timing, you’ll go from seed to harvest in 60-90 days, even in less-than-ideal climates.
📚 In This Guide
- What you need
- Instructions
- Tips and common mistakes
- Wrapping up and next steps
What you need
- ● Seeds or seedlings: Green pepper seeds (e.g., Bell Pepper, Jalapeño, Banana Pepper), 5–10 per pot or 1 lb for direct sowing.
- ● OR Healthy seedlings (transplant-ready, 4–6 weeks old).
- ● Soil: Well-draining potting mix (sterile, peat-based or coco coir blend) or garden soil amended with 50% compost.
- ● Containers: Seed-starting trays (72-cell) or 4–6" pots for seedlings.
- ● 5-gallon pots or raised beds (minimum 12" deep) for mature plants.
- ● Fertilizer: Balanced starter fertilizer (5-5-5 or 10-10-10, 1 tbsp per gallon of water).
- ● Slow-release organic fertilizer (e.g., fish emulsion or worm castings, 2–3 tbsp per plant).
- ○ Heat Mat (Optional but Recommended): Electric seedling heat mat (70–80°F range) for indoor starts.
- ● Planting tools: Small hand trowel, pruning shears, and a spray bottle (for misting).
- ● Grow lights: LED grow lights (12–16 hrs/day) or a sunny south-facing window for seedlings.
- ● Mulch: Straw or black plastic mulch to retain soil warmth (critical for heat zones <7!).
- ● pH Test Kit: To ensure soil pH is 6.0–6.8 (peppers love slightly acidic soil!).
- ○ Support Structures (Optional): Stakes or cages for indeterminate varieties (e.g., Banana Peppers).
- ● Heat Zone Compatibility: Green peppers thrive in zones 8–10 year-round. For cooler zones (<7), use row covers or grow indoors.
- ● Last Frost Date: Wait until soil temps reach 55°F+ (peppers hate cold!).
- ● Sunlight: 6–8+ hours of direct sunlight daily (no compromise!).
Instructions for establishing green pepper plants in heat zones
Here's how to get your peppers rooted quickly and thriving through every season.
🌱 Step 1: Select the Right Transplant Timing for Your Heat Zone
Peppers thrive when soil temperatures stay above 60°F—this is your first critical checkpoint. In heat zones 8-10, plant after your last frost when nighttime temperatures consistently stay above 55°F. For zones 6-7, wait until soil warms to 65°F before transplanting, usually 2-3 weeks after your last frost date.
I always check soil temperature with a soil thermometer at midday. If it’s cooler than 60°F, delay planting—peppers won’t establish roots properly in cold soil. In zones 11-12, you can plant as early as February if you use shade cloth to protect young plants from intense afternoon sun.
☀️ Step 2: Prepare the Planting Site for Fast Root Growth
Peppers need full sun (6-8 hours daily) and well-draining soil to avoid root rot. Work 2-3 inches of compost into the top 6 inches of soil before planting. This improves drainage and provides nutrients for rapid root establishment. If your soil is heavy clay, mix in sand or perlite to loosen it.
Dig a hole twice as wide as the pepper’s root ball but only as deep as the container it came in. This prevents burying the stem too deep, which can cause disease. Gently remove the plant from its container and tease the roots outward if they’re circling. Place the pepper in the hole so the top of the root ball sits just below soil level. Real talk: Don’t plant too deep—you’ll smother the stem and slow growth.
💧 Step 3: Water Deeply and Maintain Moisture for Root Development
After planting, water deeply (1-1.5 gallons per plant) to settle the soil and eliminate air pockets around the roots. Peppers need consistent moisture—never let the soil dry out completely, but avoid soggy conditions. Water at the base of the plant in the morning to reduce evaporation and fungal risks.
Here’s the thing—peppers establish roots fastest when soil stays evenly moist. Use drip irrigation or soaker hoses to deliver water slowly at the root zone. If you’re using a sprinkler, water early in the day so foliage has time to dry. You’ll know moisture is right when the top 1-2 inches of soil feel damp but not wet—stick your finger in to check.
✂️ Step 4: Protect Young Plants and Encourage Bushy Growth
For the first 2-3 weeks, shield young peppers from direct afternoon sun in hot zones (use shade cloth or row covers). This prevents stress while roots establish. Once plants show new leaves (true growth, not seed leaves), gradually remove shade to harden them off.
Pinch off the first flower buds if your goal is fast foliage growth. Peppers focus energy on fruit production, and removing early flowers lets the plant build a stronger root system and bushier structure. I also side-dress with balanced fertilizer (10-10-10) after 4-6 weeks to support rapid growth—just sprinkle it around the base and water it in.
🪴 Step 5: Monitor and Adjust for Year-Round Success
In heat zones 9-10, peppers grow year-round. After the first harvest, trim spent plants back by one-third to encourage new growth. In zones 6-8, mulch heavily with straw or wood chips to insulate roots in winter. Remove mulch in early spring to warm the soil for planting.
Watch for yellowing leaves—this usually means overwatering or nutrient deficiency. If leaves curl, your plant may be too hot; provide afternoon shade until roots catch up. Peppers are fast growers, so you’ll see new leaves and flowers in 4-6 weeks if conditions are right. This is the moment that matters: a strong root system means bigger yields and fewer pests.
Tips & tricks for perfect green pepper plant establishment
These pro moves will help your peppers take root faster and thrive through every heat zone challenge.
Soil Temperature is Non-Negotiable: The 60°F soil temperature threshold isn't just a guideline—it's the minimum for root development. I learned this the hard way when my peppers in zone 7 struggled for weeks in 58°F soil. Use a soil thermometer at midday for accuracy, and consider black plastic mulch to warm soil 5-10°F faster in cooler zones. This simple step cuts your establishment time nearly in half.
Root Ball Prep Makes All the Difference: When teasing roots outward in Step 2, focus on the outer third of the root ball—these are the most responsive roots. I also recommend soaking the root ball in water for 10-15 minutes before planting to hydrate the roots without oversaturating the soil. This hydration jumpstart helps peppers in zones 11-12 avoid transplant shock from intense dry heat.
Watering Strategy for Zone-Specific Success: The 1-1.5 gallons per plant rule works, but delivery matters more. In zones 8-10, I use drip irrigation on a timer for 15 minutes twice daily—this maintains that critical even moisture without soggy soil. For zones 6-7, morning watering is essential to prevent fungal issues from overnight dampness. Always check that top 1-2 inches of soil—this is your moisture gauge.
Shade Timing is an Art: Those 2-3 weeks of afternoon shade protection in Step 4 should align with your local heat patterns. In zone 10, I start with 30% shade cloth and remove it gradually over 10 days. In zone 6, I extend the shade period to 4 weeks until nighttime temperatures consistently stay above 60°F. Watch for the first true leaves—this is your cue to begin hardening off.
Pro Tips for Green Pepper Plant
- These pro moves will help your peppers take root faster and thrive through every heat zone challenge.
- Soil Temperature is Non-Negotiable: The 60°F soil temperature threshold isn't just a guideline—it's the minimum for root development.
- Root Ball Prep Makes All the Difference: When teasing roots outward in Step 2, focus on the outer third of the root ball—these are the most responsive roots.
Frequently asked questions
Got questions about growing your own green pepper plants? You’re not alone! Here are some of the most common queries—plus quick, actionable answers to keep your peppers thriving year-round.
How long does it take for green pepper plants to establish roots after transplanting?
With the right heat zone conditions (70–85°F), your green pepper plants typically establish roots in 1–2 weeks. For faster results, soak roots in water before planting and use a mycorrhizal fungi boost. Mulch lightly to retain moisture and warmth—this helps roots spread deeper within 3–4 weeks.
Can green pepper plants survive winter in cooler climates?
Green peppers are tender perennials and won’t survive frost (<32°F). In cooler zones (USDA 8+), grow them as annuals or use containers to move indoors when temps drop. For year-round harvests, start new plants in late winter under grow lights or in a greenhouse.
Why are my green pepper leaves turning yellow, even with plenty of water?
Yellowing leaves often signal overwatering or nutrient deficiencies. Check soil moisture—peppers prefer consistently moist but well-drained soil. Test for nitrogen or magnesium deficiency (yellowing between veins) and amend with compost or Epsom salt. Pests like aphids can also cause stress—spray with neem oil if needed.
Are there any low-maintenance alternatives to traditional green pepper plants?
Yes! Try shishito peppers (mild, prolific) or jalapeños (disease-resistant). For minimal effort, opt for dwarf varieties like ‘Snackable’ or grow in hanging baskets to save space. Self-pollinating types (like ‘Carolina Wonder’) reduce hand-pollination hassles.
How do I revive a green pepper plant that’s struggling in extreme heat?
Extreme heat (>95°F) can shock peppers. Immediate fixes:
- Provide afternoon shade with shade cloth (30–50%).
- Mulch heavily to cool roots and retain moisture.
- Water deeply at dawn (avoid wetting leaves to prevent disease).
- Fertilize lightly with potassium-rich feed (like banana peel tea) to boost heat tolerance.
Wrapping up and next steps
Growing a thriving green pepper plant is all about timing, patience, and the right conditions!
By understanding your heat zone timeline—whether you’re planting in spring, summer, or even extending the season with containers—you’ll give your peppers the best start for fast root establishment and year-round harvests. 🌱 Whether you’re a beginner or a seasoned gardener, these insights will help you cultivate healthy, productive plants with minimal stress.
Ready to take the next step? Start small: Try planting just 2-3 peppers in containers this season to test your heat zone’s success. Then, expand your garden with confidence—your future harvests (and taste buds!) will thank you! 🌶️