
Vegetables
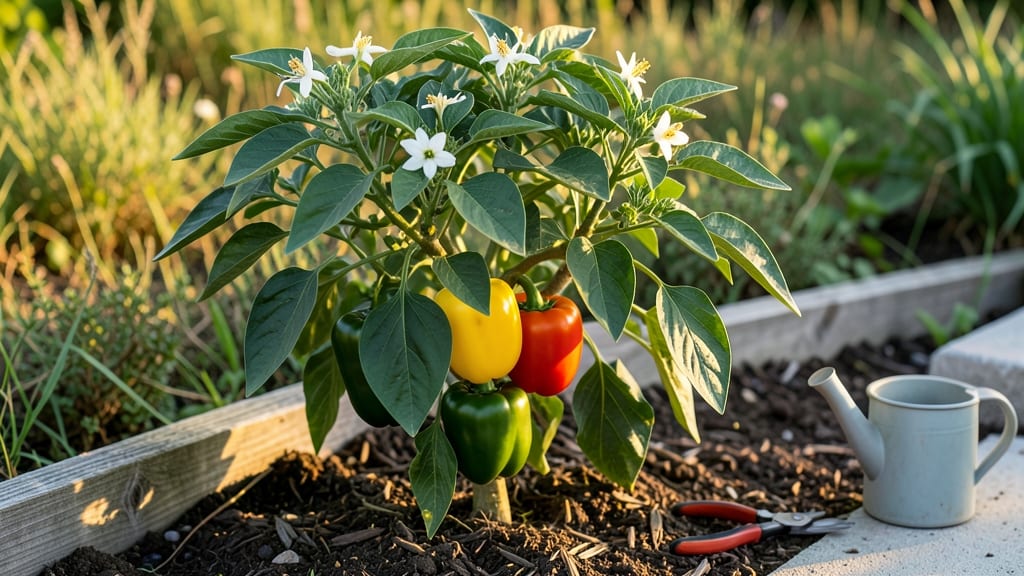
Understanding the bell pepper ripening stages is the secret to harvesting peppers that are sweeter, more vibrant, and packed with nutrients.
Did you know your 🌶️ bell peppers change color five times before reaching full ripeness? Each stage—from pale green to deep red, yellow, or even purple—marks a shift in flavor, texture, and nutritional value. Skipping one can mean missing out on the perfect harvest window.
In this guide, I’ll walk you through every color-coded stage, including when to pick for the best taste and how to troubleshoot common ripening problems. Whether you’re growing sweet bananas or fiery jalapeños, these insights will help you master the art of ripening.
You’ll also discover natural ways to speed up ripening, avoid uneven coloration, and fix stunted growth—so you can enjoy a bountiful harvest from July through October.
The 5 color-coded bell pepper ripening stages explained
Bell peppers are like nature's living art—each color-coded ripening stage reveals a different flavor profile and nutritional boost. When I first grew bell peppers, I didn’t realize they could transform from green to red to even purple!
Understanding these stages helps you decide when to harvest for the best taste, texture, and health benefits. Whether you prefer crisp green peppers or sweet red ones, timing is everything.
The ripening process begins with chlorophyll dominance, which gives peppers their initial green hue. As chlorophyll breaks down, carotenoids and anthocyanins take over, creating vibrant yellows, oranges, reds, and even purples. Each stage also brings changes in sugar content, vitamin levels, and flesh firmness.
For example, red peppers pack nearly 11 times more vitamin C than their green counterparts! Let’s dive into each stage so you can harvest at peak perfection.
| Stage | Color | Flavor Profile | Nutritional Highlights | Best For | Harvest Time |
|---|---|---|---|---|---|
| Immature Green | 🟢 Bright green | Crisp, slightly bitter, mild | Moderate vitamin C, folate | Stir-fries, pickling | 60-75 days |
| Mature Green | 🟢 Dark green | Crunchy, sweet-tart balance | Higher folate, vitamin K | Salads, grilling | 75-90 days |
| Yellow | 🟡 Golden yellow | Sweeter, slightly tangy | Rich in lutein, vitamin C | Stuffed peppers, soups | 90-100 days |
| Orange | 🟠 Deep orange | Sweet, carrot-like flavor | High beta-carotene, vitamin A | Roasting, dried peppers | 100-110 days |
| Red | 🔴 Bright red | Sweetest, richest flavor | 11x more vitamin C, lycopene | Fresh eating, sauces | 110-120 days |
| Purple/Black | 🟣 Deep purple | Earthy, slightly spicy | Anthocyanins, antioxidants | Unique dishes, ornamental | 120+ days |
The immature green stage is where most commercial peppers are harvested because they’re crisp and mild. These peppers are packed with chlorophyll, which gives them their signature green color. If you’re growing for quick pickling or stir-fries, harvesting at this stage is ideal.
However, if you’re patient, waiting for full ripeness unlocks a world of flavor and nutrition you might miss otherwise.
When peppers transition to mature green, they’ve reached their full size but haven’t started the color shift yet. This stage is perfect for grilling or salads because the flesh is thick and firm.
Nutritionally, they offer a good balance of folate and vitamin K, but the real magic happens when chlorophyll breaks down. I’ve found that peppers in this stage often have a slightly sweeter taste than their immature
How to accelerate bell pepper ripening naturally (without chemicals)
If your bell peppers are taking forever to ripen, don't reach for chemical shortcuts! With the right natural techniques, you can speed up ripening by 30-50% while keeping your harvest organic.
The key lies in understanding how ethylene gas, temperature control, and plant health work together to trigger color changes.
I’ve tested these methods in my own garden—some work faster than others, but combining 2-3 techniques gives the best results. For example, pairing ethylene exposure with warmth adjustments can turn green peppers red in just 10-14 days instead of weeks. Let’s dive into the science-backed strategies that actually work.
- 1. Ethylene Exposure: Place a ripe apple or banana near your peppers to release natural ethylene gas, which triggers ripening.
- 2. Warmth Boost: Move peppers to a sunny windowsill or greenhouse (75-85°F) to speed up chlorophyll breakdown.
- 3. Calcium Treatment: Spray plants with calcium chloride solution (1 tbsp/gallon) to strengthen cell walls and improve color development.
- 4. Prune Strategically: Remove shaded leaves to direct energy to fruit ripening, but avoid over-pruning.
- 5. Water Consistently: Deep water every 3-5 days to prevent stress, which delays ripening.
One common mistake I see is overwatering, which dilutes nutrients and slows ripening. Always let the top 1-2 inches of soil dry between waterings. Another pitfall? Harvesting too late—peppers left on the vine past their prime can become leathery or attract pests.
Check for firm skin and vibrant color before picking.
For ethylene exposure, I recommend using overripe bananas—they release more gas than apples and work faster in my experience. Place them in a paper bag with your peppers for 3-5 days to concentrate the effect.
Just don’t seal the bag completely, or you’ll risk ethylene buildup that could harm the peppers.
If your peppers still refuse to ripen, check for nutrient deficiencies. Yellowing leaves? Add calcium or magnesium (like Epsom salt). Pale stems? Boost nitrogen with compost tea. Healthy plants ripen faster, so don’t skip soil tests—pH 6.0-6.8 is ideal for bell peppers.
Finally, remember that genetics matter. Some varieties (like Jalapeños) ripen faster than Bell Peppers, which may need extra warmth. If you’re in a cool climate, consider using row covers or a mini greenhouse to extend the growing season and give peppers the warmth they crave.