
Pests and Diseases
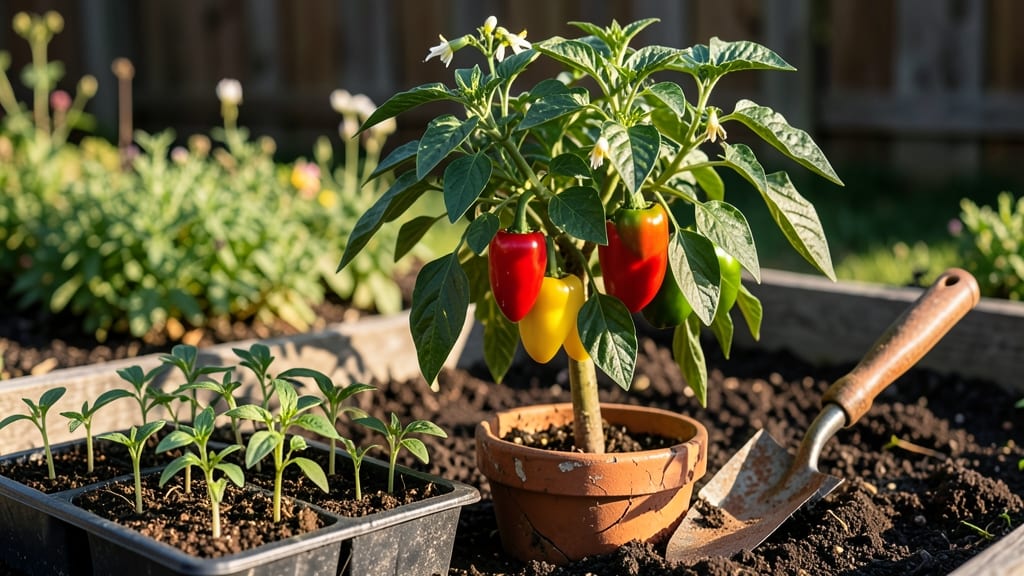
Here are some pepper planting tips that will transform your garden—just don’t ignore heat zones, or your jalapeños might bolt like mine did. 🌶️ I’ve learned the hard way that timing, soil warmth, and variety matter more than most beginners realize. because I planted too early, and that’s a mistake you can easily avoid.
The secret starts with soil temperature: peppers need 60°F+ to germinate, so wait until after your last frost when nights stay above 55°F. Use black plastic mulch or a cold frame if your spring lingers—it speeds up soil warming by 10-15°F.
For transplants, harden them off for 5-7 days before moving them outside to prevent shock.
By mid-summer, you’ll be picking peppers that are fiery, plentiful, and disease-free—if you space them 18-24 inches apart, prune suckers early, and keep the soil consistently moist (not soggy).
The key is patience: peppers take 70-90 days to mature, but every week of proper care compounds into a harvest that’ll make your neighbors jealous.
Works for all peppers—jalapeños, bell peppers, habaneros—just adjust spacing based on variety. Here’s how to troubleshoot common early-stage issues like slow germination or yellowing leaves before they become bigger problems.
📚 In This Guide
- What you need
- Instructions
- Tips and common mistakes
- Wrapping up and next steps
What you need
- ● Pepper Seeds or Seedlings: Choose from varieties like jalapeño, habanero, bell, or cayenne. Start with 3–5 plants for a small harvest or up to 10+ for a bountiful yield.
- ● Well-Draining Soil: A mix of 60% potting soil, 30% compost, and 10% perlite or sand (peppers hate soggy roots!).
- ● Containers or Garden Bed: Containers: 5–7 gallon pots (minimum) with drainage holes. Opt for fabric grow bags or plastic pots.
- ● Garden Bed: Full sun (6–8 hours/day) and 6–12 inches of loose, fertile soil.
- ● Fertilizer: A balanced, organic fertilizer (e.g., 5-5-5 or 10-10-10) or compost tea for a nutrient boost.
- ● Watering Can or Hose: With a gentle spray nozzle to avoid damaging delicate seedlings.
- ○ Gloves: Optional but wise—peppers can irritate skin, especially spicy varieties!
- ● Trowel or Hand Fork: For transplanting seedlings or amending soil.
- ● Pruning Shears: To trim yellow leaves or excess growth (sterilize with rubbing alcohol!).
- ● Mulch: Straw or shredded leaves (2–3 inches) to retain moisture and deter weeds.
- ○ Support Stakes or Cages: For tall varieties like bell peppers (optional but helpful!).
- ● Heat Tolerance: Peppers love warmth! Ensure your minimum soil temp is 60°F+ (use a seedling heat mat if starting indoors).
- ● Sunlight Access: Confirm your spot gets full sun—no skimpiness here!
- ● Patience: From seed to harvest, peppers take 60–120 days, depending on the variety.
How to plant peppers for maximum heat and productivity
Here's the method I've perfected for growing peppers that thrive in heat zones—where the real spice happens.
🌱 Step 1: Choose Your Heat Zone and Variety
Peppers need consistent warmth to develop their signature heat. Select varieties suited to your USDA heat zone—hot peppers like jalapeños and habaneros thrive in zones 9-11, while milder bell peppers do well in zones 7-10. I always check the seed packet for days to maturity—60-90 days is standard for most spicy varieties.
Start seeds indoors 8-10 weeks before last frost in your zone. If you're in a zone 10+, you can direct-sow after soil reaches 70°F. Cold soil slows germination, so I use a heat mat to keep soil at 80°F for faster sprouting. Watch for first true leaves—that's when you know they're ready to harden off.
☀️ Step 2: Prepare Soil and Plant in Warmth
Peppers demand well-draining, fertile soil with a pH of 6.0-6.8. Mix 2-3 inches of compost into the top 6 inches of soil to improve drainage and nutrient retention. I avoid fresh manure—it burns tender roots. If your soil is heavy clay, amend with sand or perlite to prevent waterlogging.
Plant in full sun—6-8 hours daily—but protect young seedlings from intense afternoon heat with shade cloth until they're established. Space plants 18-24 inches apart to allow airflow, which prevents fungal diseases like powdery mildew. I stake taller varieties like cayenne peppers early to avoid staking later when roots are disturbed.
💧 Step 3: Water Deeply and Maintain Consistent Moisture
Peppers hate soggy roots but also wilting stress. Water deeply once a week, soaking the soil to 12 inches deep. Let the top 2 inches dry out between waterings—this encourages deep root growth. I use drip irrigation to avoid wetting leaves, which reduces disease risk.
Mulch with straw or black plastic to retain moisture and keep roots cool in zones 10+. If you're in a drier climate, water in the early morning to reduce evaporation. Yellowing leaves? That’s usually overwatering—pepper plants prefer slightly dry conditions over soggy soil.
✂️ Step 4: Prune and Fertilize for Bigger Peppers
Pinch off flower buds on the first 6-8 inches of stem to encourage bushier growth. Once plants are established, fertilize with a balanced 10-10-10 or organic compost tea every 4-6 weeks. I avoid high-nitrogen fertilizers—they promote leafy growth at the expense of peppers.
Prune suckers (the small shoots that grow where the stem meets a branch) to direct energy into fruit production. Harvest peppers when they reach full size but before they turn soft—this encourages more blooms. If peppers stop producing, it’s often due to too much shade or over-fertilizing with nitrogen.
🌿 Step 5: Protect and Harvest for Maximum Heat
In zones 9-11, peppers thrive year-round, but late summer heat can stress them. Provide afternoon shade if temperatures exceed 95°F. I also hand-pollinate flowers in humid climates by gently shaking plants to ensure fruit set.
Harvest peppers regularly—ripe peppers develop more capsaicin (the compound that makes them hot). Store them in a cool, dark place or freeze for later use. If birds or pests are a problem, cover plants with floating row covers early in the season. The key to heat? Consistent warmth, good drainage, and patience.
Tips & tricks for perfect pepper planting in heat zones
Here's what nobody tells you about growing peppers that actually pack the heat.
Heat Zone Matching: Don't just pick any pepper variety—match it to your climate. In zones 9-11, you can grow habaneros and ghost peppers year-round, but in zones 7-8, stick with jalapeños or serranos that tolerate cooler nights. I once planted habaneros in zone 8 and got bitter, underwhelming peppers because they couldn't handle the temperature swings. The seed packet's heat zone recommendation isn't just a suggestion—it's a survival guide for your plants.
Soil Temperature Secret: Those 70°F soil temps for direct sowing are non-negotiable. I learned this the hard way when my seeds sprouted in 65°F soil and took 3 weeks to emerge instead of 5 days. Use a soil thermometer to check—if it's below 70°F, wait or use a heat mat. For faster germination, maintain 80°F soil temps, especially in cooler climates. Pro tip: Place your heat mat under seed trays before planting to give them a head start.
Watering Wisdom: The deep watering once a week rule only works if you're consistent. I used to water lightly every day and ended up with stunted plants. The key is that 12-inch deep soak—it forces roots to grow downward where they'll find moisture during dry spells. For container growers, make sure your pots have drainage holes and water until it runs out the bottom. And here's a trick: Water in the morning so any excess moisture evaporates before nightfall, reducing disease risk.
Pruning Payoff: Those 6-8 inch stems where you pinch off flower buds might seem counterintuitive, but it works wonders. I've seen plants that produced 30% more peppers after this pruning because all the energy went into the remaining blooms. For suckers, be ruthless—remove every one that appears at the stem junctions. The plants will reward you with bigger, hotter peppers. And if your plants suddenly stop flowering? Check your fertilizer—too much nitrogen makes them grow leaves instead of peppers.
Pro Tips for Pepper Planting Tips
- Here's what nobody tells you about growing peppers that actually pack the heat.
- Heat Zone Matching: Don't just pick any pepper variety—match it to your climate. In zones 9-11, you can grow habanero...
- Soil Temperature Secret: Those 70°F soil temps for direct sowing are non-negotiable. I learned this the hard way when...
Frequently asked questions
Got questions about growing peppers? You’re not alone! Whether you're a first-time gardener or a seasoned pro, these FAQs cover the most common pepper-planting challenges. Dive in for quick, actionable answers to keep your plants thriving.
When is the best time to plant peppers outdoors?
Peppers thrive in warm soil—wait until after the last frost when nighttime temps stay above 55°F (13°C). In cooler climates, start seeds indoors 8–10 weeks before the last frost and transplant seedlings outdoors after April or May. Use row covers if early spring nights dip below 50°F (10°C).
Can I grow peppers in containers? What’s the ideal setup?
Peppers adapt well to containers if they get at least 5-gallon pots (bigger for bush varieties). Use well-draining soil, place pots in full sun (6+ hours/day), and ensure pots have drainage holes. Add a slow-release fertilizer at planting time, and rotate pots weekly for even growth.
How do I prevent pests like aphids or pepper maggots?
Start with healthy soil—crop rotation and compost reduce pest risks. For aphids, blast them off with water or introduce ladybugs. To deter maggots, apply diatomaceous earth around plants or use floating row covers early in the season. Neem oil is a great organic spray for early intervention.
Why are my pepper leaves turning yellow? Is it a disease or nutrient issue?
Yellow leaves usually signal overwatering, underwatering, or nutrient deficiencies. Check soil moisture—peppers hate soggy roots. If leaves yellow between veins, it’s often iron deficiency; amend soil with chelated iron. Fungal diseases (like early blight) cause yellow spots with dark borders—remove affected leaves and improve airflow.
Do I need to prune my pepper plants? How much?
Pruning isn’t mandatory but can boost yield and airflow. Trim lower leaves to prevent soil-borne diseases, and remove suckers (side shoots in the leaf axils) to direct energy to fruit. For determinate varieties (bush peppers), prune lightly; for indeterminate (vining) types, prune more aggressively. Stop pruning 2–3 weeks before harvest to avoid stress.
Wrapping up and next steps
Growing peppers in the right heat zone is all about patience, preparation, and a little passion! 🌶️ By choosing the perfect variety, prepping your soil, and keeping pests at bay, you’re well on your way to a spicy, bountiful harvest.
Remember, even the hottest peppers start as tiny seeds—so don’t let challenges discourage you.
Now that you’re armed with these pepper planting tips, it’s time to roll up your sleeves! Start with just one or two plants to build confidence, then expand your garden next season. Happy planting—your future meals (and bragging rights) are about to get seriously flavorful! 🌱✨