
Propagation
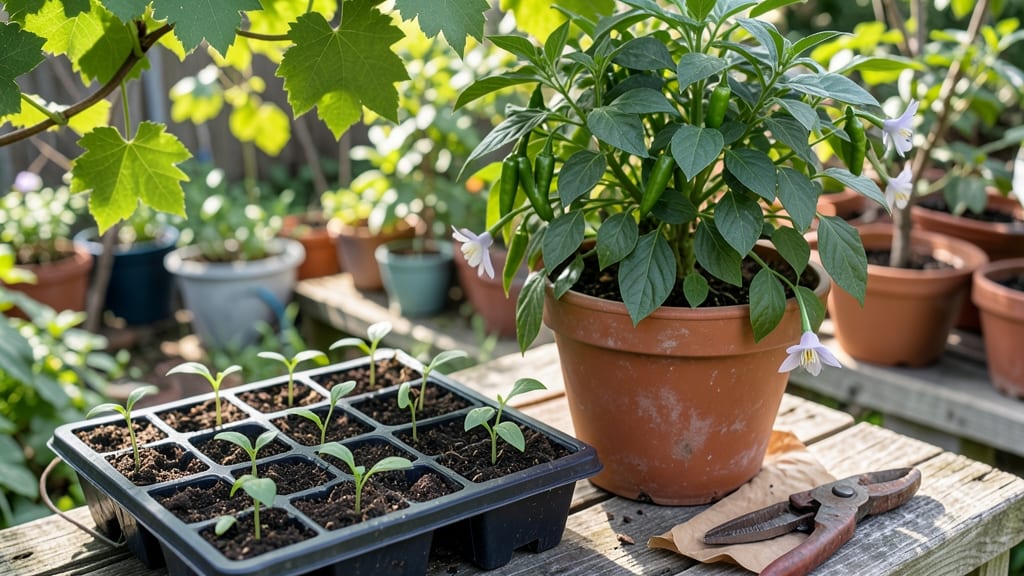
Growing chili peppers from seed gives you fiery varieties you won’t find at stores—like my Carolina Reaper plants that burst with heat by August. 🌶️ The secret isn’t complicated: it’s timing, warmth, and patience.
Start seeds indoors 8-10 weeks before your last frost, and you’ll have robust seedlings ready for transplant when soil warms to 65°F. You’ll need seed-starting mix, small pots, a heat mat (optional but game-changing), and a sunny windowsill or grow light.
Most seeds sprout in 7-14 days, but some stubborn varieties take longer—don’t give up! Thin seedlings to the strongest one per pot, and you’ll avoid leggy, weak plants that flop in the garden.
By day 60, you’ll be harvesting peppers that pack real heat, with flavors far superior to store-bought. The first peppers might be small, but they’ll grow into bold, glossy pods that turn neighbors green with envy. Prune early to boost fruit production, and watch your plants thrive.
Works for jalapeños, habaneros, or bell peppers—just adjust heat preferences. Here’s how to keep them happy from seed to harvest!
📚 In This Guide
- What you need
- Instructions
- Tips and common mistakes
- Wrapping up and next steps
What you need
- ● Chili pepper seeds: 5–10 seeds (choose your favorite variety—jalapeño, habanero, or ghost pepper for extra heat!)
- ● Seed-starting trays or small pots: 2–4 (2–3 inches deep) with drainage holes
- ● Seed-starting mix: 1–2 cups (sterilized, lightweight potting soil—avoid garden soil!)
- ● Plastic wrap or humidity dome: 1 (to retain moisture)
- ● Grow lights or sunny windowsill: 1 (6–8 hours of light daily for seedlings)
- ● Spray bottle with water: 1 (for gentle hydration)
- ○ Fertilizer (optional but helpful): Balanced liquid fertilizer (5-5-5 or 10-10-10) for transplanting
- ● Heating mat: 1 (speeds up germination if temps dip below 70°F)
- ● Plant labels: 5–10 (to track varieties)
- ● Tweezers or toothpick: 1 (for careful seed placement)
- ● Calcium carbonate (crushed eggshells): 1 tsp (boosts soil pH for stronger plants)
- ● Pest control (neem oil or insecticidal soap): 1 bottle (prevents early pests)
Step-by-step instructions for growing chili peppers from seed
Here's how to turn tiny seeds into fiery plants ready for transplanting in just a few weeks.
🌱 Step 1: Prepare Seeds and Planting Medium
Start by soaking your chili pepper seeds in a bowl of lukewarm water for 12-24 hours. This softens the seed coat and speeds up germination—you'll see the seeds swell slightly. While they soak, fill your seed trays with a sterile seed-starting mix (never garden soil) and moisten it until it feels like a damp sponge. Avoid overwatering; the mix should hold together when gently squeezed but not drip.
I like to use small cell packs or biodegradable pots because they make transplanting easier later. Fill each cell about ¾ full with the moistened mix, leaving room for seeds. Tap the tray gently on the table to settle the soil evenly—this prevents air pockets that could delay germination.
🌱 Step 2: Sow Seeds and Create Ideal Germination Conditions
Plant 1-2 seeds per cell, about ¼ inch deep. Chili seeds are tiny, so I use a toothpick to place them precisely without burying too deep. Cover lightly with additional mix, then mist the surface with water until evenly damp. Place the tray in a warm, dark spot—I use a seedling heat mat set to 75-85°F—because chili seeds need warmth to germinate. Cover the tray with plastic wrap or a humidity dome to trap moisture.
Check daily for condensation on the plastic—this tells you the humidity is perfect. Germination typically takes 7-14 days, but some varieties can take up to 3 weeks. Once sprouts appear, remove the cover immediately to prevent damping-off, a fungal disease that attacks tender seedlings overnight.
☀️ Step 3: Provide Light and Monitor Growth
The moment seedlings emerge, move them to a bright, indirect light source. A south-facing window works, but most homes don't provide enough intensity, so I use a grow light positioned 2-3 inches above the plants. Keep them under light for 14-16 hours daily—chilis need plenty to prevent leggy growth. You'll know they're getting enough light when the stems stay thick and the leaves are a vibrant green, not pale or stretched.
Water gently from the bottom by placing the tray in an inch of water for 10-15 minutes. This encourages roots to grow downward and prevents fungal issues. Once seedlings have 2-3 true leaves (the first set are cotyledons), thin to the strongest seedling per cell. Use scissors to snip the weaker one at soil level—this avoids disturbing the roots of the one you're keeping.
🪴 Step 4: Harden Off and Transplant
About 2 weeks before your last frost date, start hardening off your seedlings. Move them outside to a sheltered spot for 1-2 hours the first day, gradually increasing their time outdoors over 7-10 days. Watch for signs of stress like wilting or yellowing leaves—this means they're not ready for longer exposure. Chili peppers are sensitive to cold, so even a light frost can damage them.
Transplant outdoors after all danger of frost has passed and soil temperatures reach 60°F or warmer. Choose a spot with full sun (6+ hours daily) and well-draining soil. Dig holes slightly larger than the root ball, place the seedlings in, and firm the soil around them. Water deeply at the base to help roots establish—avoid wetting the leaves to prevent disease.
Tips & tricks for growing chili peppers from seed
These insider tricks will help you bypass common pitfalls and grow peppers that actually thrive.
Soaking Secret: The 12-24 hour soak isn't just about speed—it's about breaking dormancy. Place your seeds in a small bowl with lukewarm water and add a drop of mild dish soap to reduce surface tension. This helps seeds stay submerged and prevents them from sticking together. After soaking, gently squeeze them between paper towels to remove excess moisture before planting—they should feel slightly damp but not wet.
Germination Environment: Chili seeds need that precise 75-85°F warmth, but here's what nobody tells you: position your seedling mat on top of a small insulated tray with a thin layer of water underneath. This creates a self-regulating humidity system that mimics tropical conditions. If you don't have a heat mat, place the tray on top of your refrigerator—it generates just enough warmth for germination without overheating.
Light Transition: When moving seedlings to light in Step 3, don't rush the transition. Start with just 2-3 hours of light on day one, then gradually increase by 1-2 hours daily. This prevents shock and allows seedlings to develop stronger stems. Watch for leaves that cup upward—this is a sign they're stretching for more light. If you notice this, immediately lower the grow light 1-2 inches closer to prevent legginess.
Transplant Timing: The 60°F soil temperature rule is critical, but don't rely solely on air temperature. Stick your finger about 2 inches into the soil—if it feels cool to your wrist, wait another day. I've seen many gardeners transplant too early because they checked air temps instead. Also, avoid transplanting on windy days; chili seedlings are delicate and can be damaged by strong breezes during their first week outdoors.
Pro Tips for Growing Chili Peppers From Seed
- These insider tricks will help you bypass common pitfalls and grow peppers that actually thrive.
- Soaking Secret: The 12-24 hour soak isn't just about speed—it's about breaking dormancy.
- Germination Environment: Chili seeds need that precise 75-85°F warmth, but here's what nobody tells you: position your seedling mat on top of a small insulated tray with a thin layer of water underneath.
Frequently asked questions
Got questions about growing chili peppers from seed?
Here are answers to the most common ones to help you avoid pitfalls and grow a fiery harvest with confidence!
How long does it take for chili pepper seeds to germinate?
Most chili seeds sprout within 7–14 days when kept in warm (70–85°F), moist conditions. Jalapeños and cayennes often germinate faster (5–10 days), while heirloom or large varieties (like bell peppers) may take up to 21 days. Patience is key! If no sprouts appear after 3 weeks, try a fresh batch or check seed viability.
Can I grow chili peppers from seed indoors year-round?
Yes, but timing matters! Start seeds 6–8 weeks before your last frost date for outdoor planting. Use a grow light (12–16 hours/day) to prevent leggy plants. After transplanting, ensure they get 6+ hours of sunlight daily. Pro tip: If growing indoors long-term, use self-pollinating varieties (like pepperoncini) to avoid fruit drop.
Why are my chili pepper seedlings dying?
Common culprits include overwatering (root rot), cold temperatures (below 50°F), or poor drainage. Use well-draining soil, water only when the top inch is dry, and keep seedlings in a warm spot. Yellow leaves? Check for fungus (like damping-off) and treat with neem oil. Move slowly! Harden off seedlings gradually before outdoor planting.
Do chili peppers need full sun, or can they grow in partial shade?
Chilis thrive in full sun (6–8+ hours/day), but they’ll tolerate 4–6 hours of sun in partial shade—especially in hot climates (like Arizona or Florida). Partial shade helps prevent sunscald on fruits. However, fewer peppers will form, and flavors may be milder. Solution: Use reflective mulch or a light-colored container to maximize light.
Can I save seeds from store-bought chili peppers?
It’s possible, but not guaranteed! Store-bought seeds may be hybrid (F1), leading to unpredictable plants. For best results, save seeds from open-pollinated or heirloom varieties. Let peppers fully ripen on the plant, scoop out seeds, rinse them, and dry on a paper towel for 1–2 weeks. Store in a cool, dark place for up to 3 years.
Bonus Tip: How do I know when chili peppers are ready to harvest?
Harvest when peppers reach your desired color, size, and heat level! Most are ready in 60–90 days. Green peppers can be picked early, while red/orange/yellow indicates full ripeness. Twist gently—if the pepper resists, it’s not ready. For drying, wait until skins wrinkle or turn deep red.
Wrapping up and next steps
Growing chili peppers from seed is a rewarding journey that brings bold flavors and fiery satisfaction to your kitchen! With just a little patience and care—sunlight, warmth, and consistent watering—you’ll be harvesting homegrown peppers in as little as 60 days.
Whether you’re a novice gardener or a seasoned spice enthusiast, this spicy adventure is well worth the effort.
Ready to take the next step? Start with a few seeds, nurture your seedlings, and soon you’ll be enjoying the fruits of your labor—literally! 🌱🔥