Picking
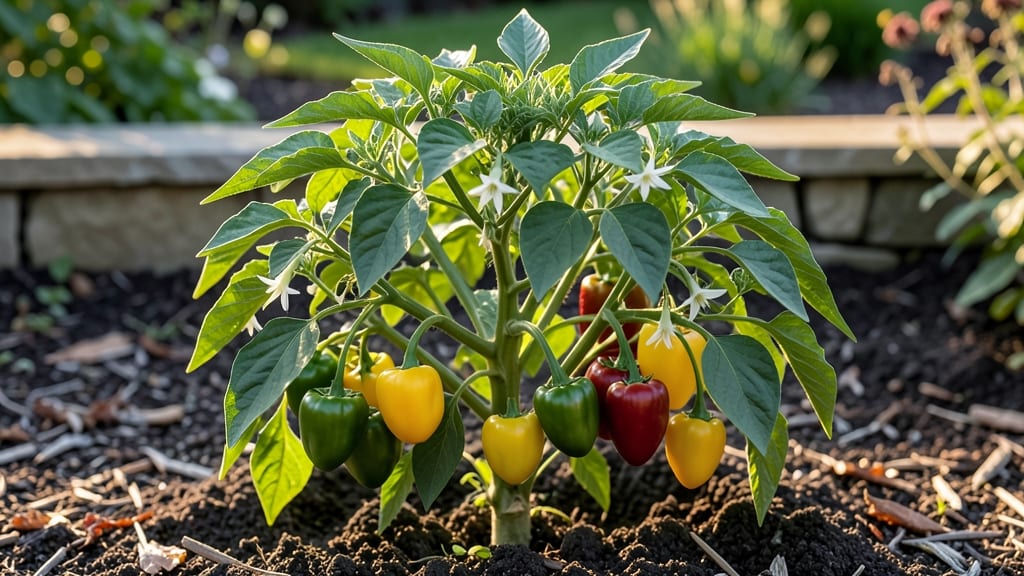
Growing Bonnie Bell peppers from seed means sweet, crisp harvests that outshine store-bought varieties. 🌱 I’ve grown them in my Zone 9 garden for years—these peppers thrive where others fail, producing heavy yields of 3-inch sweet bells even in summer’s peak heat. The secret?
Starting early indoors and giving them just the right balance of sun, water, and soil. You’ll need a sunny spot with at least 6-8 hours of direct light daily, well-draining soil rich in compost, and consistent moisture—but not soggy roots.
Bonnie Bells are compact, so space them 12-18 inches apart in rows 2 feet apart. Prune suckers early to focus energy on fruit production, and watch for pests like aphids, which love tender new growth.
By midsummer, you’ll be harvesting bright green peppers that turn red when ripe—perfect for fresh eating, stuffing, or grilling. The plants keep producing until frost, so one seed packet gives you a season of snacks without the grocery store markup.
Works in containers too: just use a 5-gallon pot per plant and keep them in full sun. Here’s how to set it up for maximum success!
📚 In This Guide
- What you need
- Instructions
- Tips and common mistakes
- Wrapping up and next steps
What you need
- ● Bonnie Bell pepper seeds: 10–20 seeds (or 5–10 seedlings if transplanting). Choose a variety suited for your heat zone (e.g., 'Bonnie Bell' or 'California Wonder').
- ● Growing containers or garden bed: Containers: 5–10 gallon pots (1–2 per plant) with drainage holes.
- ● Garden bed: Full sun (6+ hours daily) with well-draining soil.
- ● High-quality potting mix: 5–10 gallons (sterilized, well-draining, and rich in organic matter). Avoid garden soil unless amended with compost.
- ● Fertilizer: Balanced, slow-release fertilizer (10-10-10 or 5-10-10) or organic options like compost or worm castings.
- ● Watering can or hose with a gentle spray nozzle: For consistent moisture without damaging seedlings.
- ● Plant labels: 10–20 labels to track varieties and planting dates.
- ○ Garden twine or stakes (optional but helpful): For support as peppers grow (especially in windy areas).
- ● Seedling heat mat: To accelerate germination in cooler heat zones.
- ● Row covers or shade cloth: For young plants in intense heat (30–50% shade).
- ● Mulch (straw or black plastic): To retain moisture and suppress weeds.
- ● Epsom salt (magnesium sulfate): 1 tablespoon per plant monthly for extra vigor.
- ● Pest control: Neem oil or insecticidal soap for aphids/spider mites.
Step-by-step instructions for growing Bonnie Bell peppers
Here's the foolproof method I use to grow sweet, prolific Bonnie Bell peppers every season—even in hot climates.
🌱 Step 1: Start Seeds Indoors 8-10 Weeks Before Last Frost
Fill 2-3 inch deep seedling trays with moistened seed-starting mix (not garden soil). Plant Bonnie Bell seeds ¼ inch deep, two per cell, since they germinate slowly. I like to use biodegradable pots—they eliminate transplant shock when it's time to move them outside.
Cover the trays with plastic wrap to retain warmth and moisture, then place them in a warm spot (70-80°F). Bonnie Bell seeds need consistent warmth to germinate, so a seedling heat mat helps if your home runs cooler. Expect sprouts in 10-14 days—don't give up if they take longer, especially in cooler conditions.
☀️ Step 2: Provide Bright Light Immediately After Germination
The moment those first true leaves appear, move seedlings under grow lights or to the brightest south-facing window. Bonnie Bells need 14-16 hours of light daily—without it, they stretch leggy and weak. I use a full-spectrum LED bulb 2-4 inches above the plants and raise it as they grow to maintain that distance.
Watch for signs of light deficiency: pale stems, leaves spaced far apart, and plants leaning toward the light. If you notice these, adjust the light position immediately. Strong Bonnie Bell seedlings have thick stems, deep green leaves, and compact growth between nodes.
🪴 Step 3: Transplant Outdoors After All Frost Risk Has Passed
Wait until soil temperatures reach at least 60°F before transplanting Bonnie Bells outside. They thrive in full sun (6-8 hours daily) and warm soil, so don't rush this step—cold soil stunts root growth. Harden off seedlings by placing them outside in a sheltered spot for 1-2 hours the first day, gradually increasing time over 7-10 days.
Plant Bonnie Bells 12-18 inches apart in rows 18-24 inches apart to allow airflow and prevent disease. I always add a handful of compost to the planting hole—Bonnie Bells are heavy feeders and reward rich soil with bigger, sweeter peppers. Water deeply at planting to settle the roots.
💧 Step 4: Water Consistently and Fertilize Regularly
Bonnie Bells need 1-1.5 inches of water weekly, but never let the soil dry out completely—consistent moisture prevents blossom-end rot. Water at the base in the morning to reduce evaporation and fungal risks. I use drip irrigation for containers to keep leaves dry, which prevents common pepper diseases.
Fertilize every 2-3 weeks with a balanced 10-10-10 or 5-5-5 fertilizer once plants are established. Bonnie Bells are prolific producers, so they need steady nutrients. Stop fertilizing 4-6 weeks before harvest to improve flavor—too much nitrogen late in the season makes peppers bitter.
✂️ Step 5: Harvest Peppers at Peak Ripeness
Bonnie Bell peppers ripen quickly—harvest when they reach 3-4 inches long and turn a bright yellow or red, depending on the variety. Use pruning shears to cut stems cleanly to encourage more fruit production. I harvest every 2-3 days during peak season to keep plants productive.
Don't let peppers overripe on the plant—they'll turn red and lose their signature sweetness. Store harvested peppers in the fridge for up to 1 week or preserve them by pickling, freezing, or drying. The more you harvest, the more your Bonnie Bell plants will produce!
Tips & tricks for perfect Bonnie Bell pepper growth
Here's what nobody tells you about growing Bonnie Bell peppers that'll make all the difference in your garden.
Seedling Heat Secret: That 70-80°F warmth range for germination is non-negotiable. I learned this the hard way after ruining three batches in my cool basement. Use a seedling heat mat if your home runs cooler—it's the difference between sprouts in 10 days versus never. And trust me, those biodegradable pots are worth every penny for transplant shock prevention.
Light Game-Changer: Those 14-16 hours of light aren't just about quantity—they're about quality. If your south-facing window isn't cutting it, invest in a full-spectrum LED grow light. I keep mine 2-4 inches above seedlings and adjust as they grow. Watch for those telltale signs of light deficiency: pale stems and leaves reaching for the sun. That's your cue to move the light immediately.
Transplant Timing: Don't rush the hardening-off process! Start with just 1-2 hours outside on day one, then gradually increase over 7-10 days. I've seen gardeners skip this and end up with shocked plants that take weeks to recover. Also, wait until soil hits at least 60°F—cold soil will stunt those roots before they even get started.
Harvest Hack: Those 3-4 inches might seem small, but harvesting at peak size keeps your plants productive all season. I use pruning shears to cut stems cleanly—this prevents damage and encourages more fruit production. And here's the thing: the more you harvest, the more your plants will give you. It's like a pepper-producing feedback loop!
Pro Tips for Bonnie Bell Peppers
- Here's what nobody tells you about growing Bonnie Bell peppers that'll make all the difference in your garden.
- Seedling Heat Secret: That 70-80°F warmth range for germination is non-negotiable.
- Light Game-Changer: Those 14-16 hours of light aren't just about quantity—they're about quality.
Frequently asked questions
Got questions about growing bonnie bell peppers? You’re not alone! Here are answers to the most common queries—from timing to troubleshooting—to help you grow a bountiful harvest.
How long does it take for bonnie bell peppers to mature?
Bonnie bell peppers typically take 60–80 days from transplanting to harvest, depending on your climate. In hot zones, they may mature faster (as early as 55 days), while cooler areas could extend the timeline. Check seed packets for specific varieties—some are bred for speed!
Can I grow bonnie bell peppers in containers?
These peppers thrive in 5-gallon containers or larger with well-draining soil. Ensure pots have drainage holes and place them in a spot with 6–8 hours of sunlight daily. Dwarf varieties like ‘Bonnie Bell’ are ideal for containers—just keep them well-watered and fertilized.
Why are my bonnie bell peppers turning yellow or blistering?
Yellowing or blistering often signals overwatering, nutrient deficiency, or disease. Check soil moisture—peppers hate soggy roots. If leaves yellow, test for nitrogen or calcium deficiencies. For blisters, improve airflow by spacing plants 18–24 inches apart and avoid overhead watering to prevent fungal issues.
Are bonnie bell peppers the same as bell peppers?
Yes! ‘Bonnie Bell’ is a sweet bell pepper variety known for its blocky shape and thick walls, perfect for stuffing or slicing. Unlike jalapeños or other hot peppers, they’re zero-scoville—great for beginners. Just watch for cross-pollination if growing hot peppers nearby!
What’s the best way to pick bonnie bell peppers for maximum yield?
Harvest when peppers are firm, glossy, and fully colored (green, red, yellow, or purple). Use pruning shears or twist gently to avoid damaging the plant. Pick regularly—this encourages more production! Leave a short stem to prevent rot, and save seeds from heirloom varieties for next year.
Wrapping up and next steps
Growing Bonnie Bell peppers from seed to harvest is a rewarding journey that brings bold flavors and vibrant colors to your kitchen—even in heat zones!
With the right soil, spacing, and care, you’ll enjoy a bountiful harvest of sweet, crisp peppers perfect for fresh eating, grilling, or preserving. Don’t let a little heat stop you—your garden (and taste buds) will thank you!
Ready to take the next step? Plant your seeds today and watch your Bonnie Bell peppers thrive! For extra tips, check out our growing guide or join a local gardening group to share your progress. Happy planting! 🌱🔥