
Planting
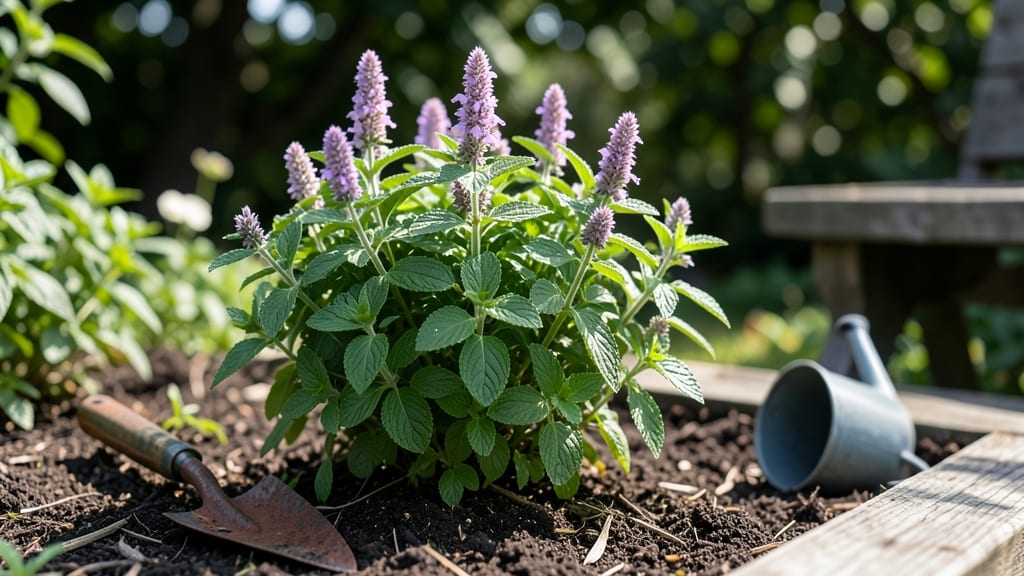
A mature peppermint plant 🌿 can reach heights of 2-3 feet and spread aggressively if left unchecked—but that’s exactly why gardeners love it.
Picture this: a lush, fragrant hedge of mint that never stops growing, ready to harvest fresh leaves all year long. The key? Pruning and propagation techniques that keep your plant thriving without taking over your garden.
Mint isn’t just for tea—it’s a versatile herb for cooking, remedies, and even pest control. But without the right care, it can become a stubborn weed.
I’ll show you how to prune for bushier growth, propagate new plants, and manage its spread so you always have fresh mint on hand.
From seasonal maintenance to container growing, this guide covers everything you need to keep your mature peppermint plant productive, healthy, and under control—so you can enjoy its benefits without the headaches.

How to prune a mature peppermint plant for optimal growth and harvest
Pruning a mature peppermint plant isn’t just about keeping it tidy—it’s essential for bushier growth, preventing woody stems, and ensuring a steady supply of fresh leaves. Without regular trimming, your plant can become leggy and sparse, reducing both yield and flavor.
The key is to stimulate new growth while maintaining a compact shape, all without stressing the plant.
Peppermint thrives when pruned correctly, but timing and technique matter. Cut too much at once, and you risk stunting growth or inviting pests. Cut too little, and you’ll miss the chance to encourage dense foliage and prevent flowering, which drains energy from leaf production.
The goal is a balanced approach that keeps your plant productive year-round.
When to prune is almost as important as how. Early spring and late summer are the best times to trim, but you can also do light pruning throughout the growing season. Avoid heavy cuts in extreme heat or late fall, as the plant needs energy to recover before winter. Now, let’s dive into the step-by-step process to keep your peppermint thriving.
Step-by-Step Pruning Guide for Mature Peppermint
- Step 1: Gather Tools
You’ll need sharp pruning shears, sterilized scissors, and gardening gloves. Sterilizing your tools with rubbing alcohol prevents disease spread between cuts. A small spray bottle with water can also help keep leaves hydrated during trimming. - Step 2: Identify Healthy Growth
Look for new shoots at the base and lush green stems. Avoid cutting into woody or brown stems, as these won’t regrow. Focus on outer leaves and leggy stems to encourage bushiness. - Step 3: Trim Leggy Stems
Cut back tall, sparse stems by one-third to half their length. This redirects energy to lateral shoots, creating a fuller plant. Always cut just above a leaf node or set of leaves to promote new growth. - Step 4: Encourage Bushiness
Pinch back the top 2-3 inches of the main stems to stimulate branching. This technique works best in early spring and late summer, when the plant is actively growing. - Step 5: Remove Flower Stems
If your peppermint starts to bolt (flower), snip off the flower stalks immediately. Flowering diverts energy away from leaf production, reducing your harvest. Use clean cuts to avoid damaging the stem. - Step 6: Thin Overcrowded Areas
If stems are too close together, thin out the weakest or oldest stems to improve airflow. This reduces fungal risks like powdery mildew and ensures all remaining leaves get adequate sunlight. - Step 7: Clean Up Debris
Remove all clippings and fallen leaves from the base of the plant. This prevents pests and diseases from taking hold. Compost the trimmings for later use in your garden. - Step 8: Water and Fertilize
After pruning, give your peppermint a deep watering to help it recover. Follow up with a balanced fertilizer (like 10-10-10) to support new growth. Avoid heavy feeding immediately after heavy pruning.
Pruning isn’t just about cutting—it’s about strategic shaping. For example, if your peppermint is growing too tall, focus on topping the stems to encourage lateral branches.
If it’s spreading too wide, trim the outermost growth to maintain a compact form. Always leave at least one-third of the plant intact to avoid over-pruning.
One common mistake is pruning at the wrong time. Avoid heavy cuts in late summer or early fall, as the plant needs time to harden off before winter.
Another pitfall is using dull or dirty tools, which can tear stems and introduce bacteria. Always use clean, sharp shears for the cleanest cuts.
Seasonal adjustments are key. In spring, prioritize removing dead wood and shaping the plant for the growing season. In summer, focus on harvesting leaves while trimming leggy growth. In fall, do minimal pruning to prepare the plant for dormancy, and avoid winter cuts entirely.
If your peppermint develops woody stems, it’s a sign of over-maturity. To rejuvenate the plant, cut back one-third of the oldest stems to the ground in early spring. This encourages new, non-woody growth from the base. Pair this with regular harvesting to keep the plant productive.
Finally, don’t forget to harvest leaves regularly—this encourages the plant to produce more foliage. Snip leaves from the top and sides rather than pulling them, which can damage the stem.
With the right pruning routine, your mature peppermint plant will stay lush, flavorful, and ready for harvest all season long.
Best propagation methods for mature peppermint plants (cuttings vs. division)
When your mature peppermint plant outgrows its space or you want to share cuttings, propagation becomes essential. The two most effective methods—stem cuttings and root division—each offer unique advantages. Understanding their differences helps you choose the best approach for your garden goals and climate.
Both methods allow you to create new plants with the same vigorous growth and aromatic qualities as the parent. However, timing and technique play critical roles in ensuring high survival rates. Spring and early summer are ideal windows for propagation, as the plant enters its most active growth phase.
Propagation timing also impacts yield. For example, dividing roots in early spring gives new plants a full growing season to establish, while stem cuttings taken in late spring root faster due to warmer soil temperatures. Let’s compare the pros and cons of each method to help you decide which fits your gardening style.
Propagation Methods Comparison
Stem Cuttings
- ✅ Fast rooting (4-6 weeks)
- ✅ Preserves parent plant (minimal stress)
- ✅ Great for small spaces (container-friendly)
- ⚠️ Requires humidity trays or propagation domes
- ⚠️ Lower survival rate in dry climates
Root Division
- ✅ Higher success rate (80%+ survival)
- ✅ Established roots (faster growth)
- ✅ Ideal for large plants (controls spread)
- ⚠️ Stresses parent plant (may reduce yield)
- ⚠️ Requires digging and replanting (labor-intensive)
For stem cuttings, select healthy, non-flowering stems with 4-6 leaves. Dip the cut end in rooting hormone to boost success, then place in a mix of perlite and peat moss.
Keep the soil moist but not soggy and maintain 70-80°F temperatures for optimal rooting. New roots typically form in 4-6 weeks, after which you can transplant.
When dividing roots, choose a cloudy day to reduce stress on the plant. Gently dig up the mature peppermint, separate the root clumps with a sharp knife, and ensure each division has 3-5 shoots.
Replant divisions immediately in well-draining soil with partial shade to prevent bolting. Water thoroughly and mulch to retain moisture.
Both methods yield high-quality peppermint plants, but your choice depends on your goals. Use stem cuttings for quick, low-stress propagation, or opt for root division when you need larger, established plants. With the right technique, you’ll enjoy year-round harvests from your expanded mint garden! 🌿